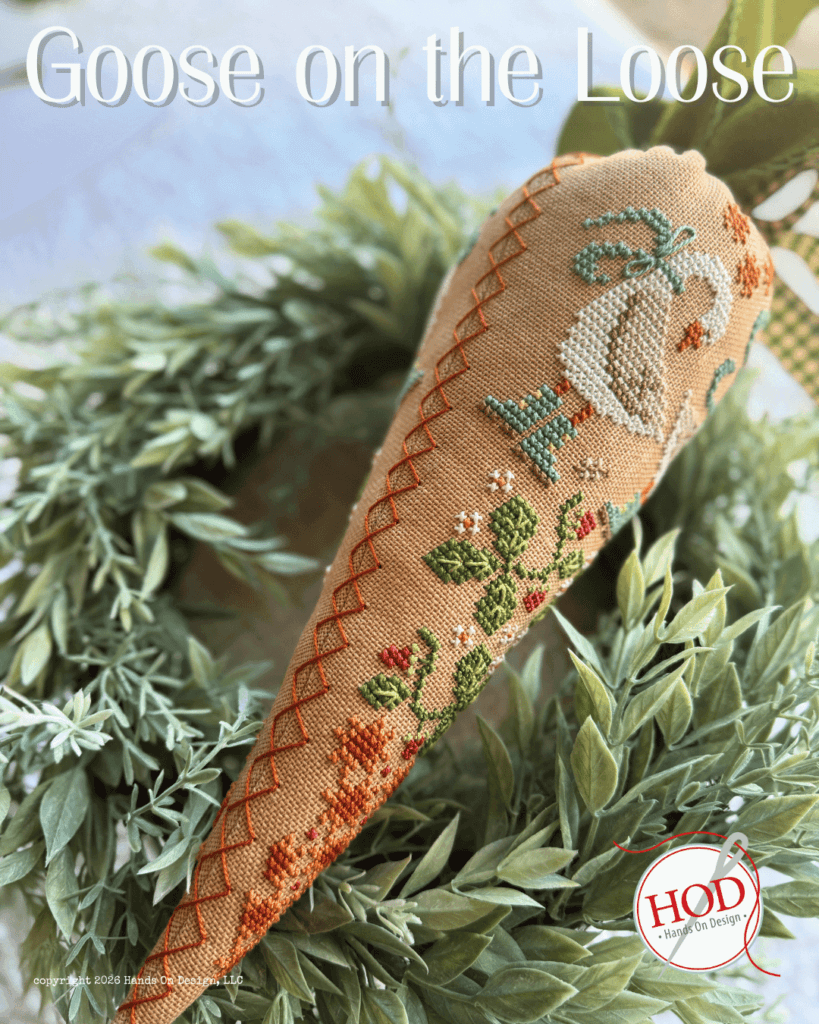
Goose on the Loose – let’s walk through the finishing of this oversize produce! It is very similar to finishing a strawberry with different leaves!
I took pictures as I finished both carrots (20ct & 32ct) & I will use the photos interchangeably. The main difference is the leaves. Scroll down for the leaf template.
Originally, I was going to have a template for the carrot. I changed my mind since I know everyone is probably using different counts – the method I will show will work for whatever count you stitch on.
Gather – lightweight fusible interfacing, stuffing (I used wool roving), woolfelt or cotton quilting fabric, lacing thread & other usual stitching/finishing supplies (ruler, scissors, marking pen, etc.).
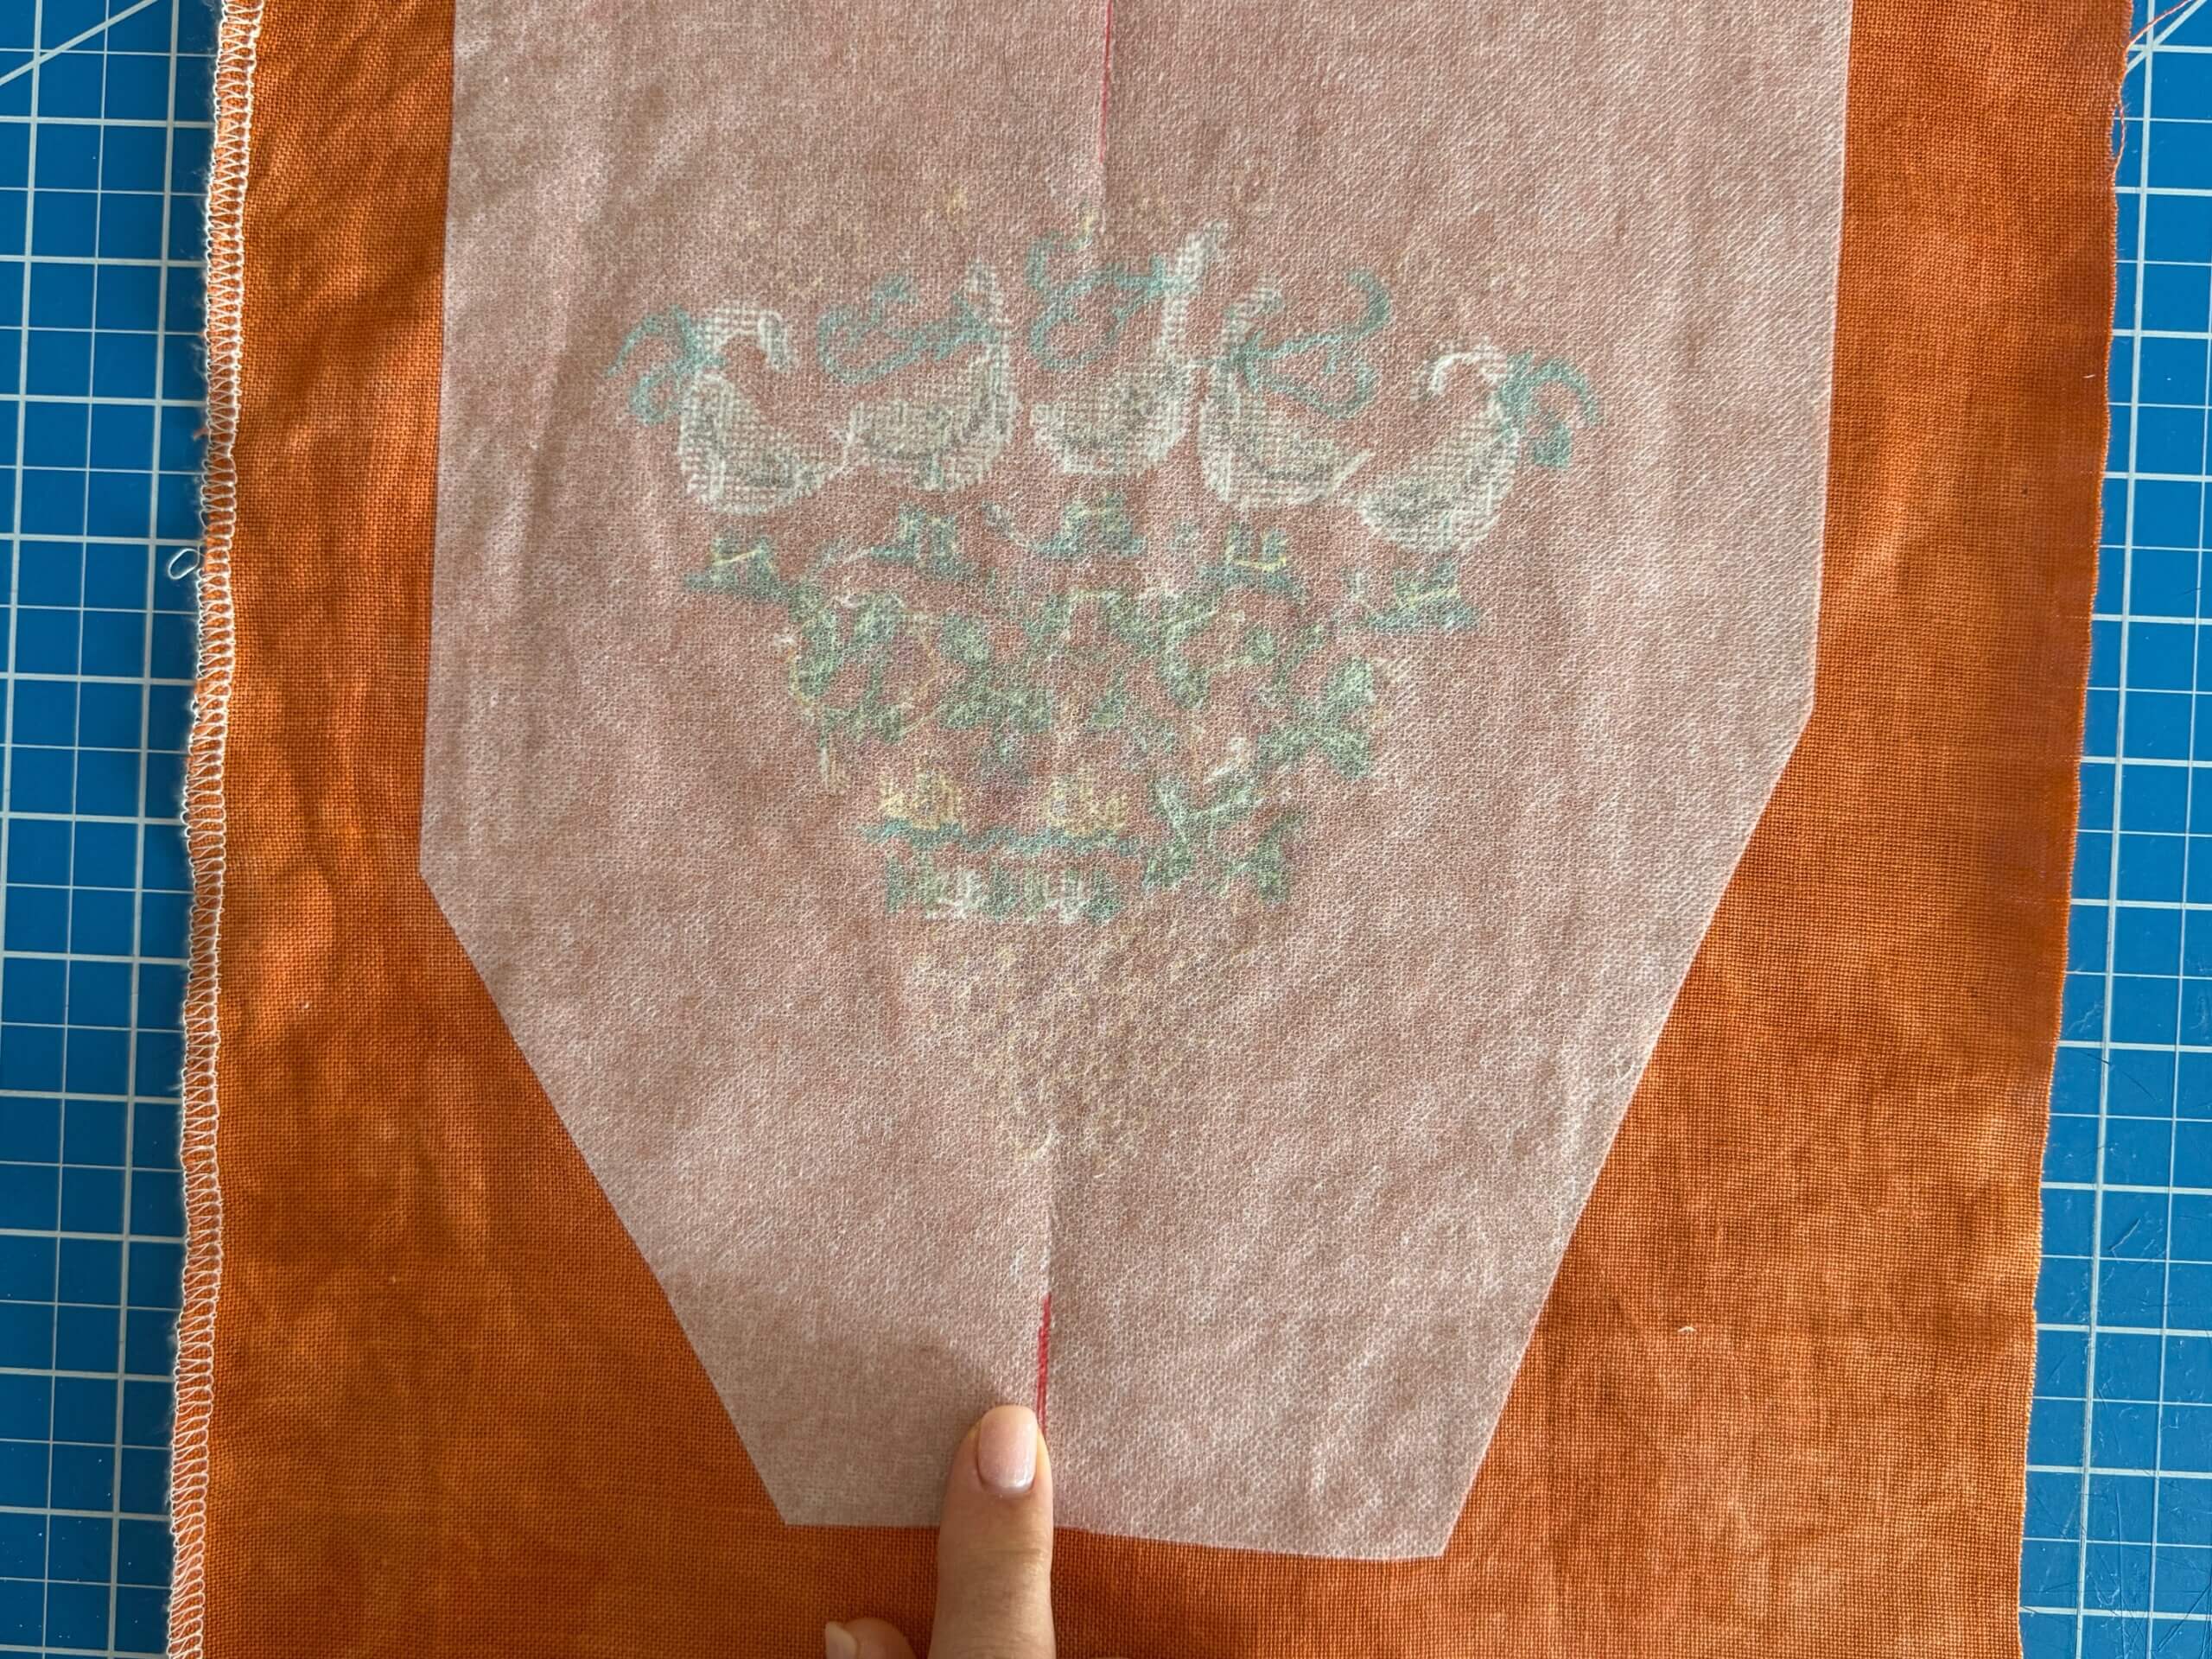
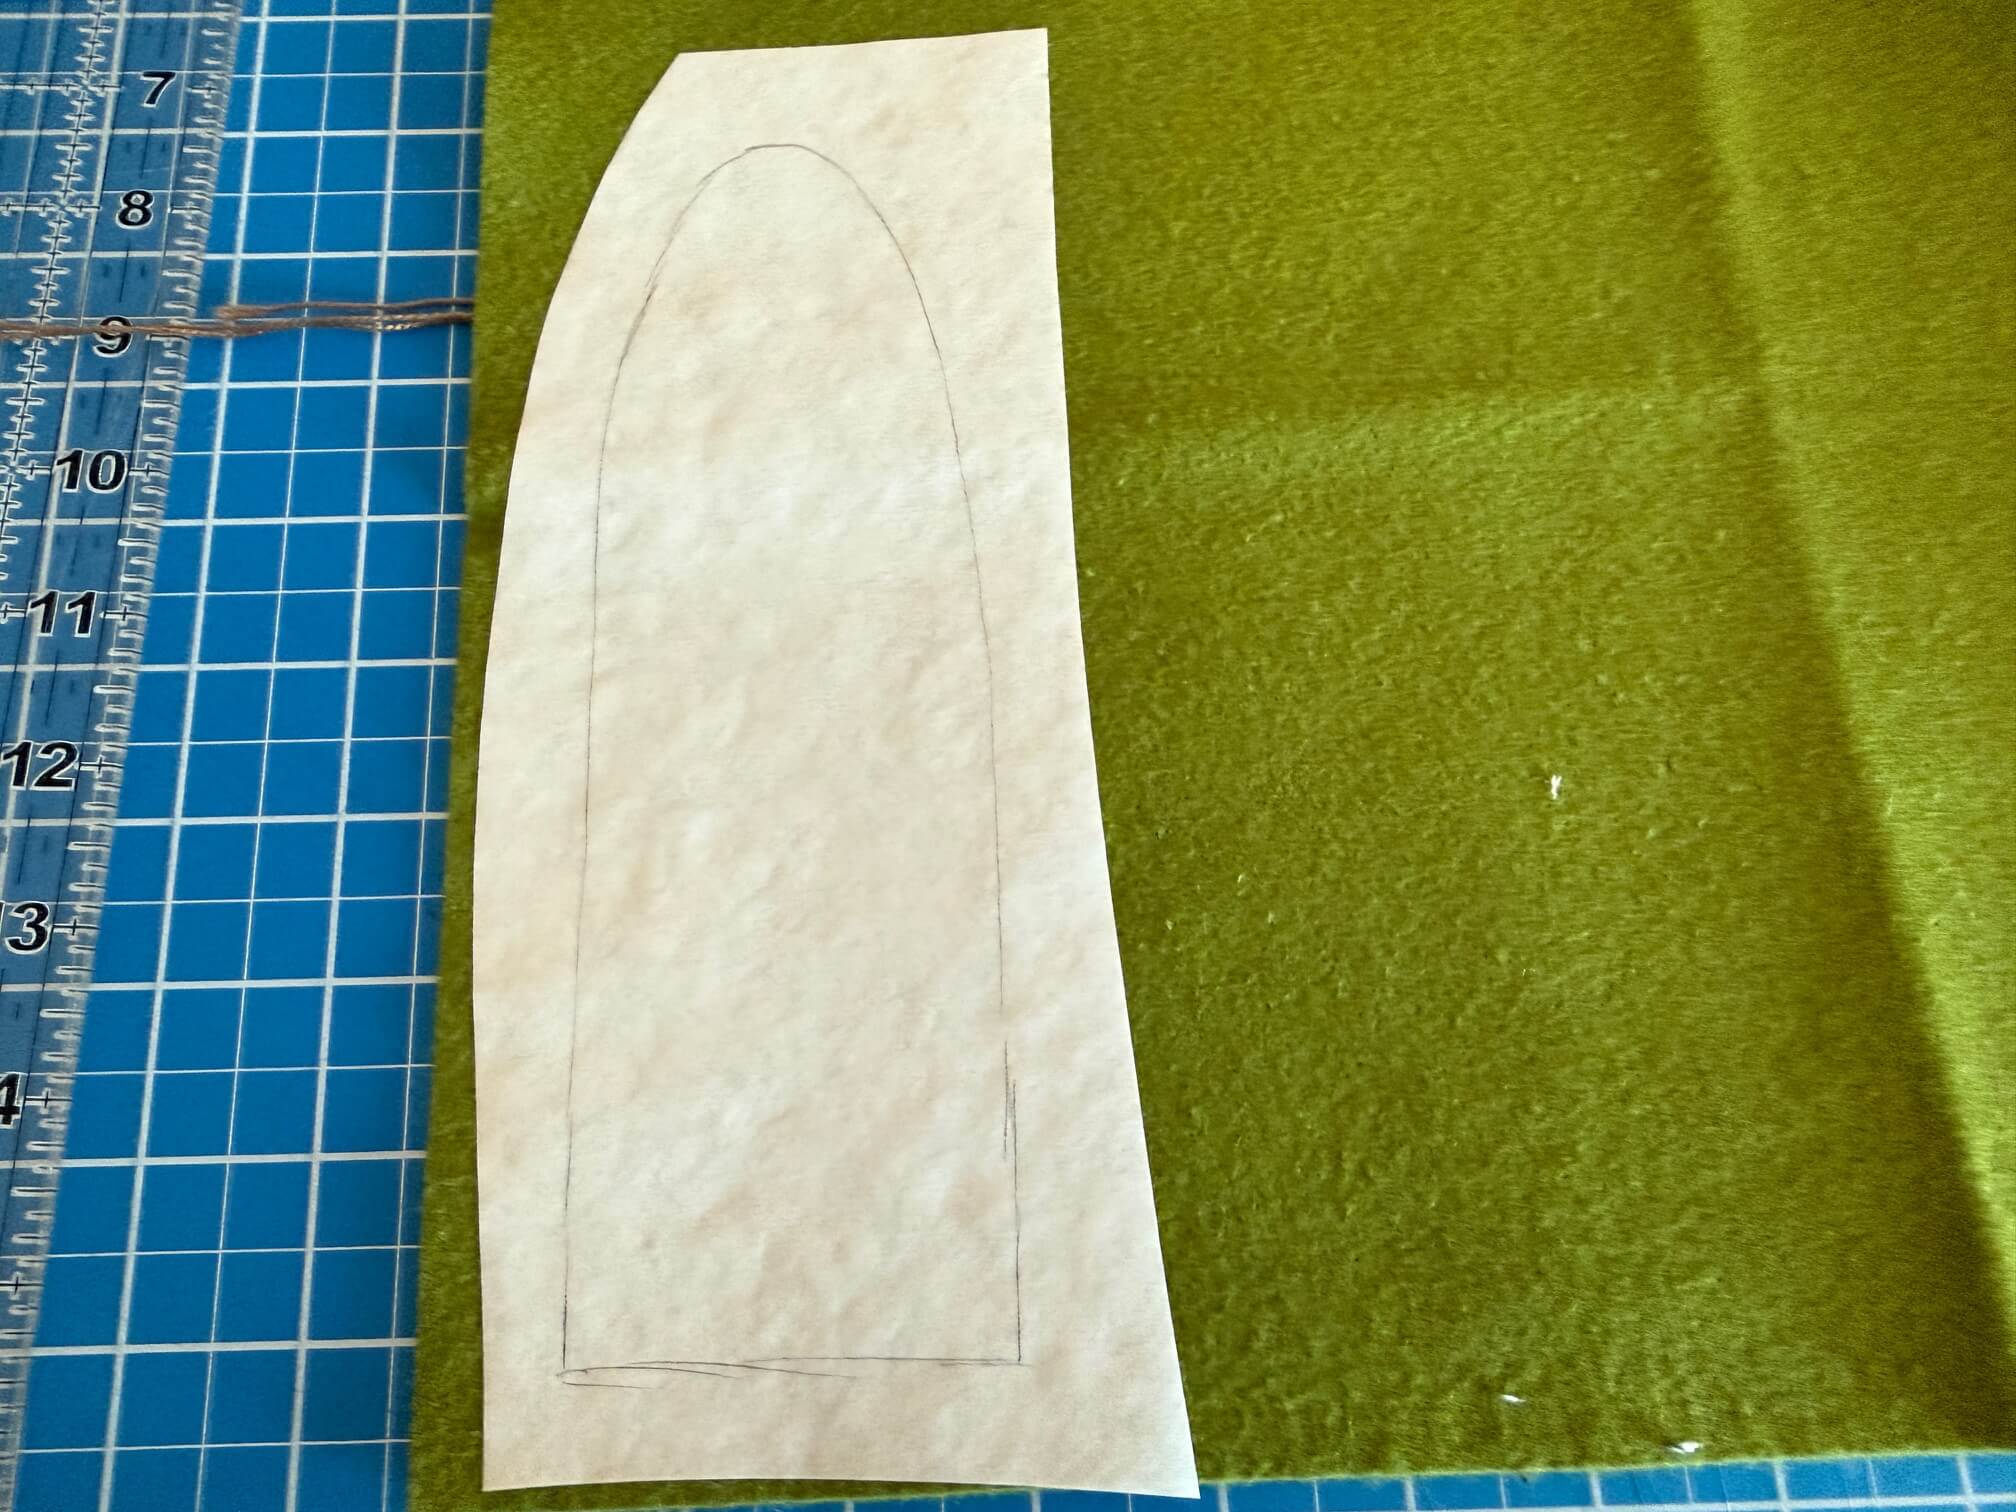
Line the back of the stitching with a lightweight, fusible interfacing (extend well beyond the edges of the stitching). Find the center of the image & fold to make a crease. Mark the center top & bottom (several inches above & below the stitching). Mark the center line with a Frixion marking pen.
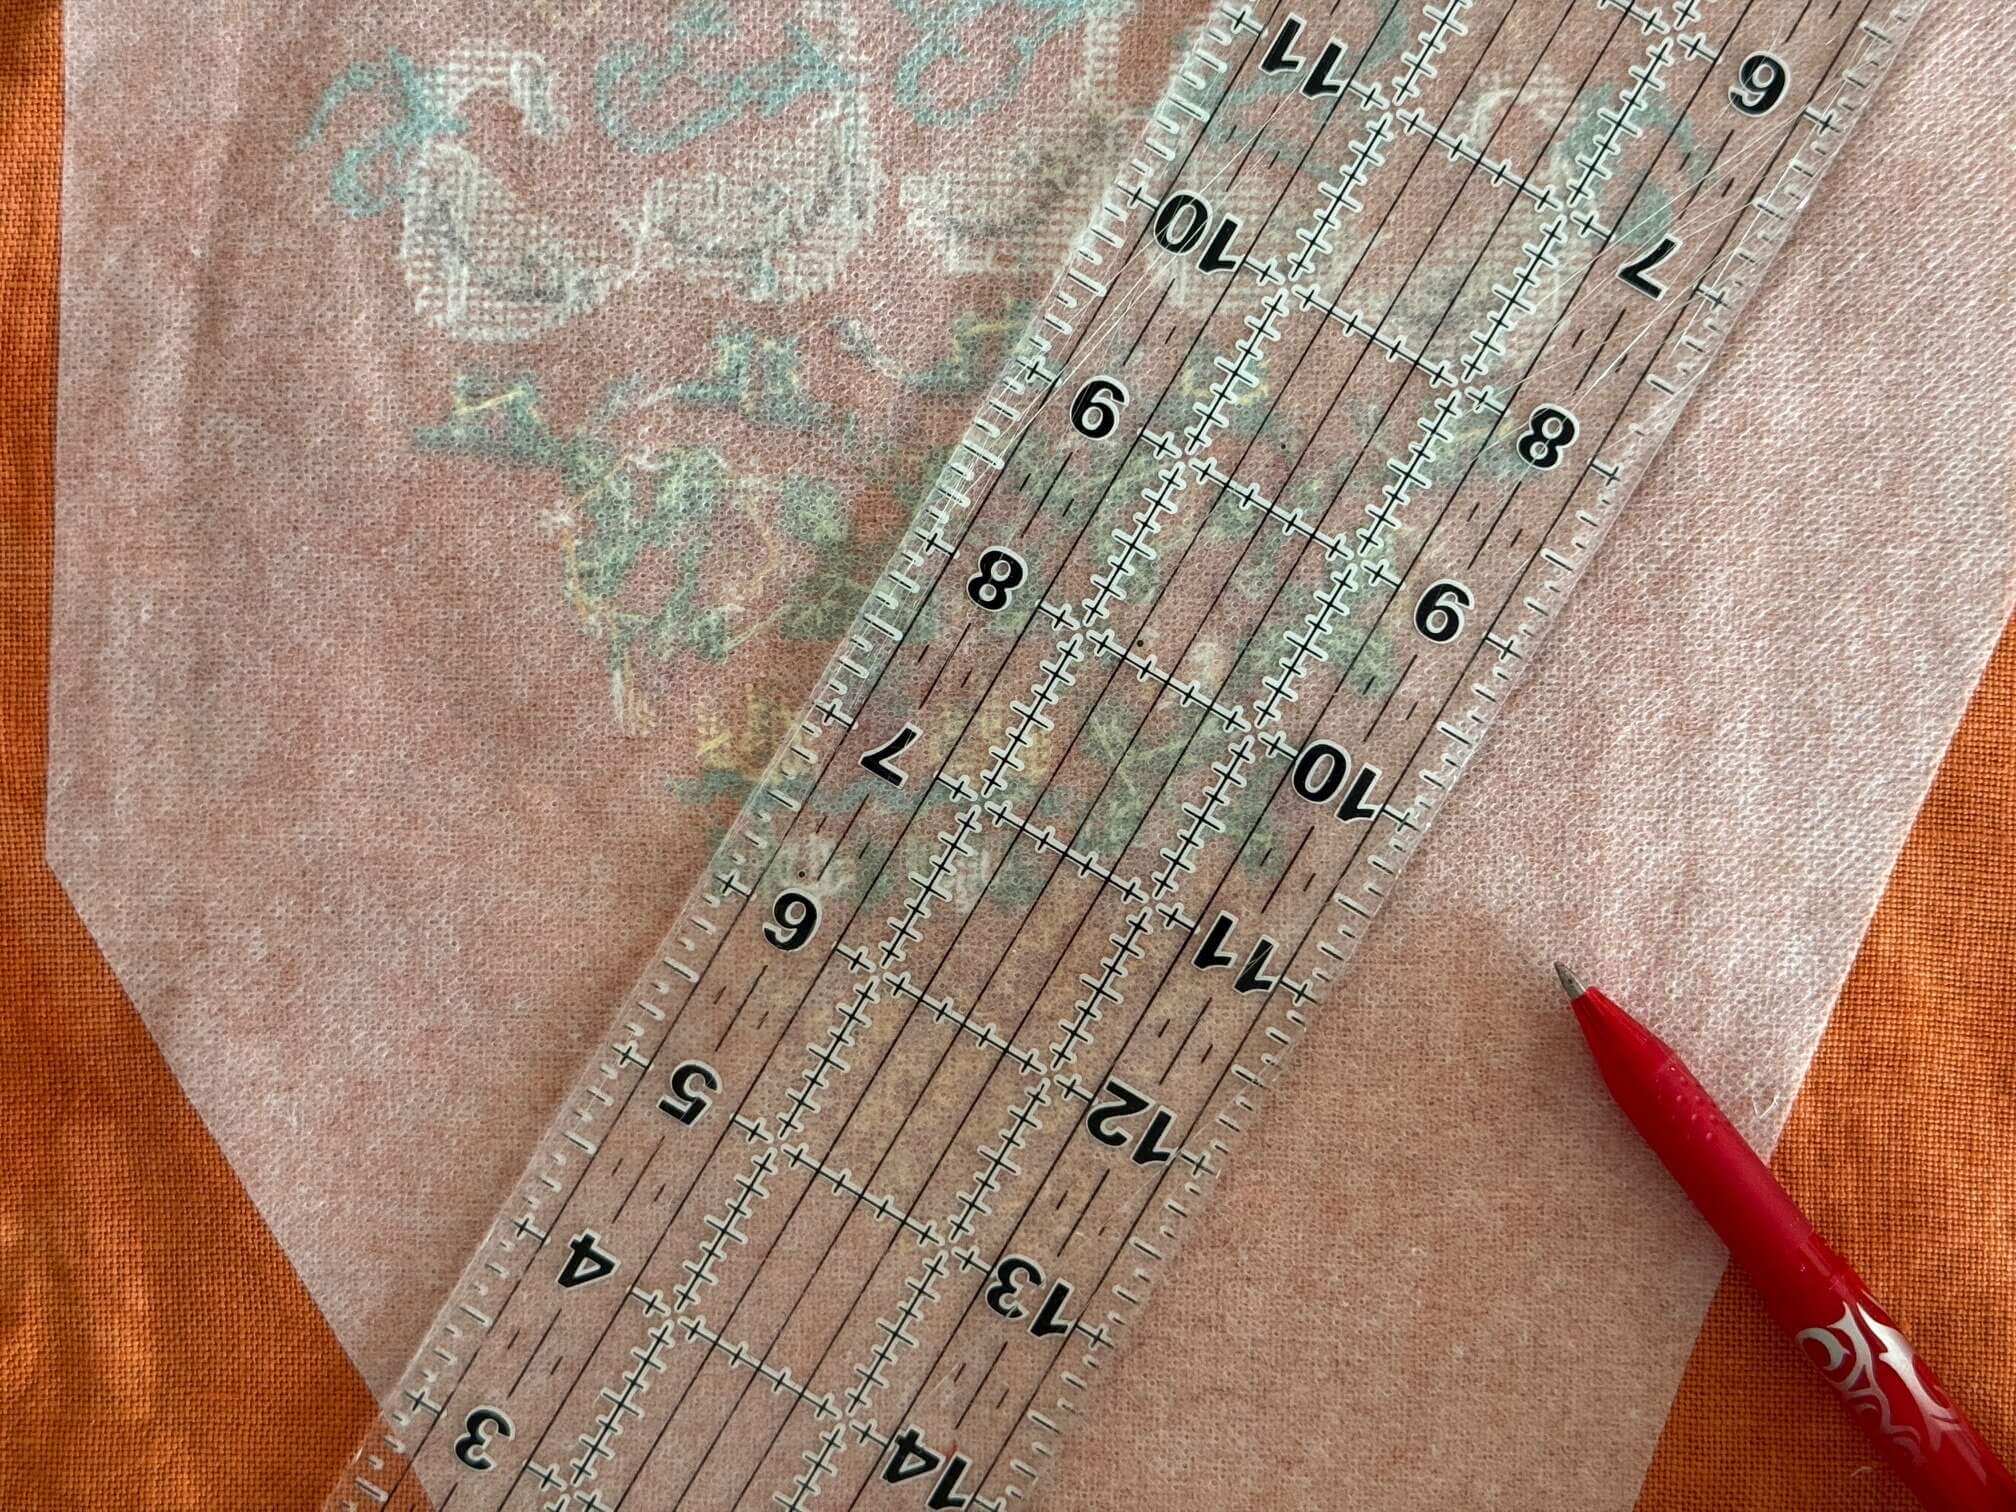
Place ruler over the stitching giving yourself a 1/2″ margin. Mark this line with the Frixion pen from the lower center line to about 3″ above the stitching on the top edge.
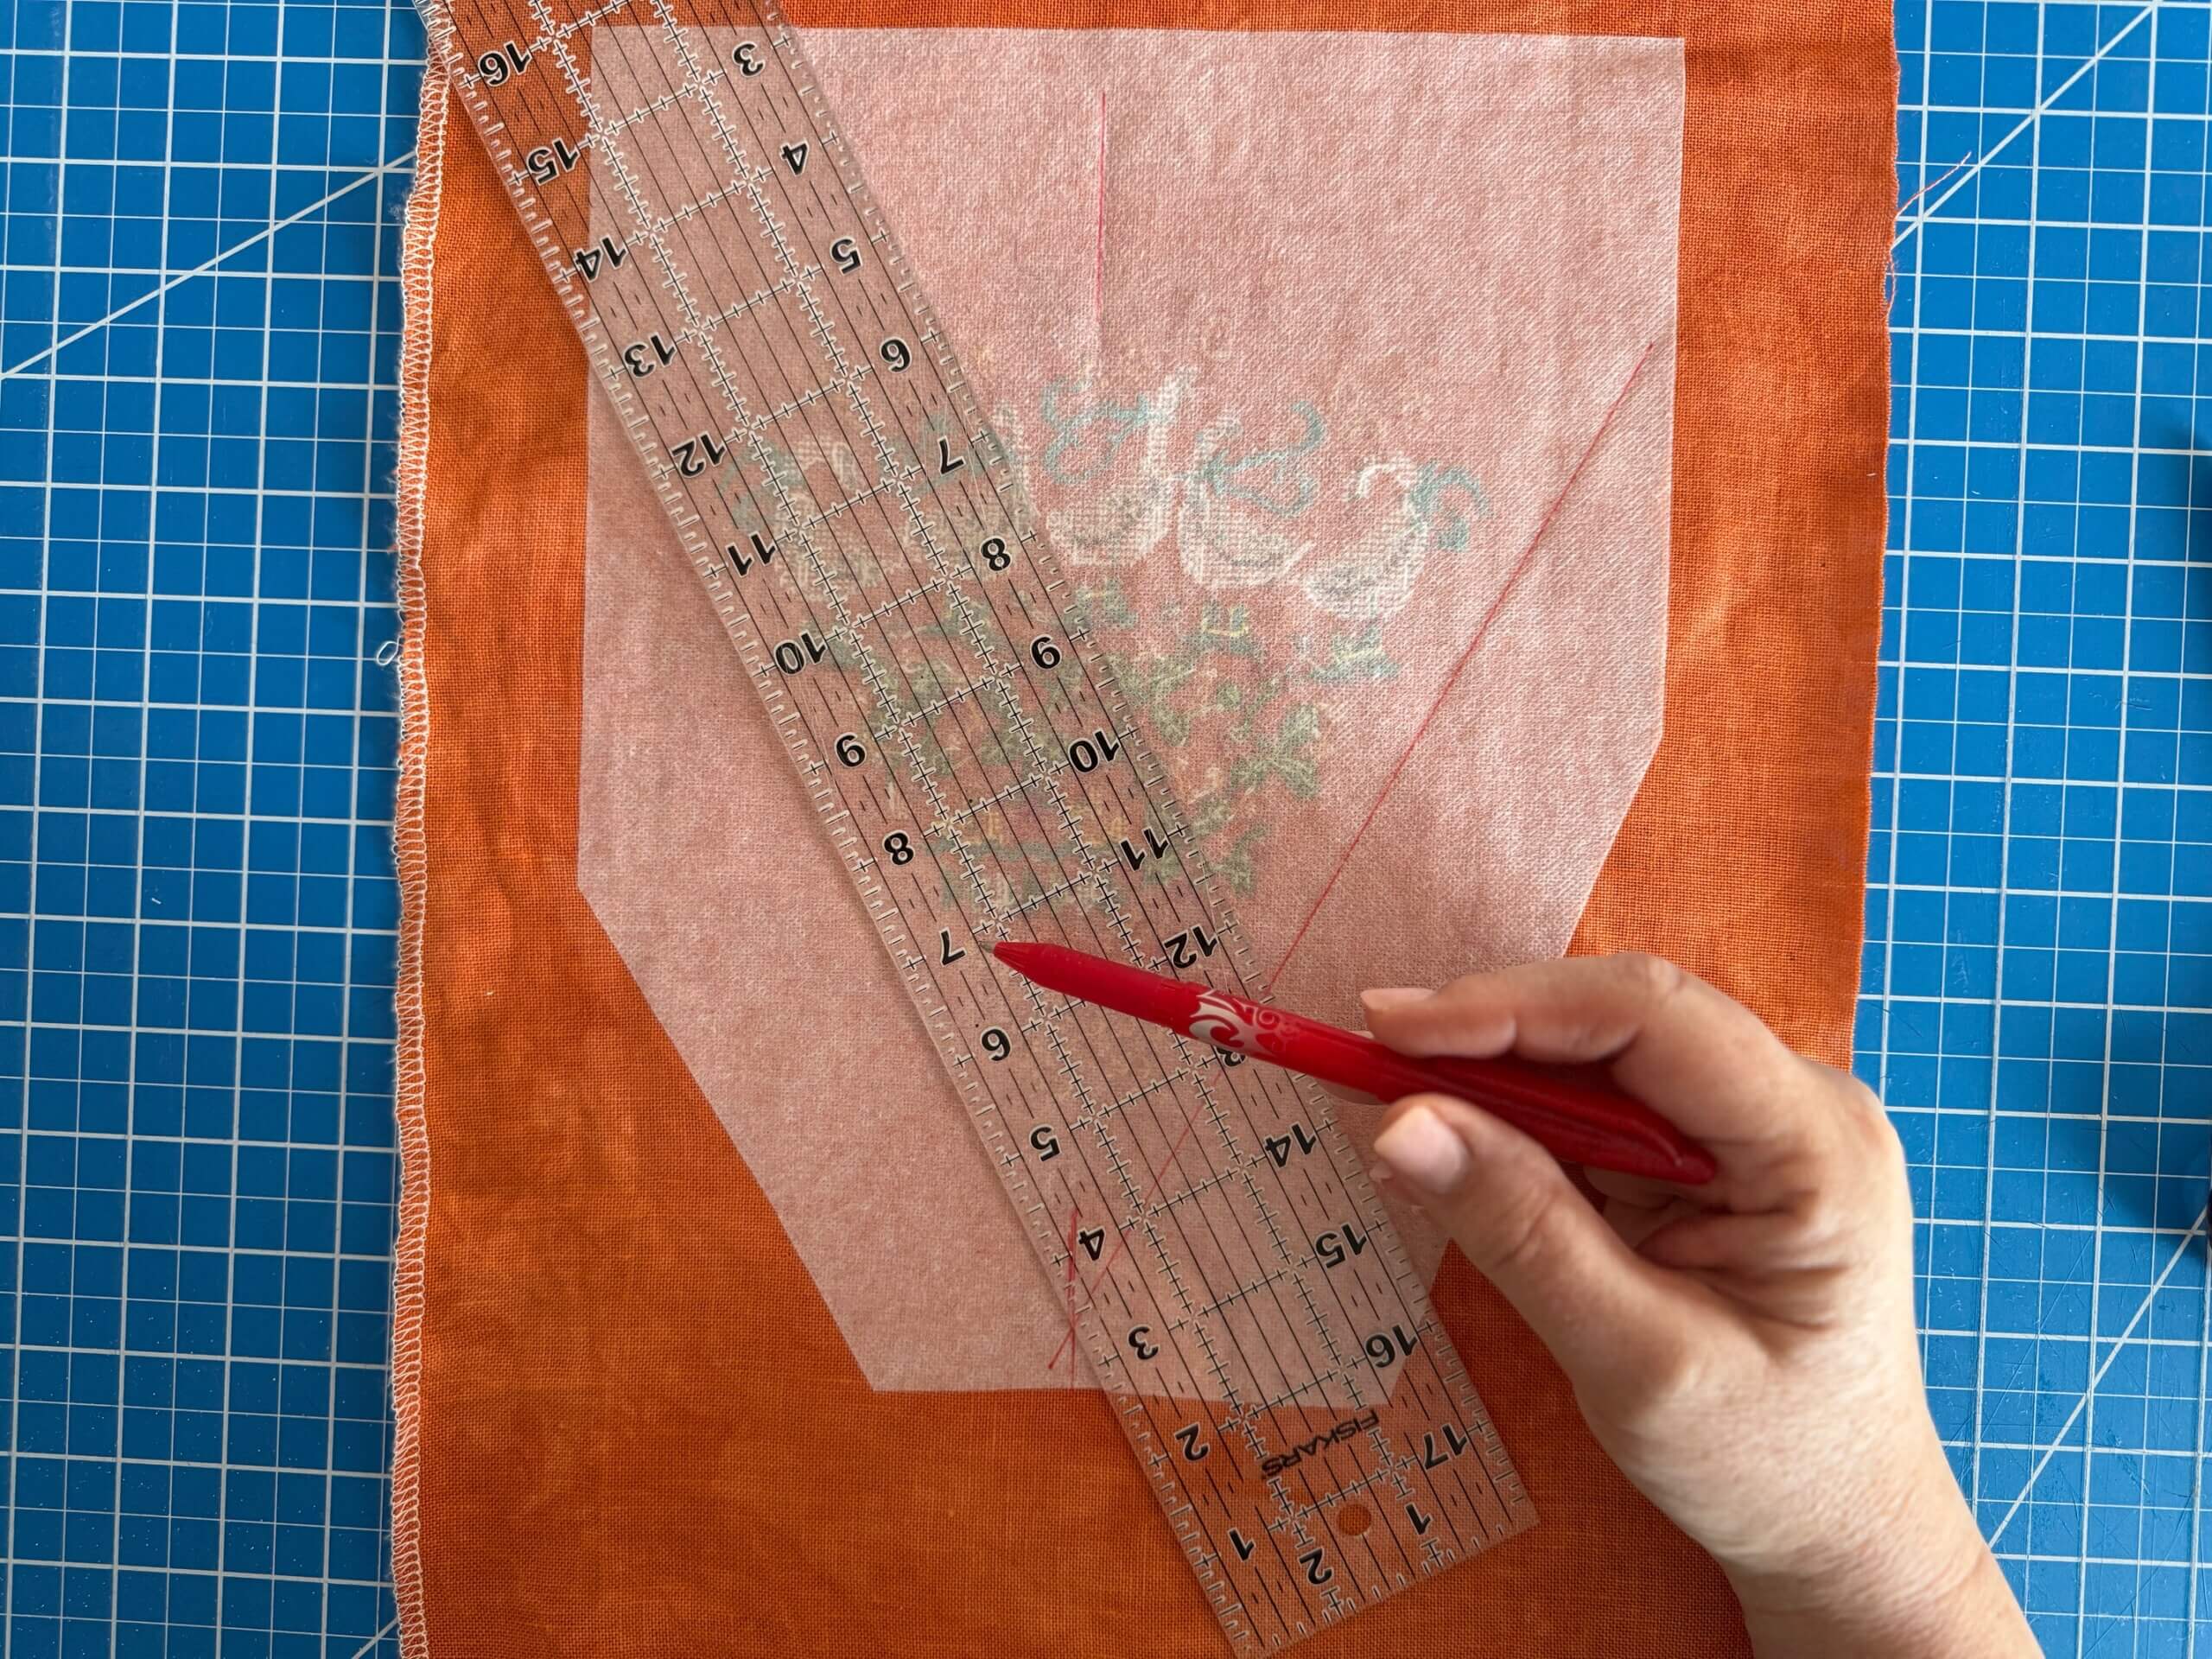
Repeat for the other sideofthecarrot.
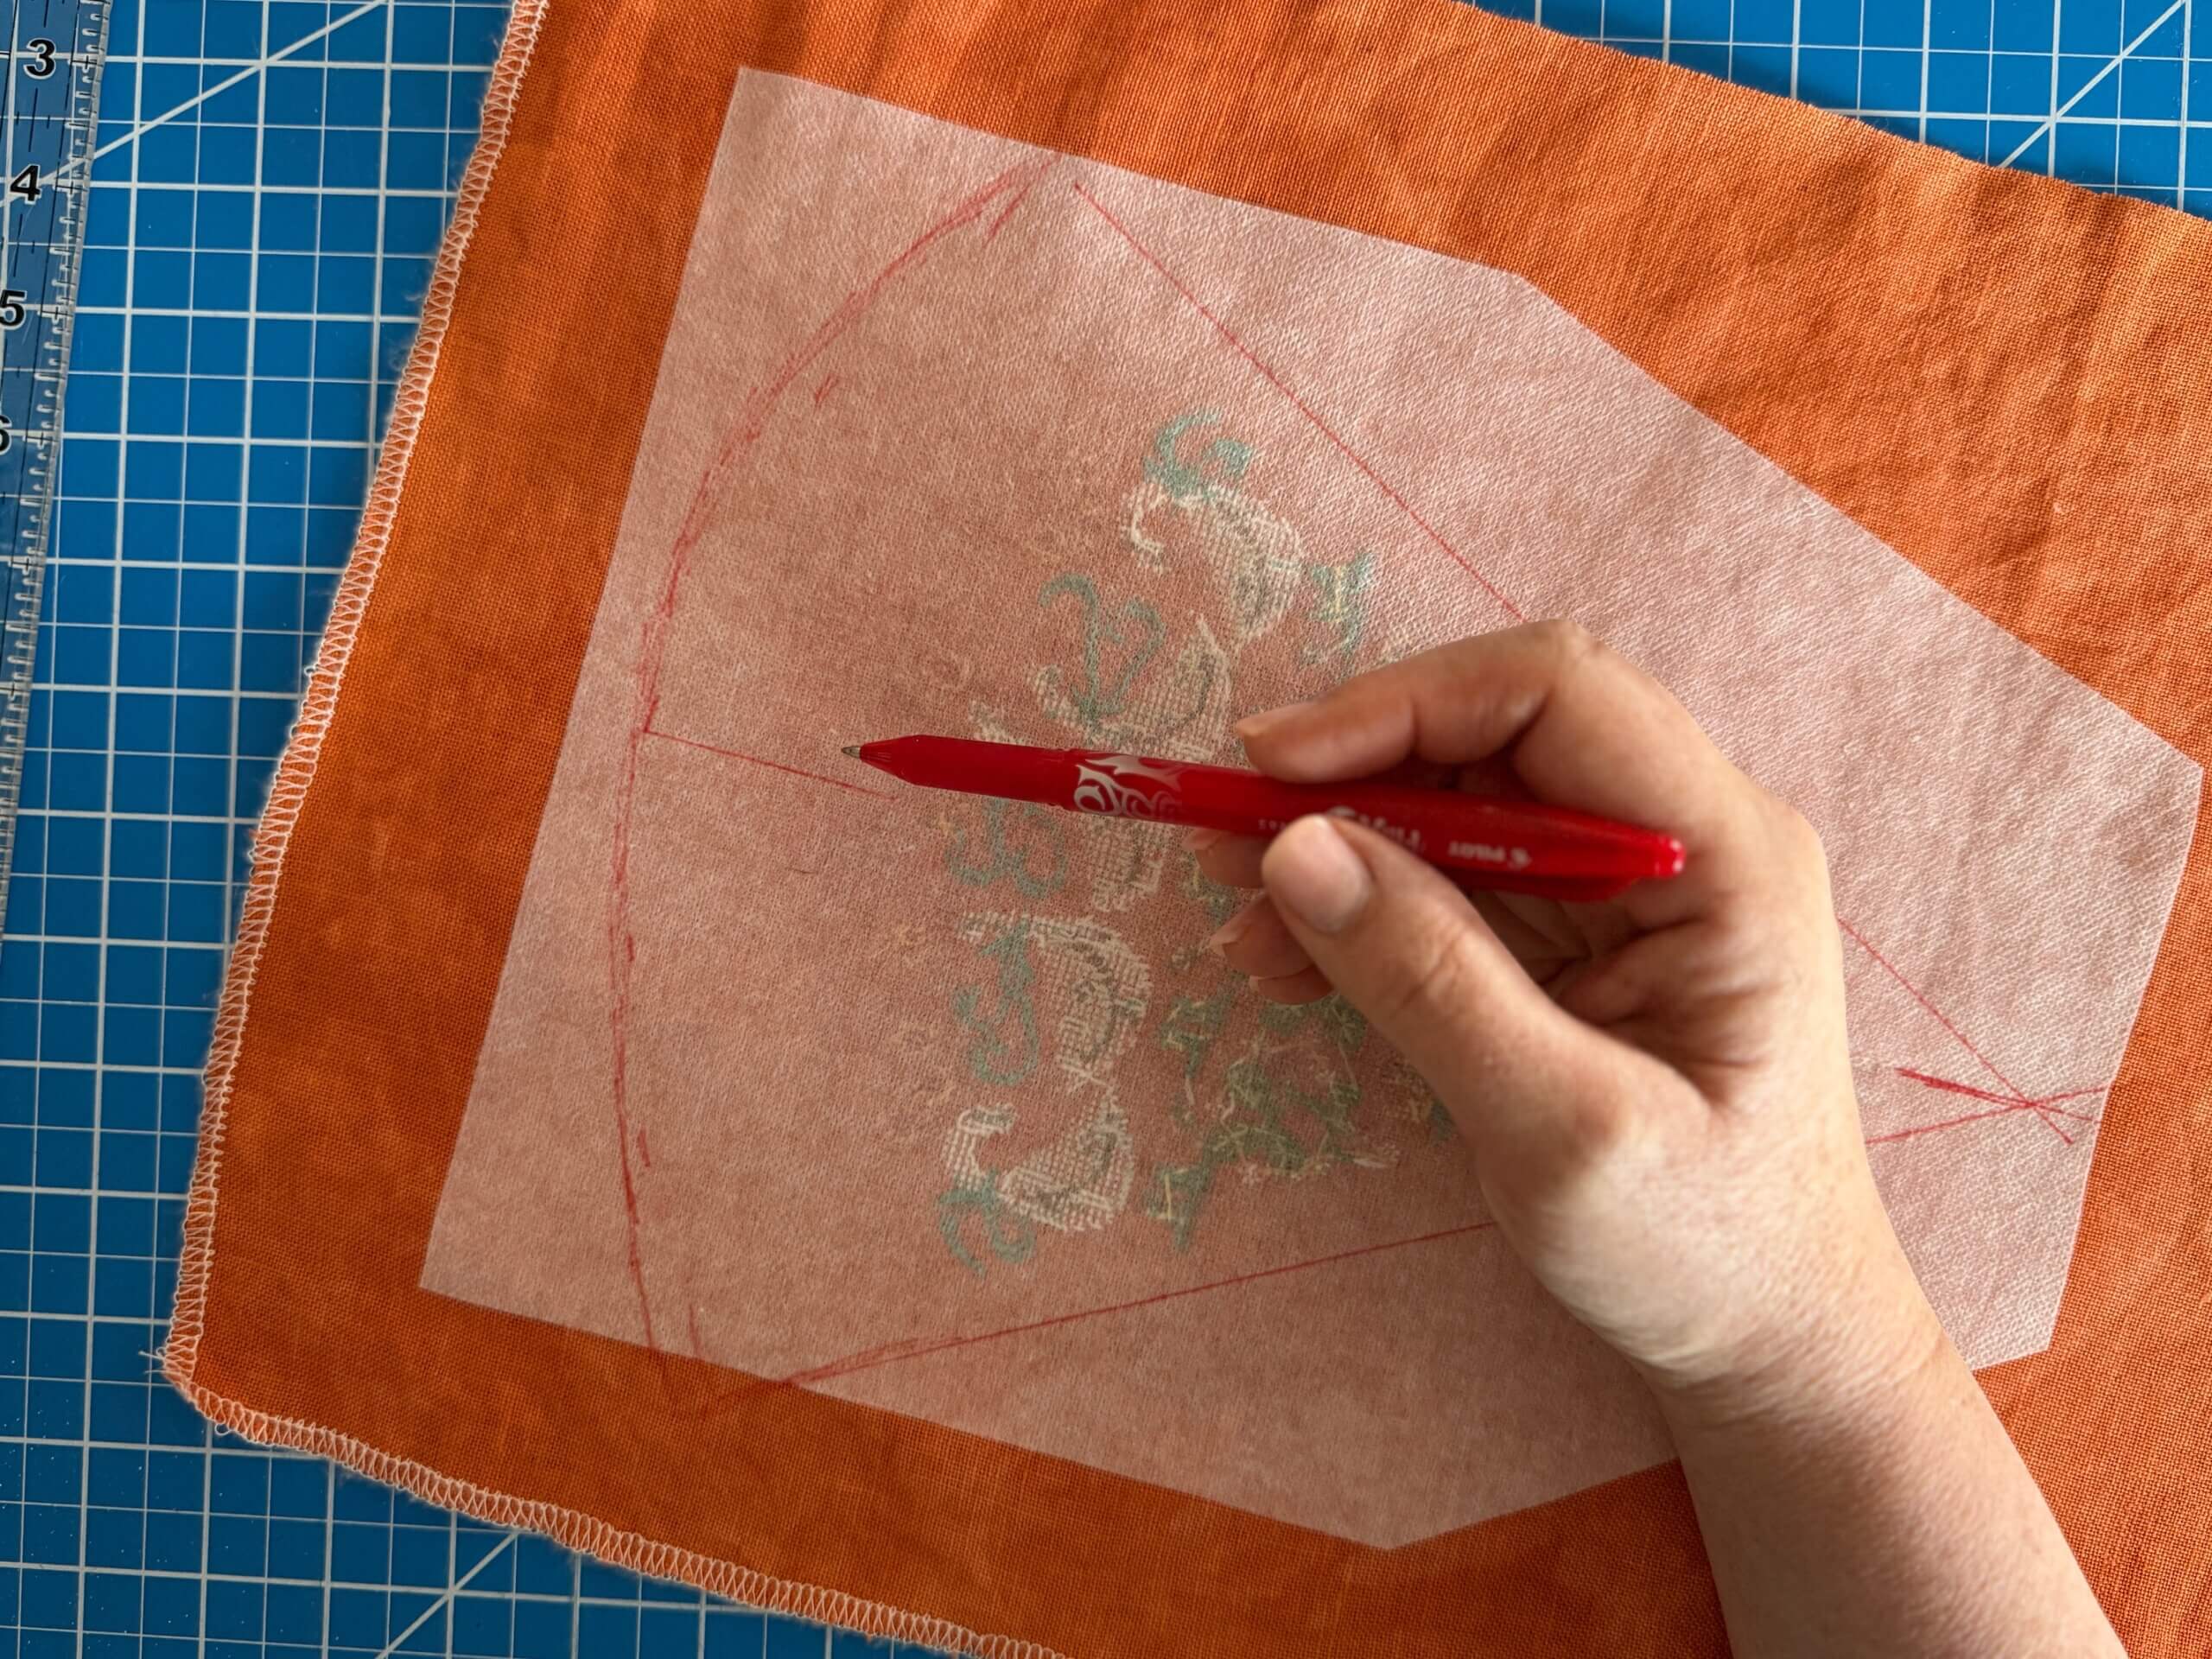
Hand draw a curved line across the top approximately 3″ above the stitching. Make sure that the straight sides are equal in length.
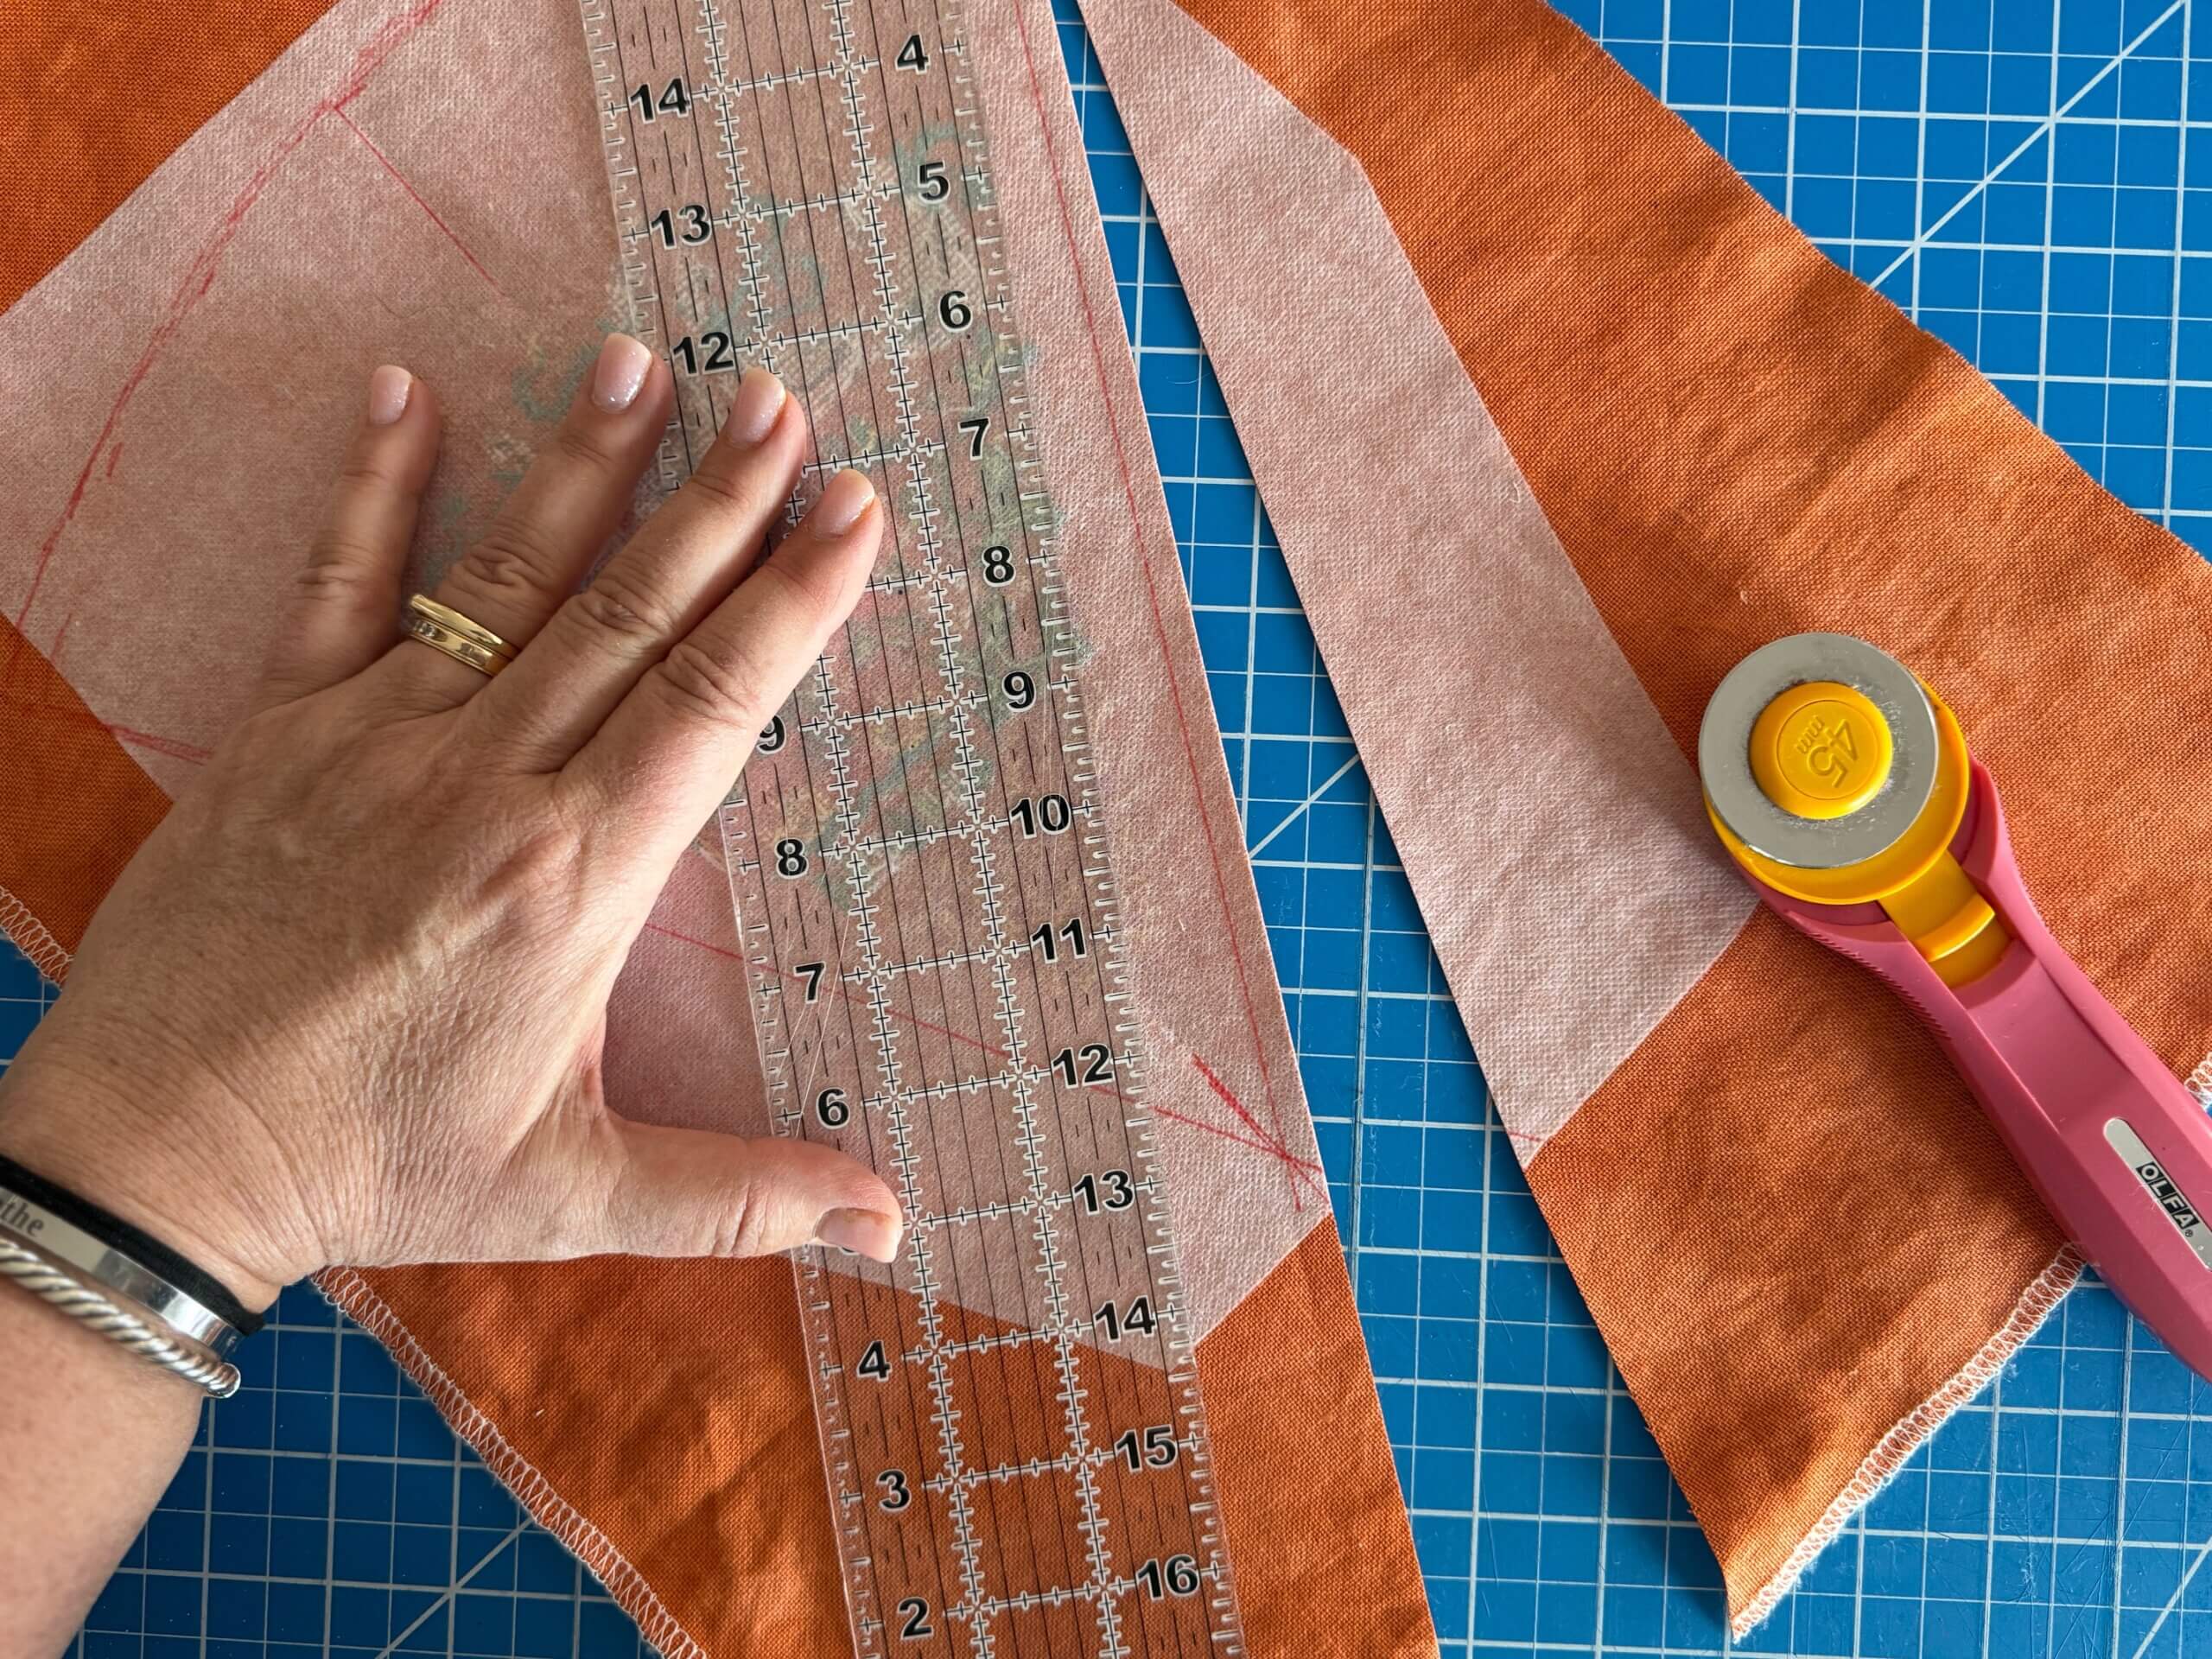
Trim linen with a rotary cutter – be sure to add 1/4″ for seam allowance.
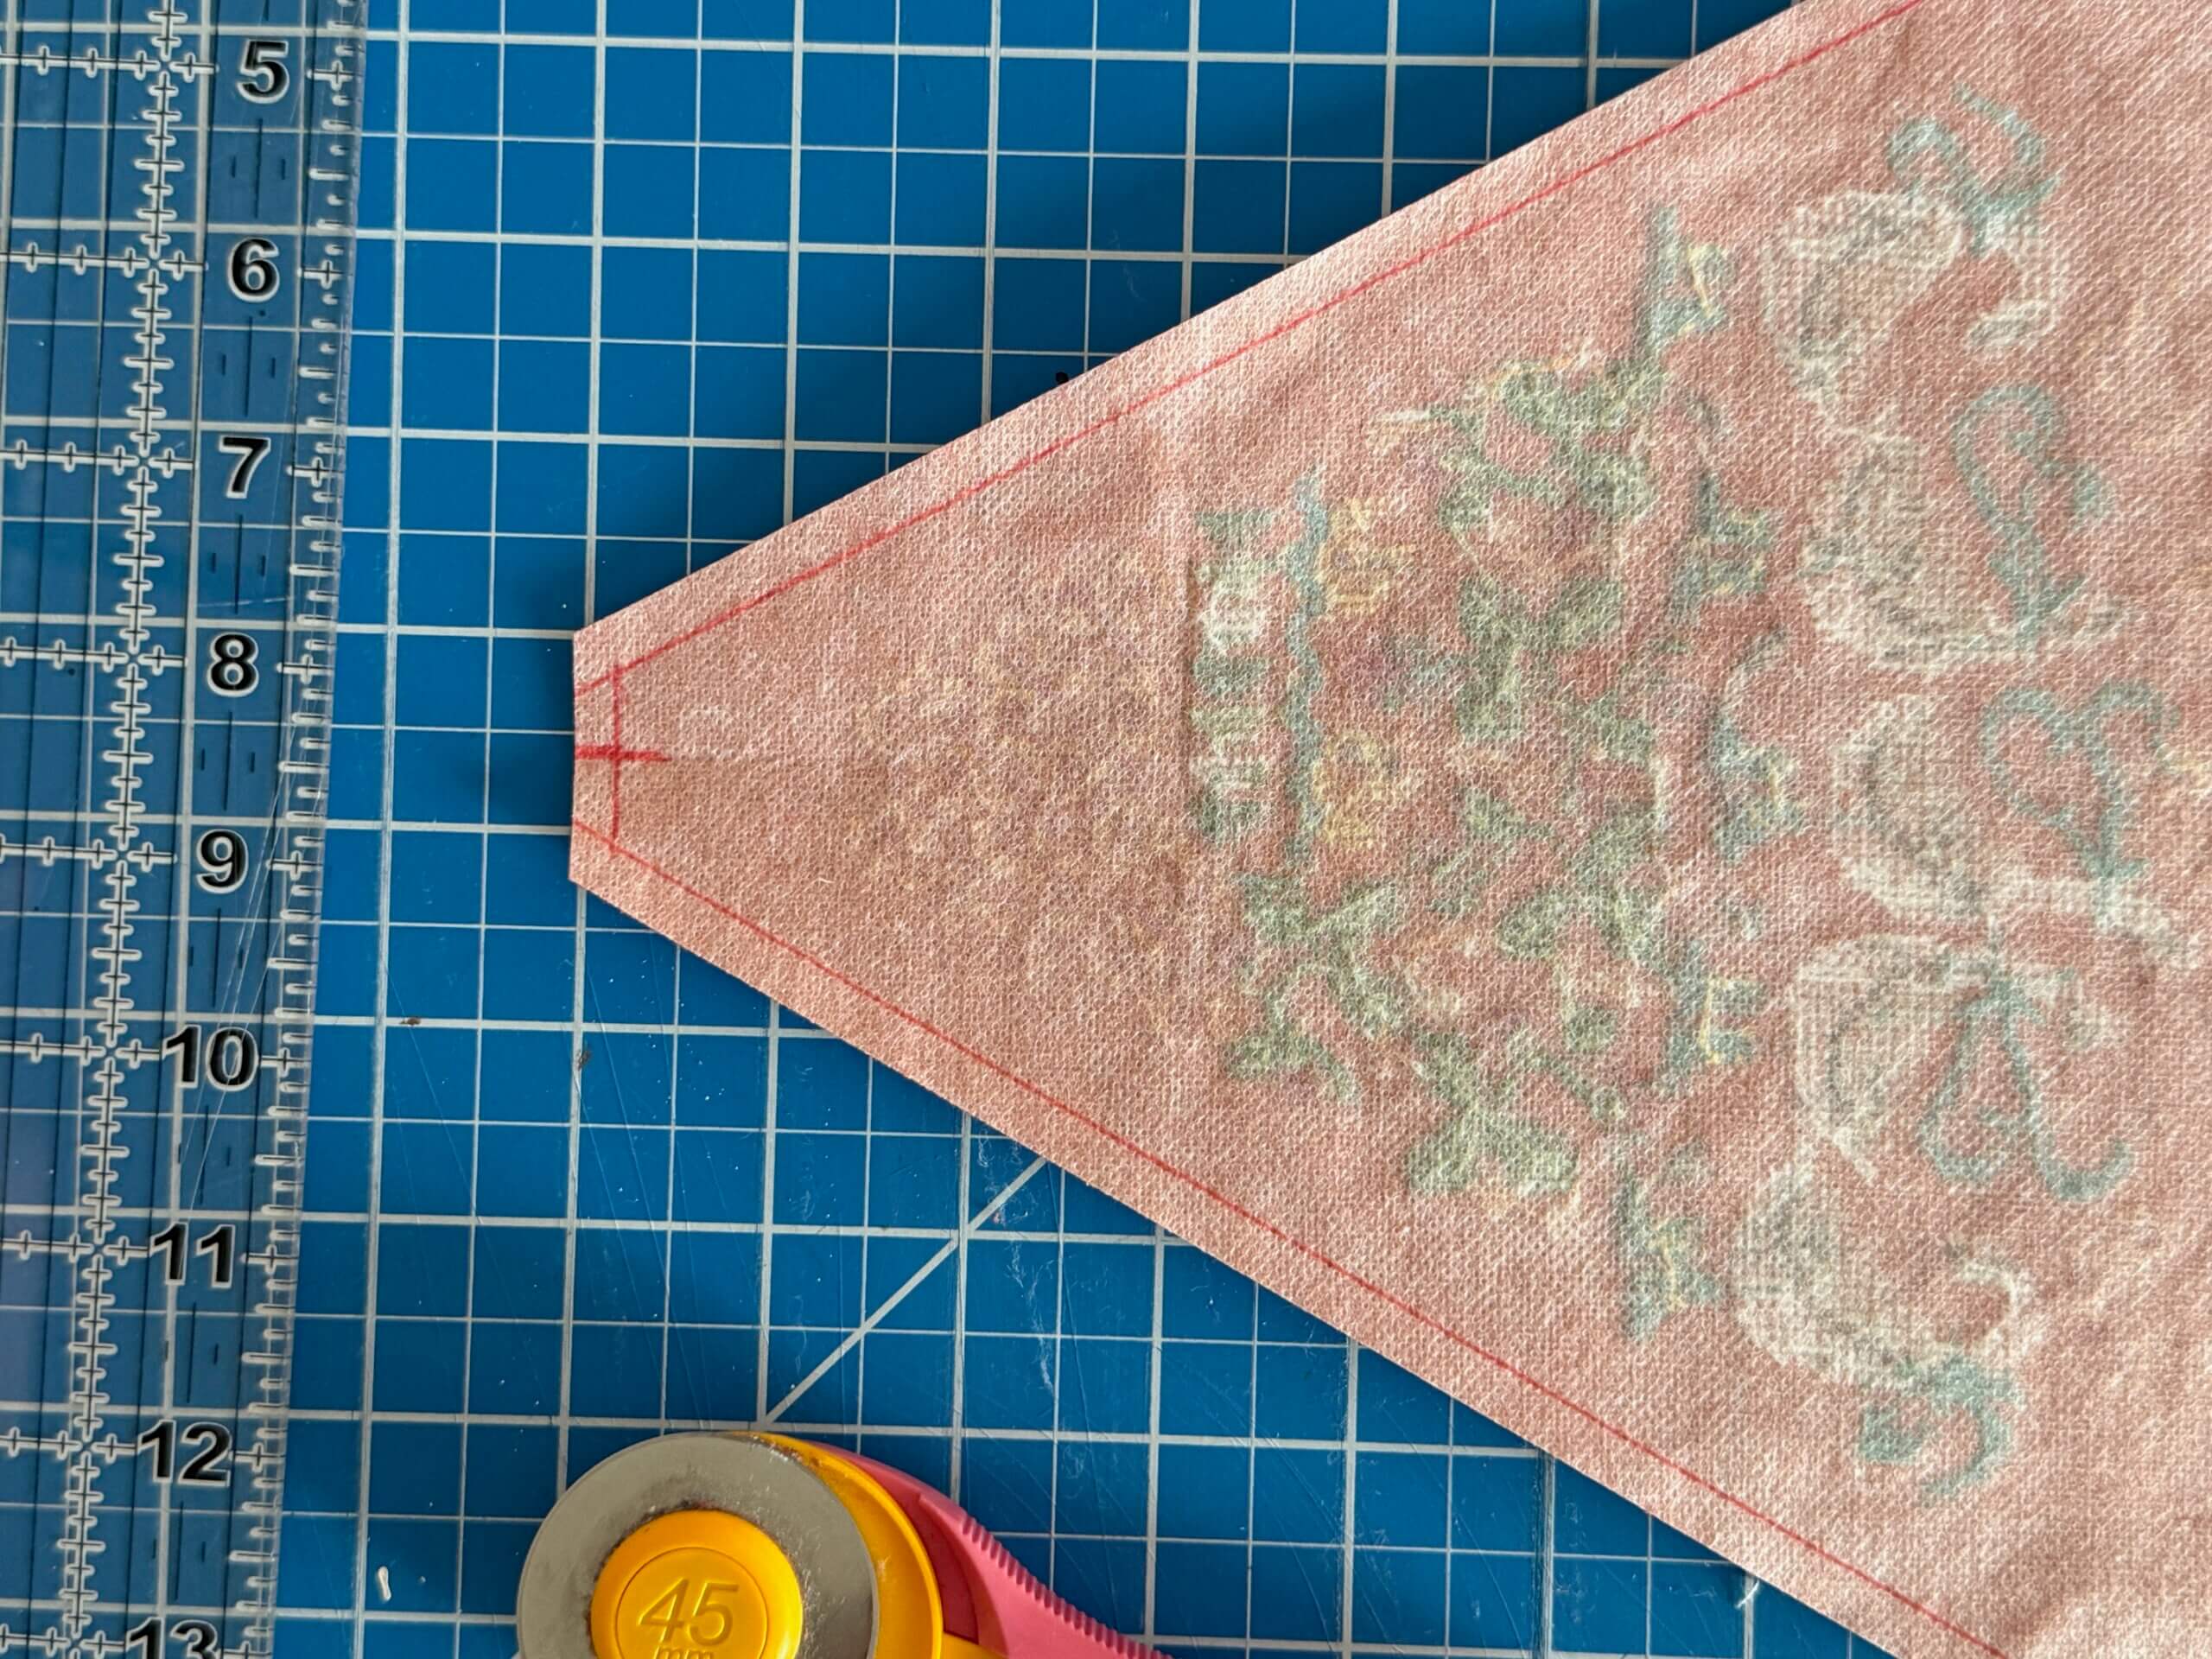
Measure up 1″ from the bottom tip. Draw a line straight across to blunt the tip. Leave a 1/4″ seam allowance & trim.
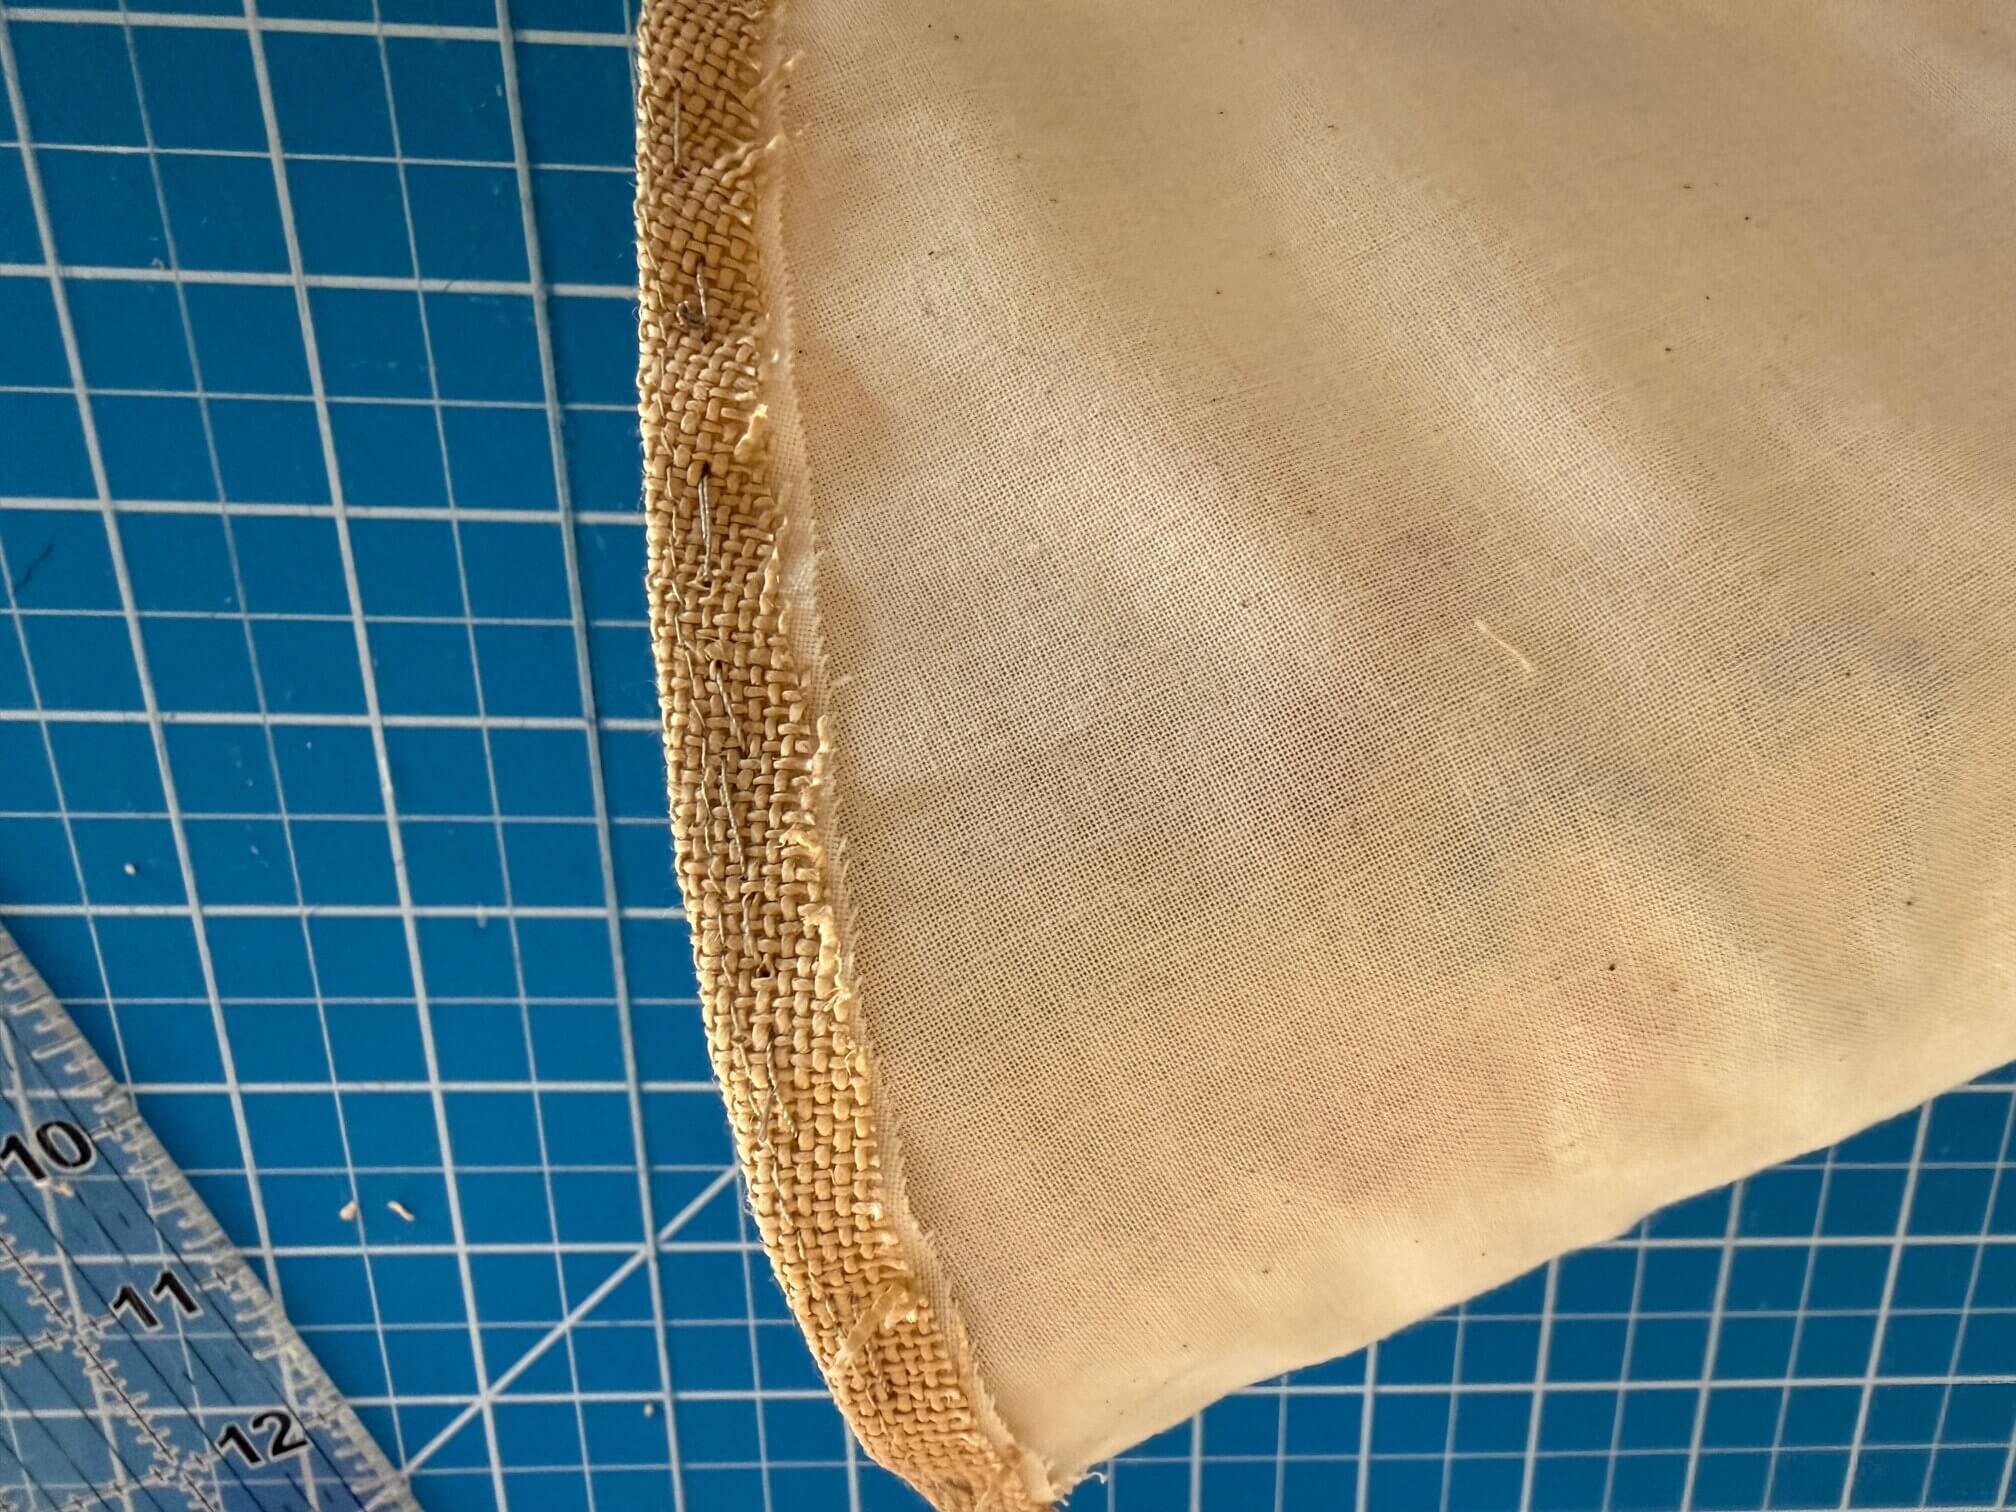
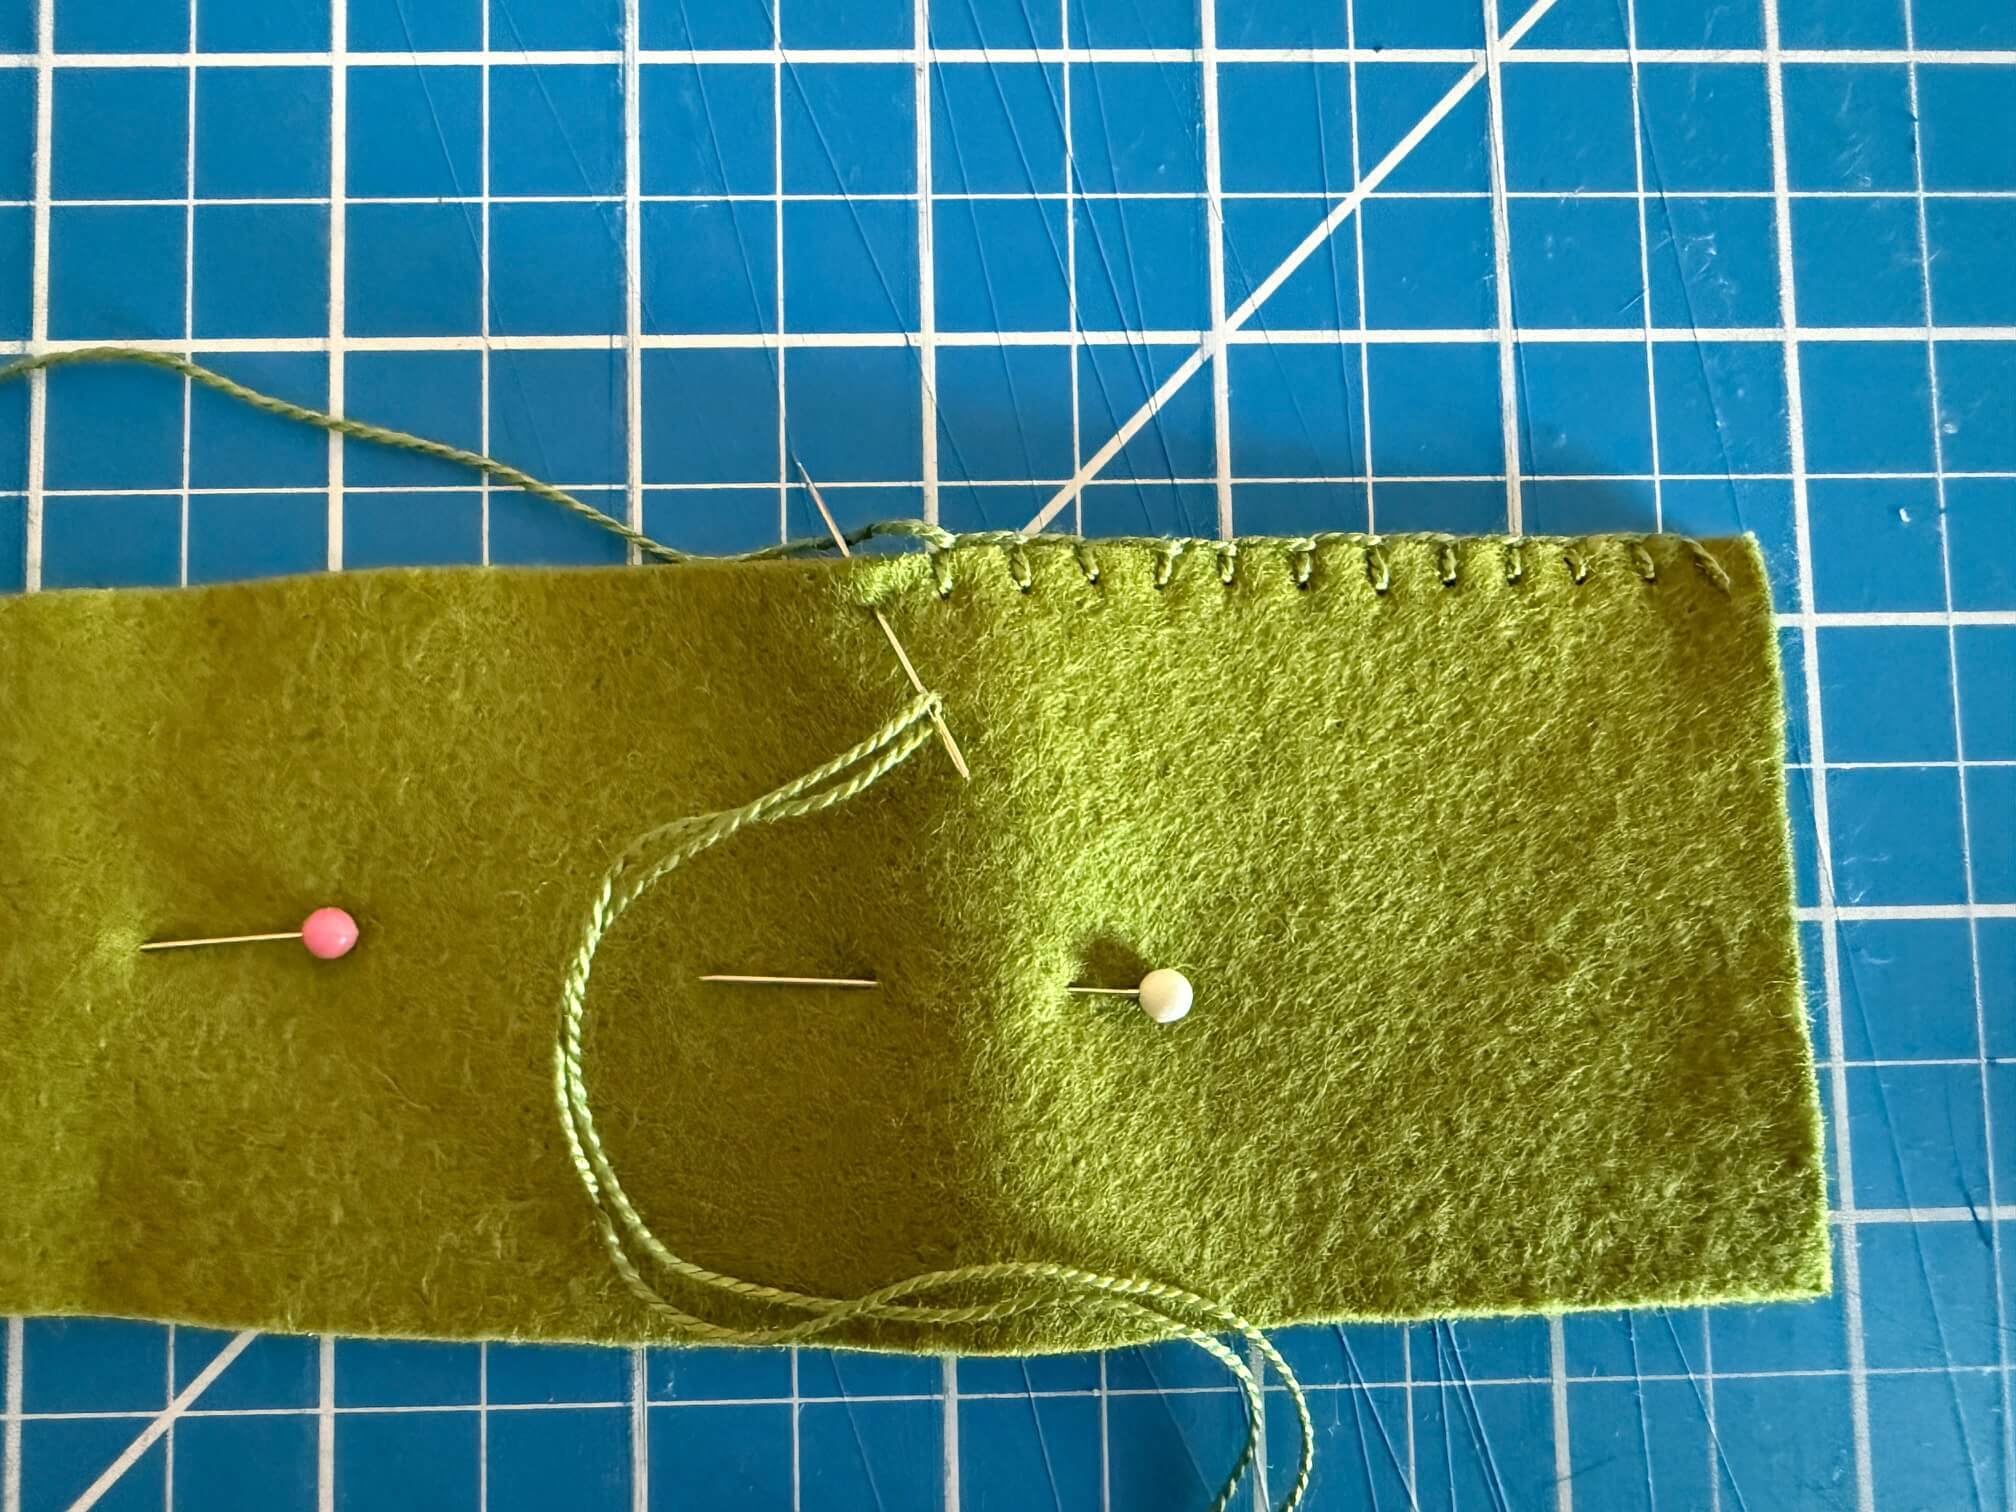
Press the seam open & turn the top cut edge over 1/4″ – press.
I suggest basting the turned edge at the top in place to make stuffing & gathering easier.
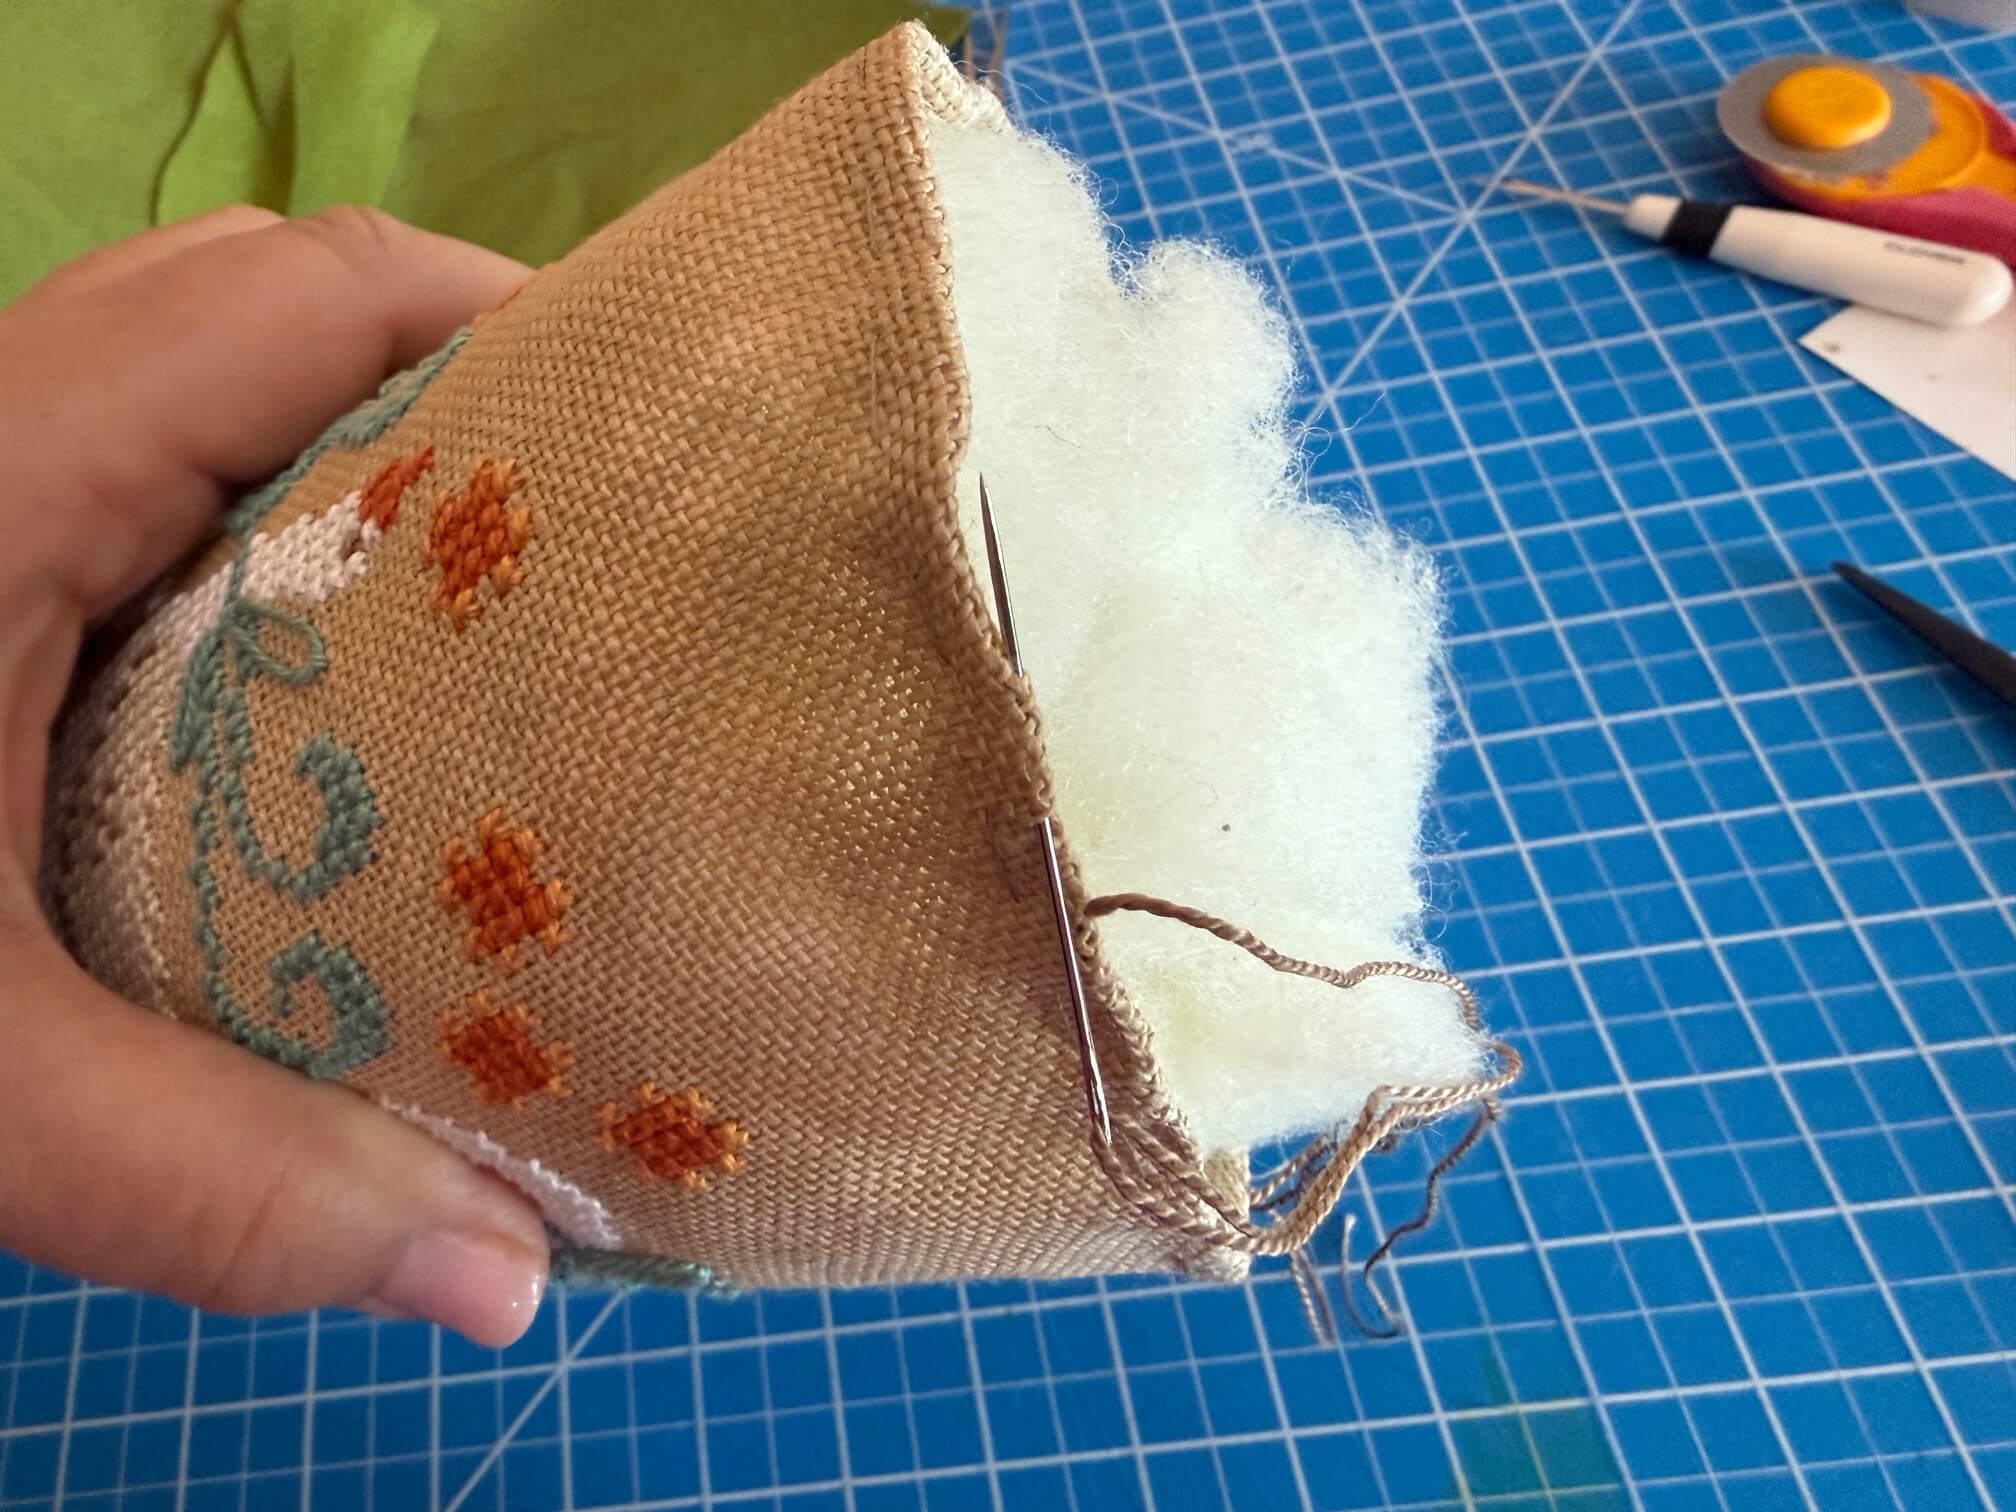
Turn the carrot right side out & stuff firmly. Baste with either pearl cotton or lacing thread through the folded edge. Cinch the top together. Let the thread dangle until you finish with the leaves.
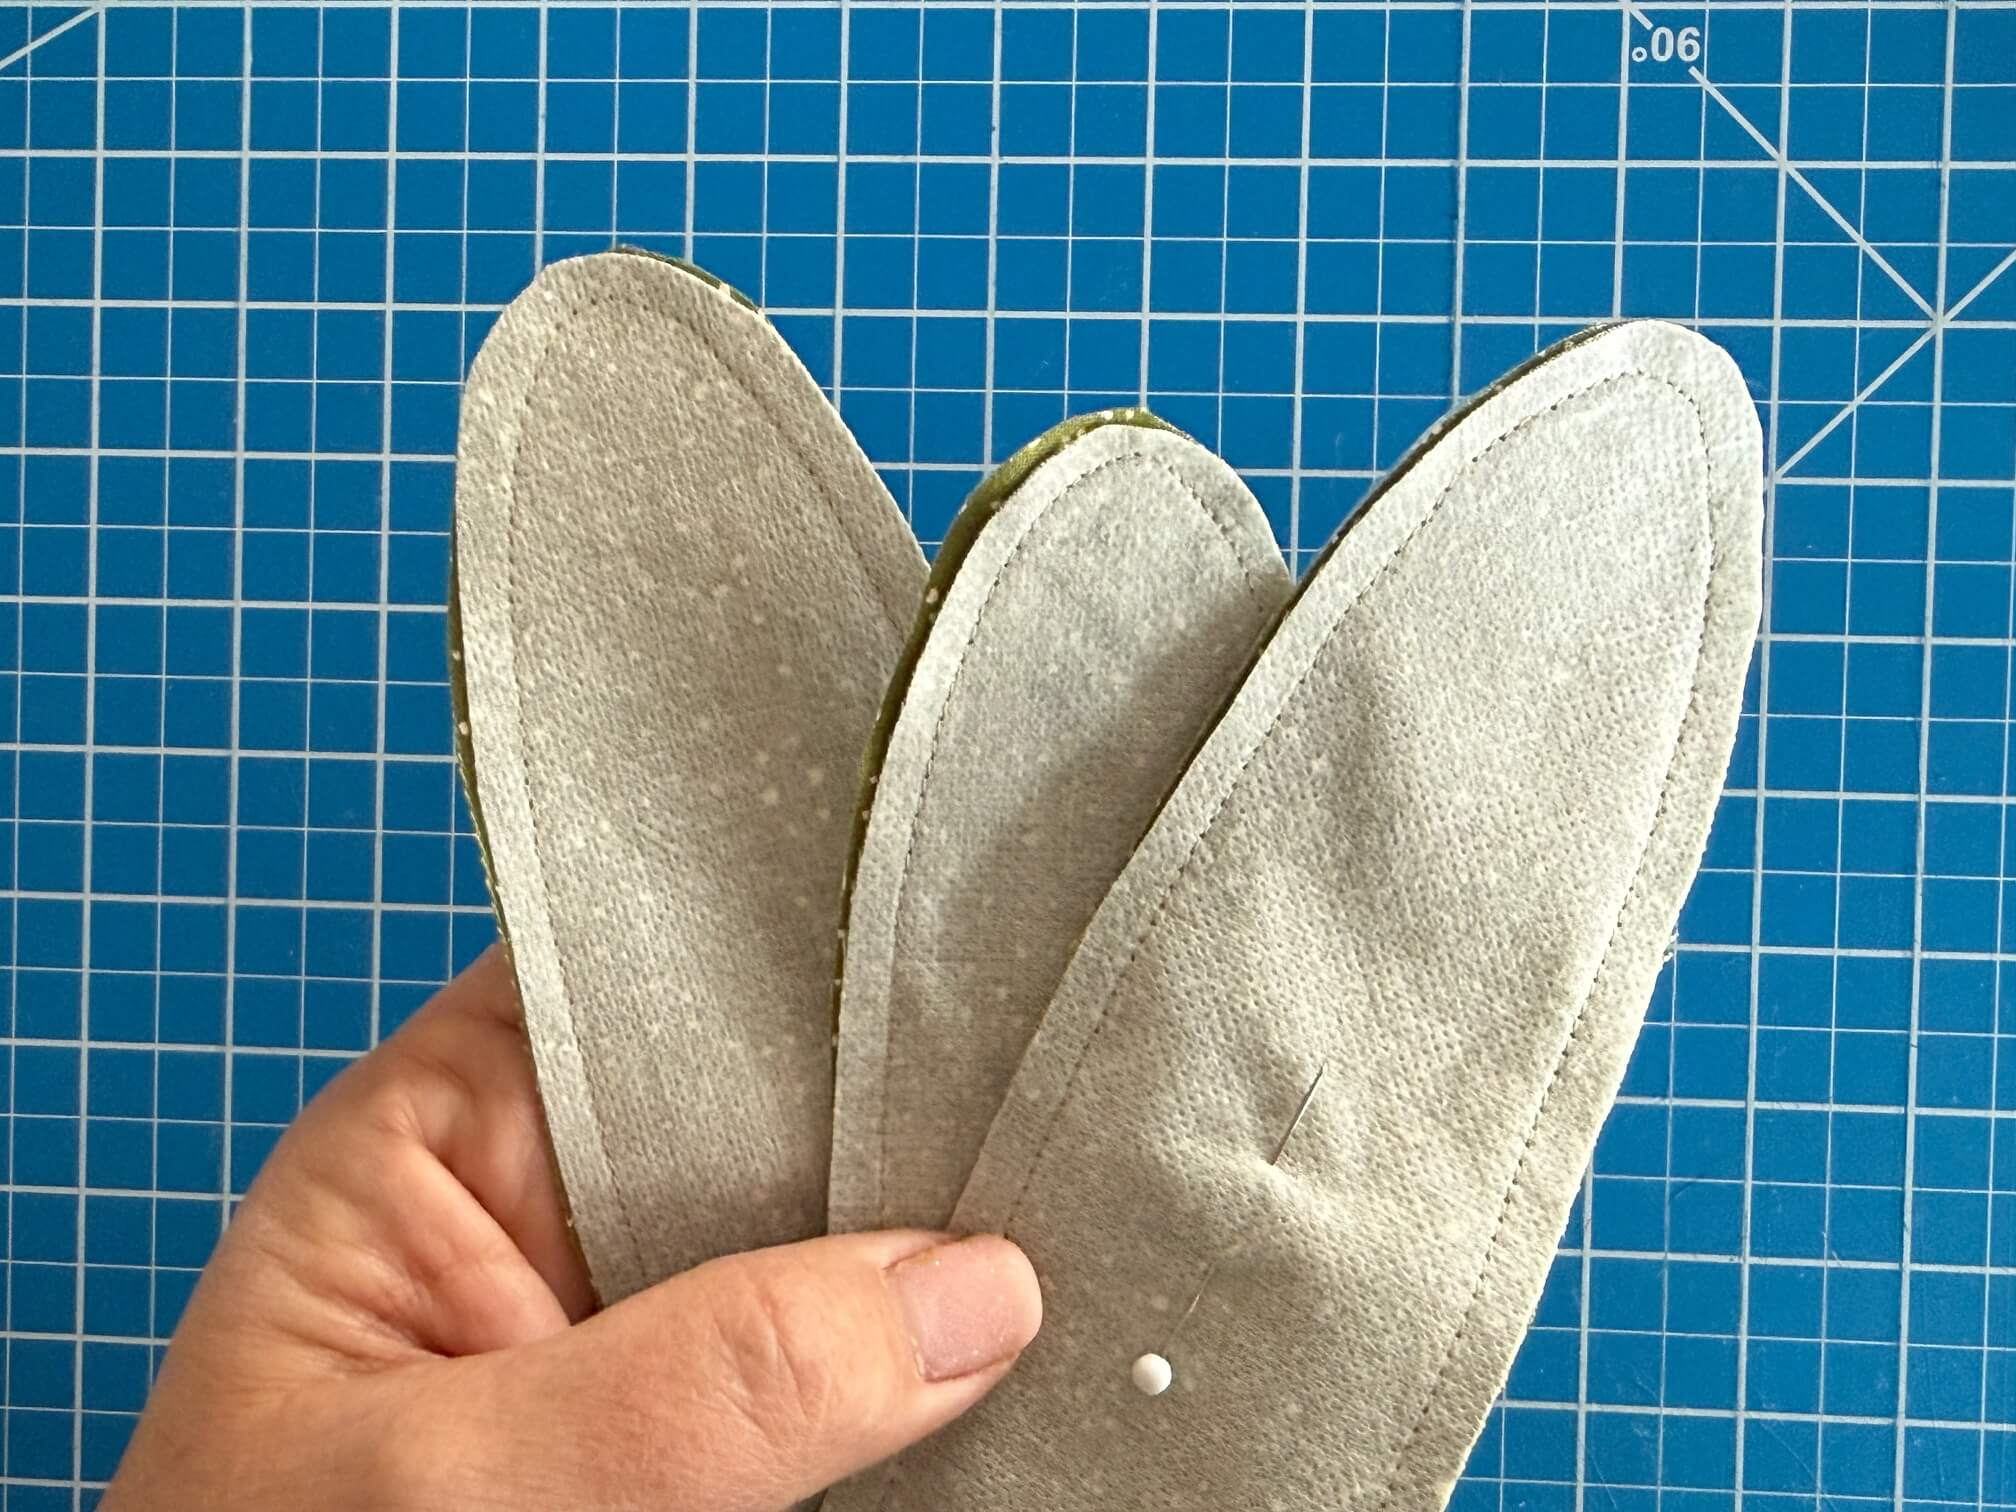
Prepare your carrot leaves. (print template – see template link at the bottom of this post)
I used Moss woolfelt for the larger carrot. Trace the leaf onto the mat side of freezer paper. Iron on to the woolfelt & trim. You will need 6 leaves.
Match up 2 leaves & button hole with coordinating thread for added texture. Make 3 leaves total.
Fold the base of the leaf in half & then fold the 2 sides in the opposite direction. Run needle & thread through the folds to secure. Fold the 2nd leaf & baste the 2 leaves together. Add the 3rd leaf in the same manner.
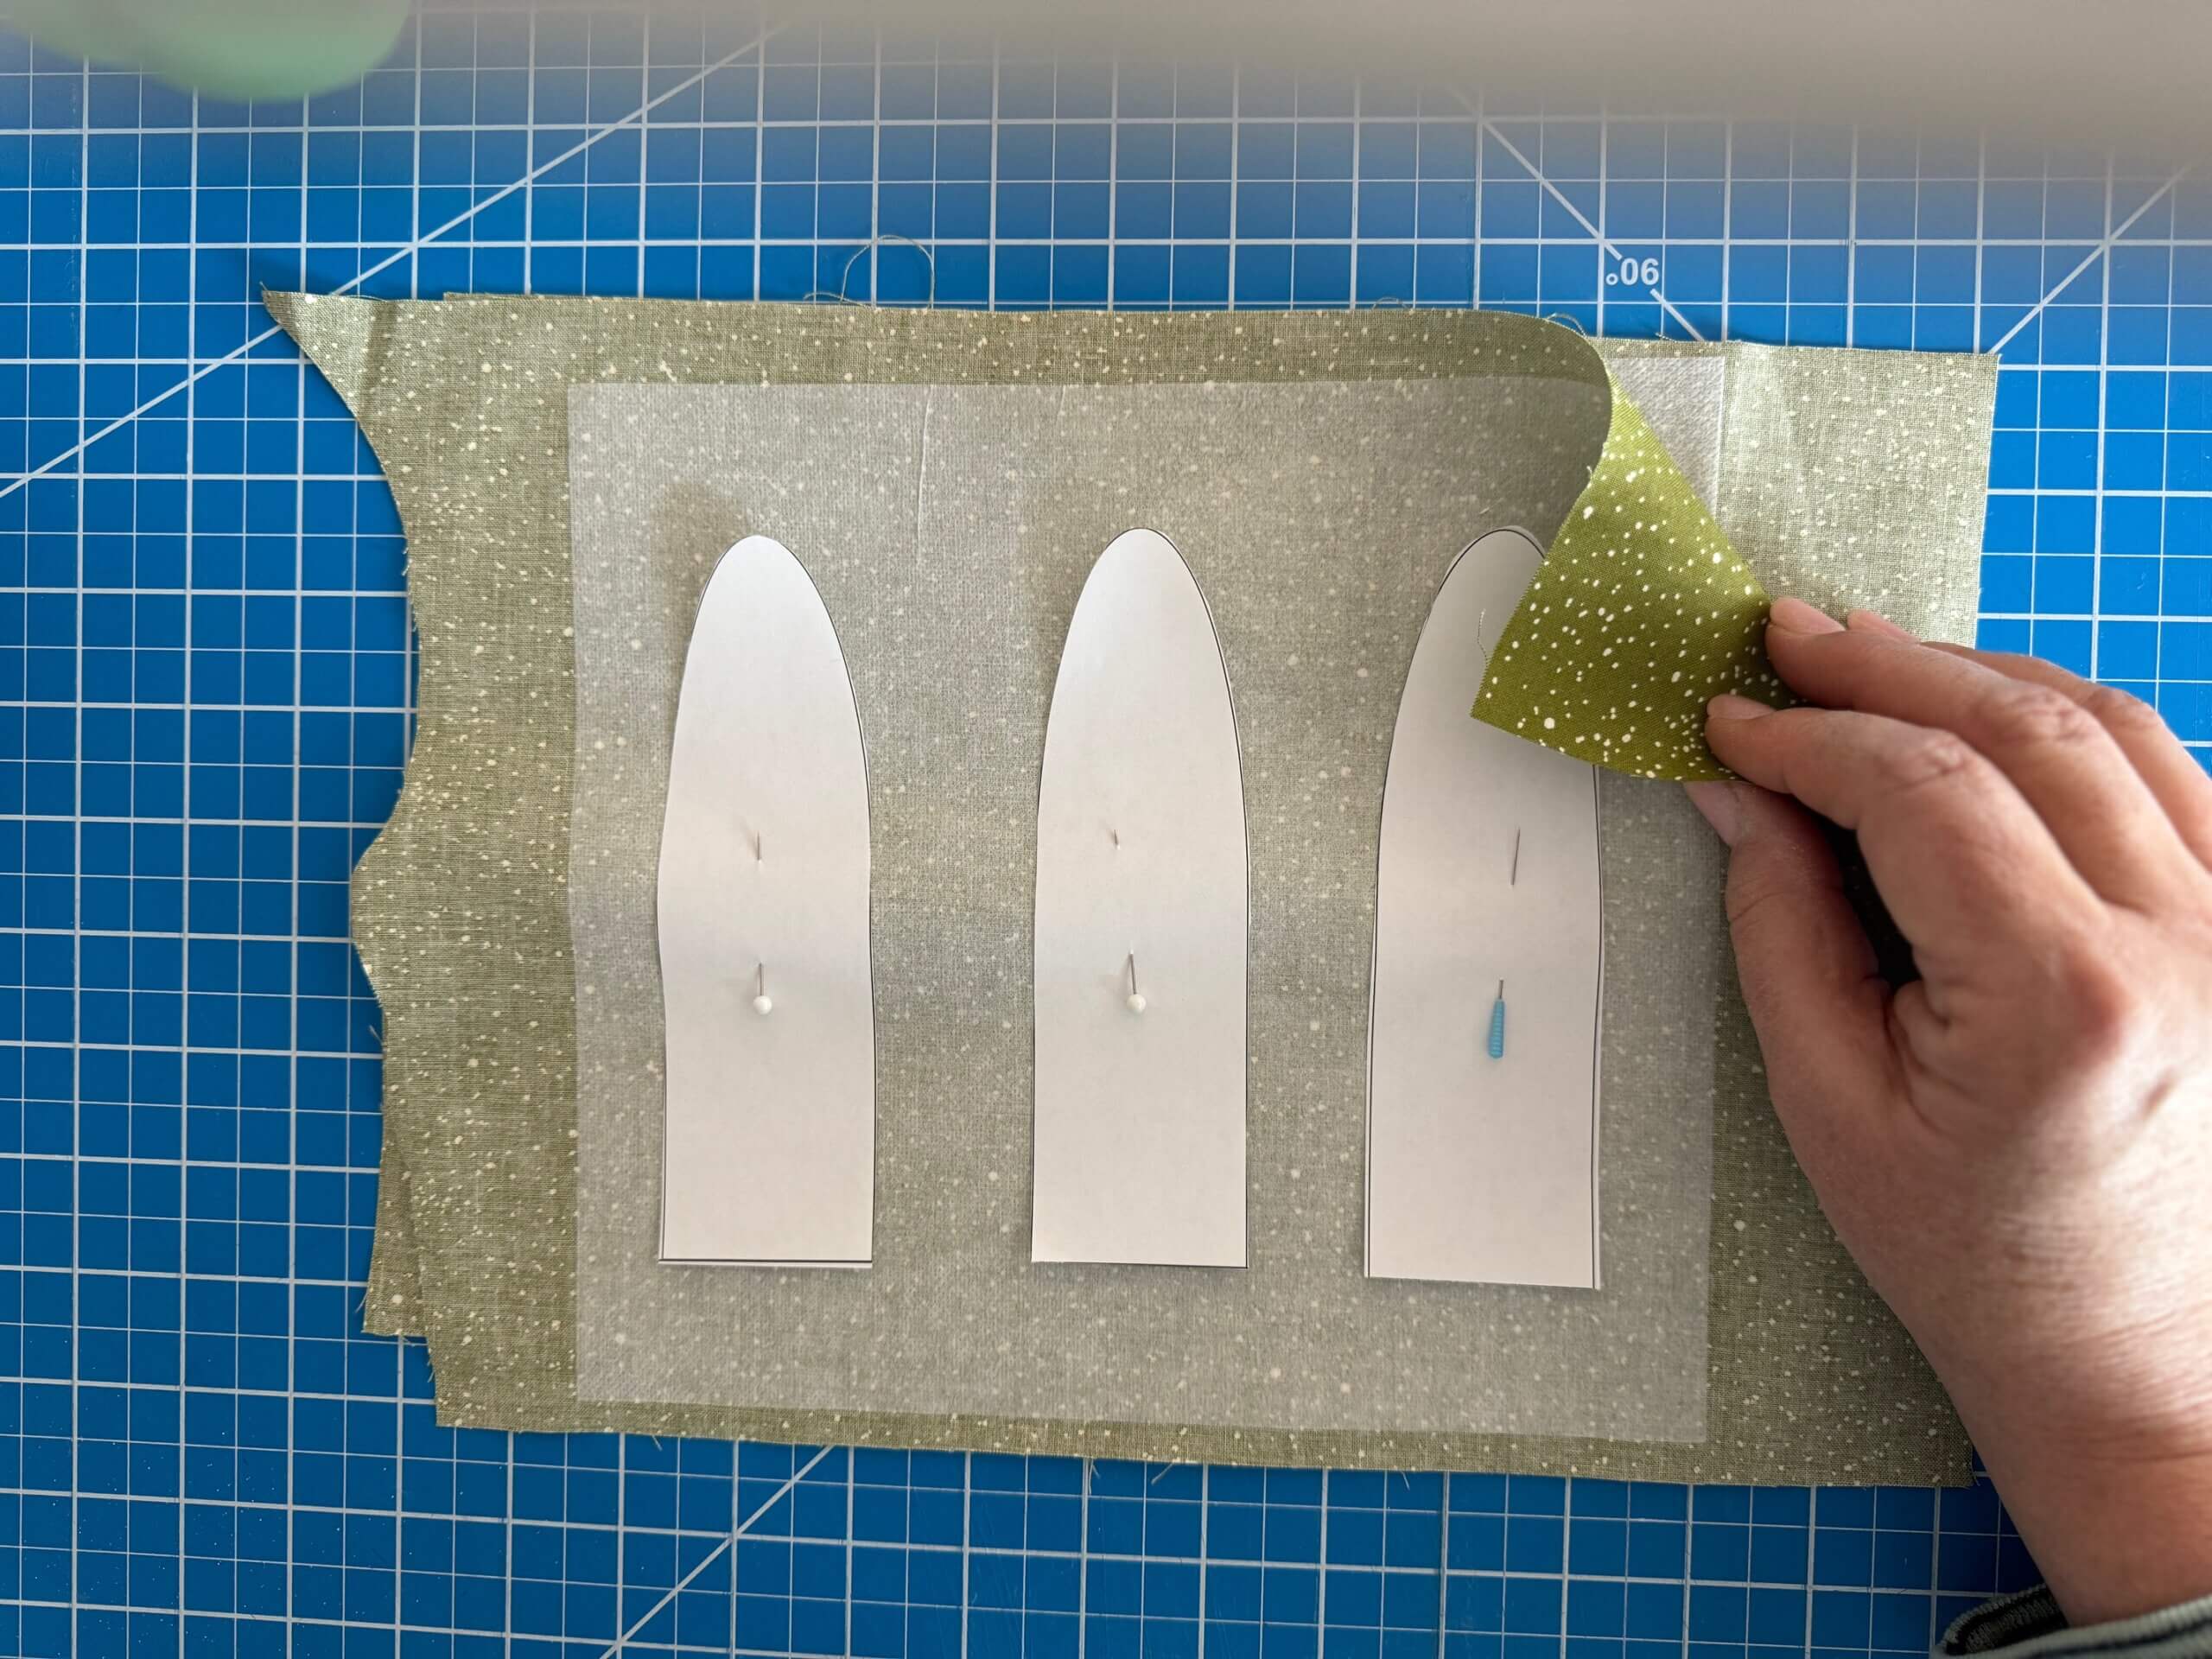
I used the smaller template & quilting cotton for the smaller carrot. Apply lightweight fusible to one of the pieces of cotton. Pin leaf patterns onto the fabric (right sides together). Cut leaving a 1/4″ seam allowance.
Sew together. Clip small snips into the curved end seam allowance. Turn & press. Fold & tack the leaves together as I showed for the woolfelt.
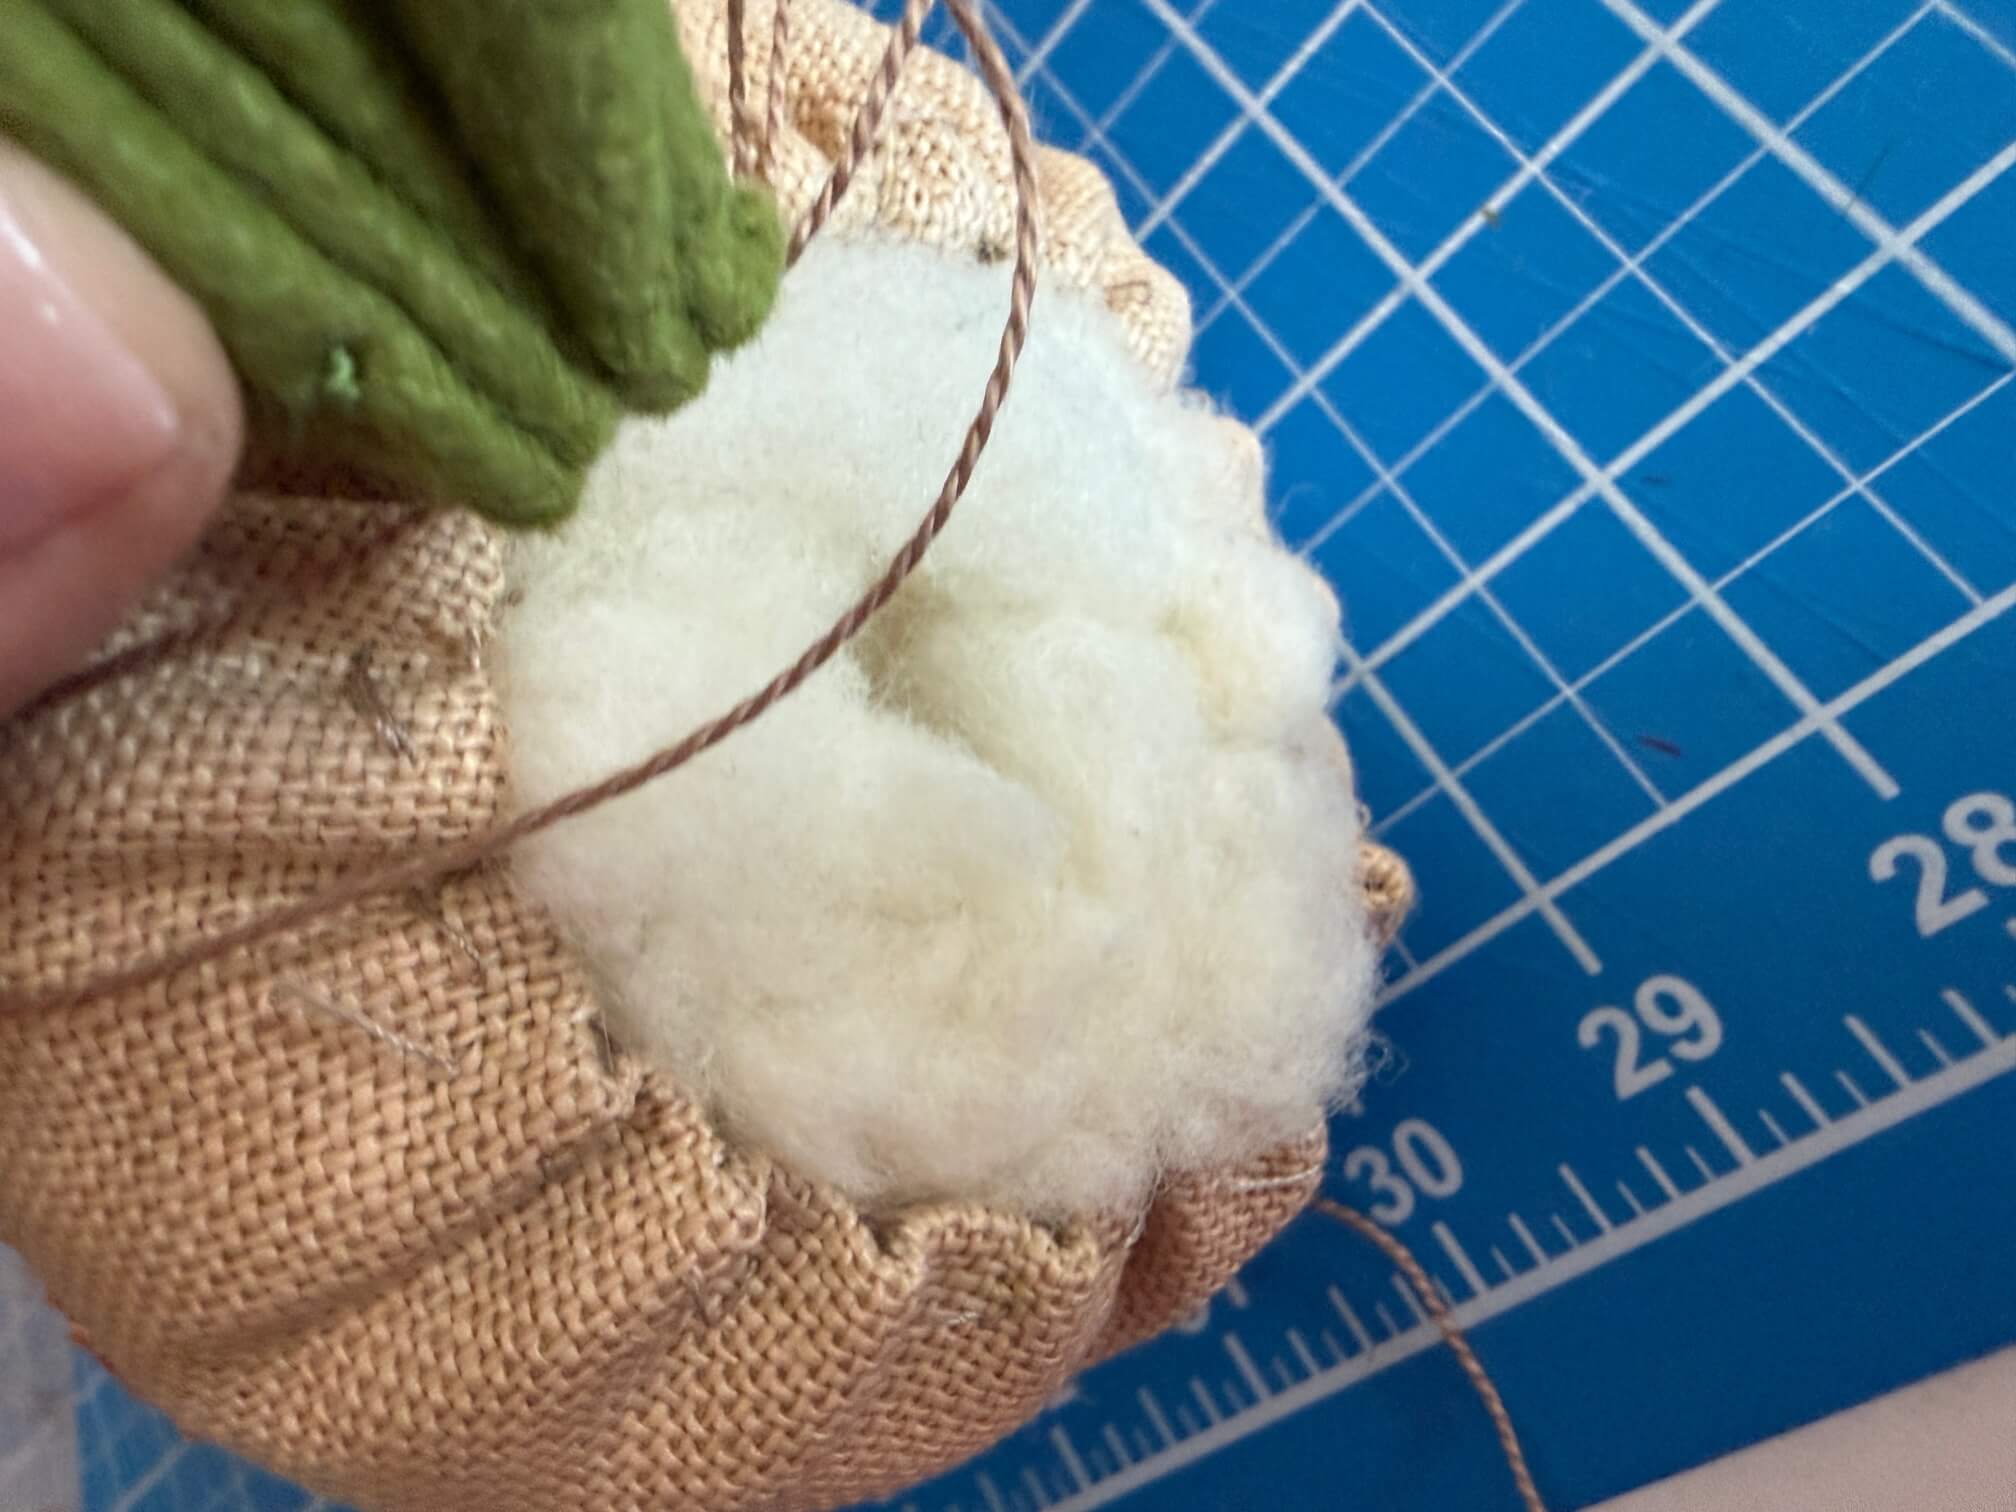
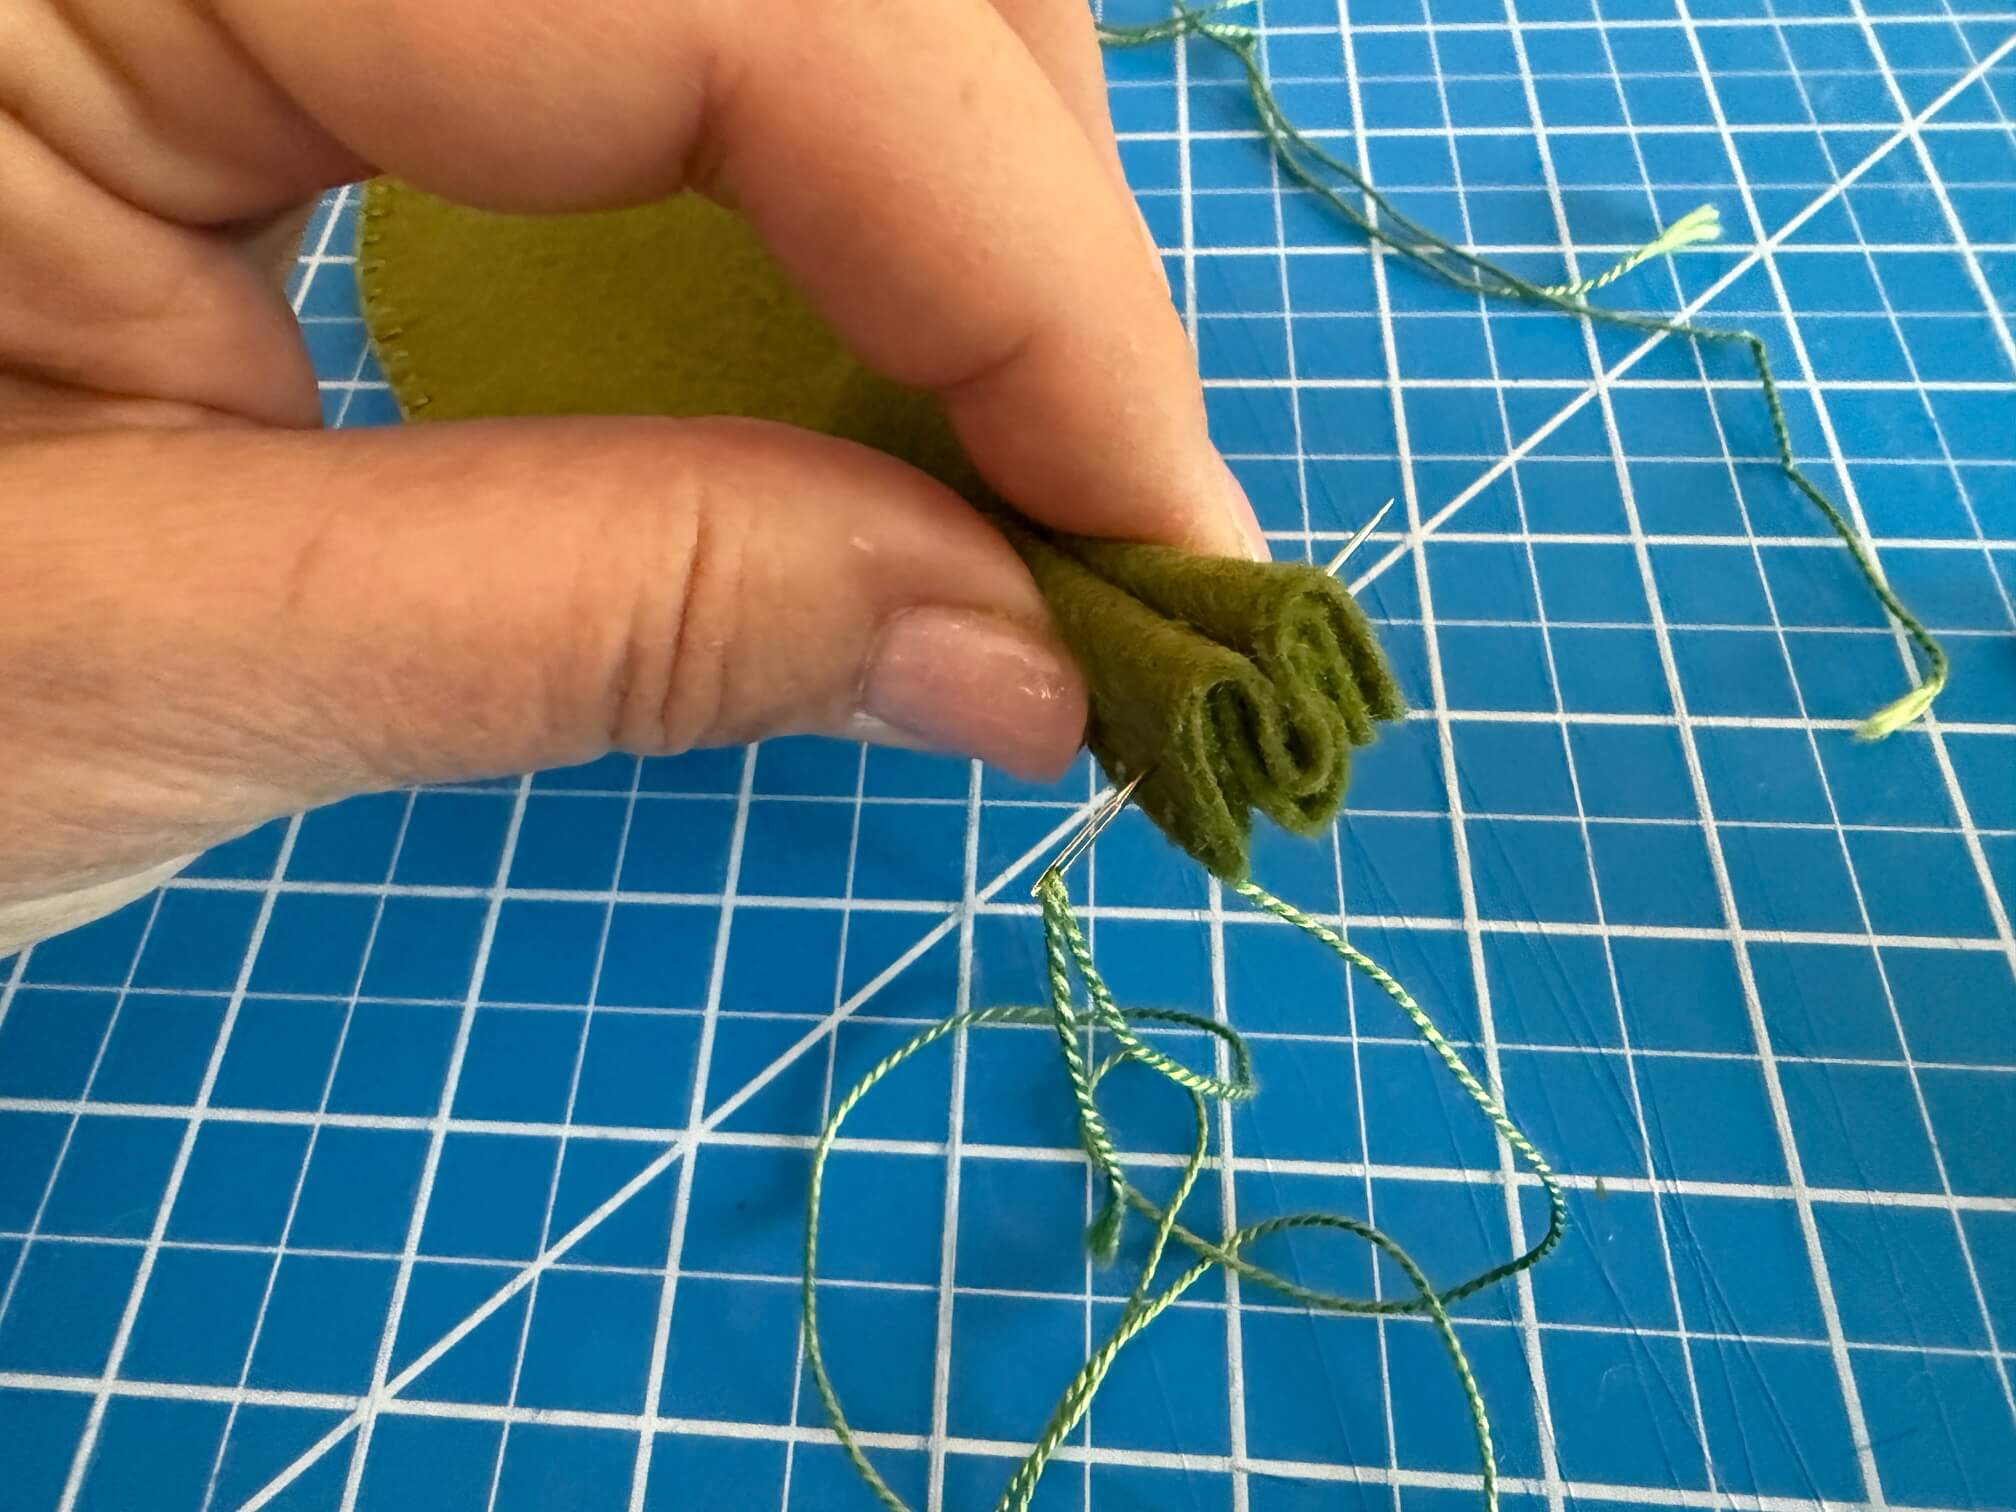
Open up a slight hole in the top of the stuffing & nestle the leaves into the carrot.
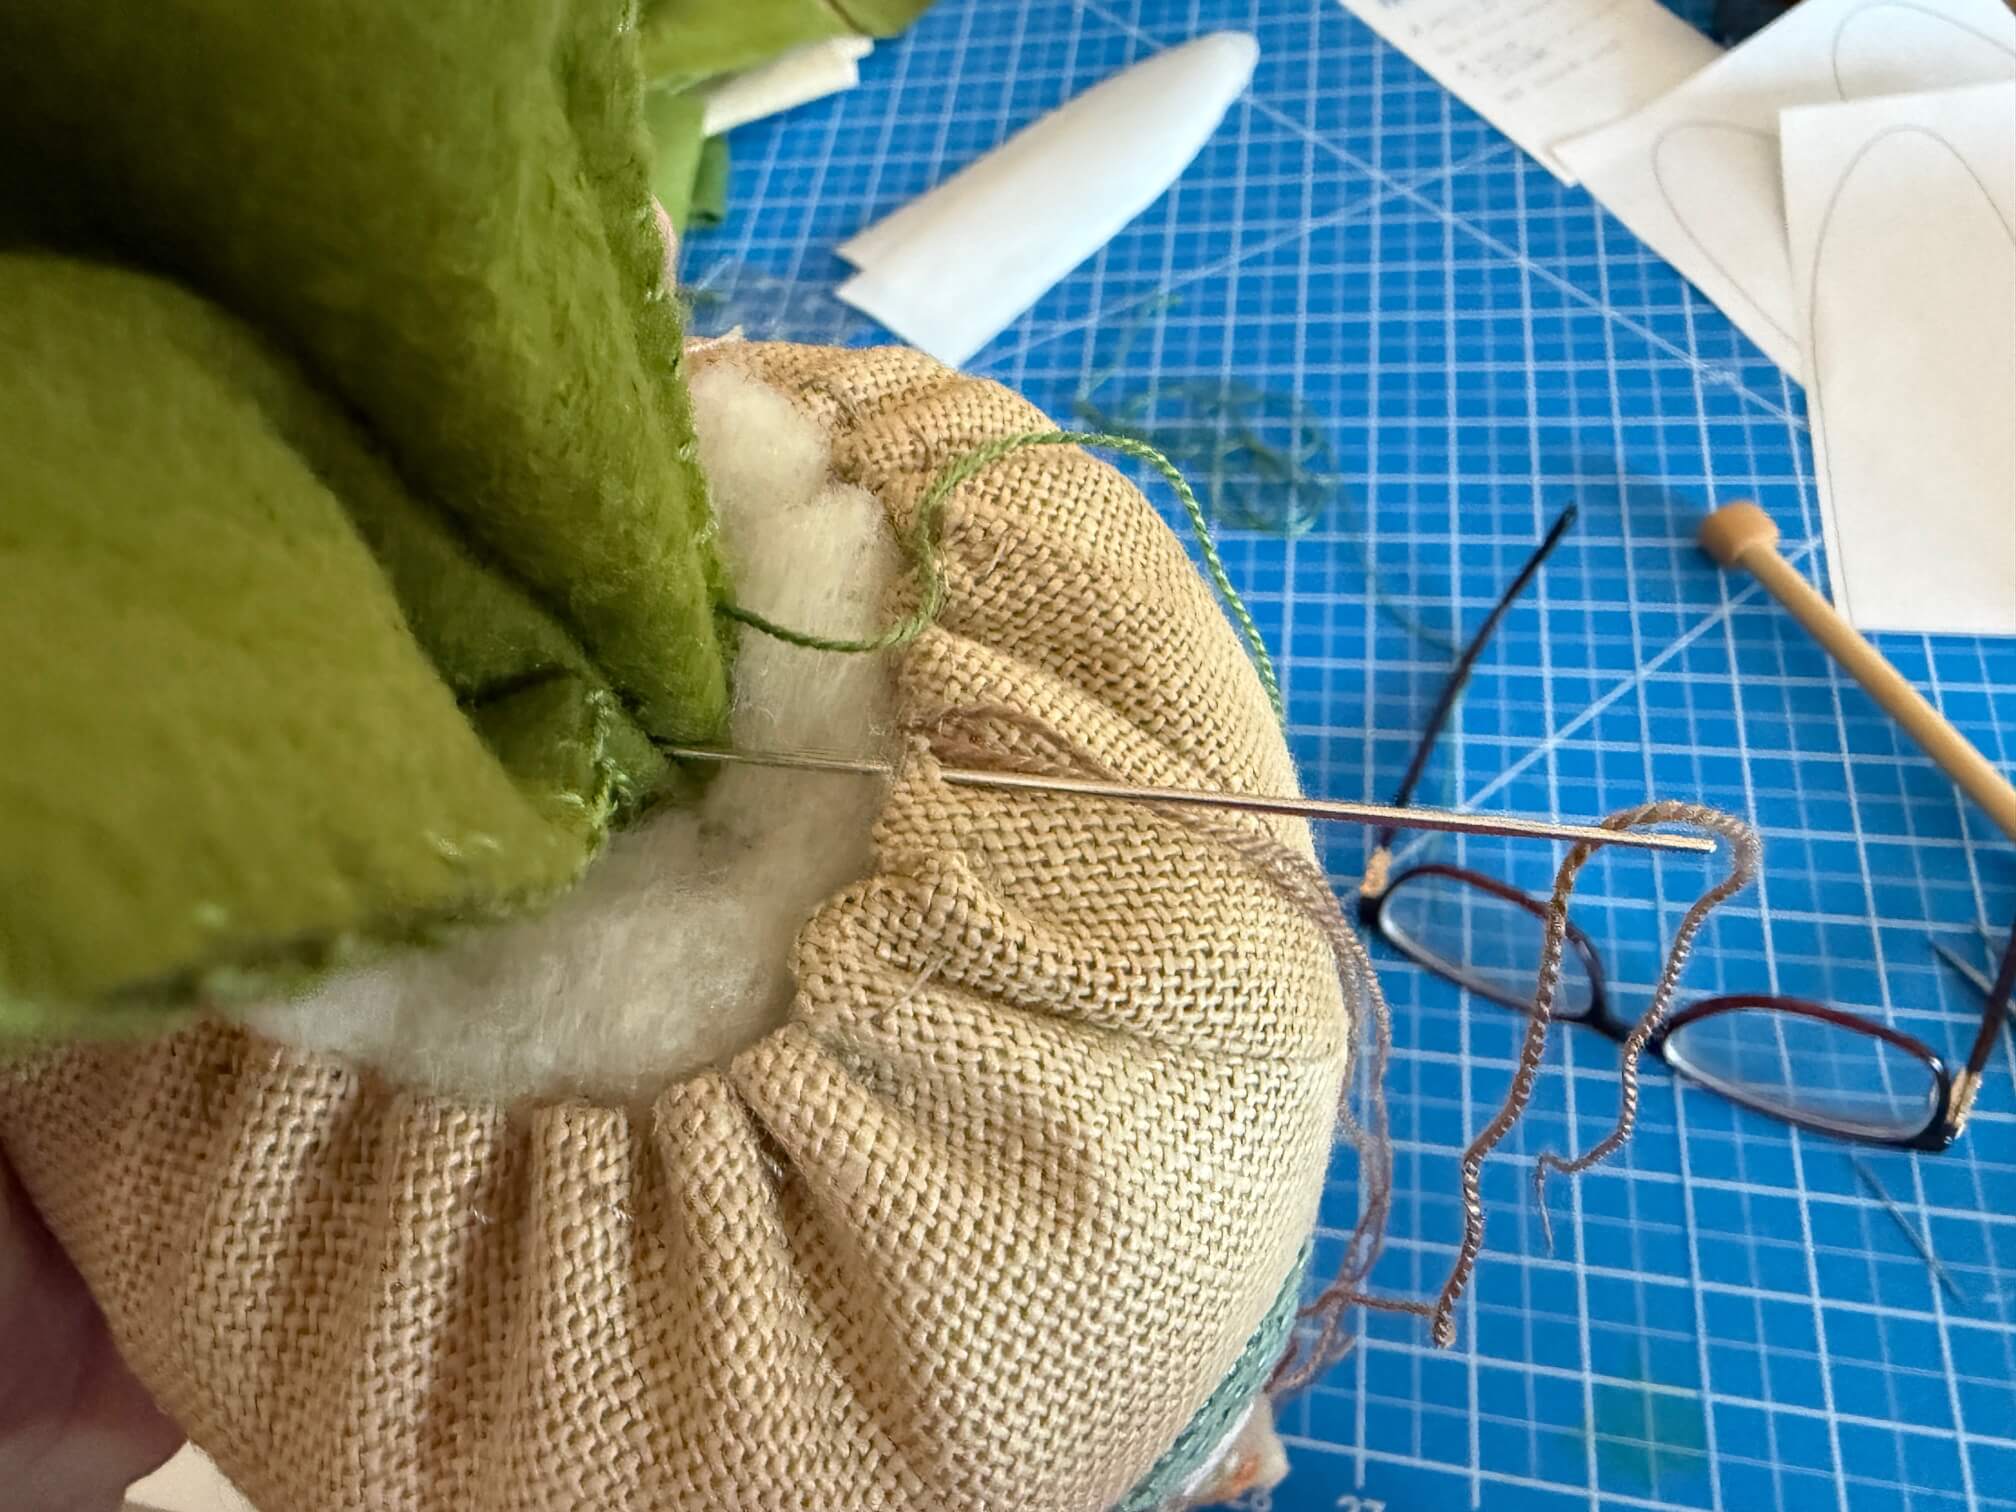
Cinch the carrot top as tight as possible to gather around the leaves. Run the needle through the base of the leaves to secure. Pull on the thread to gather the linen. Keep doing this – run through the leaves &
pull the carrot top together until leaves are secure & the top is closed.
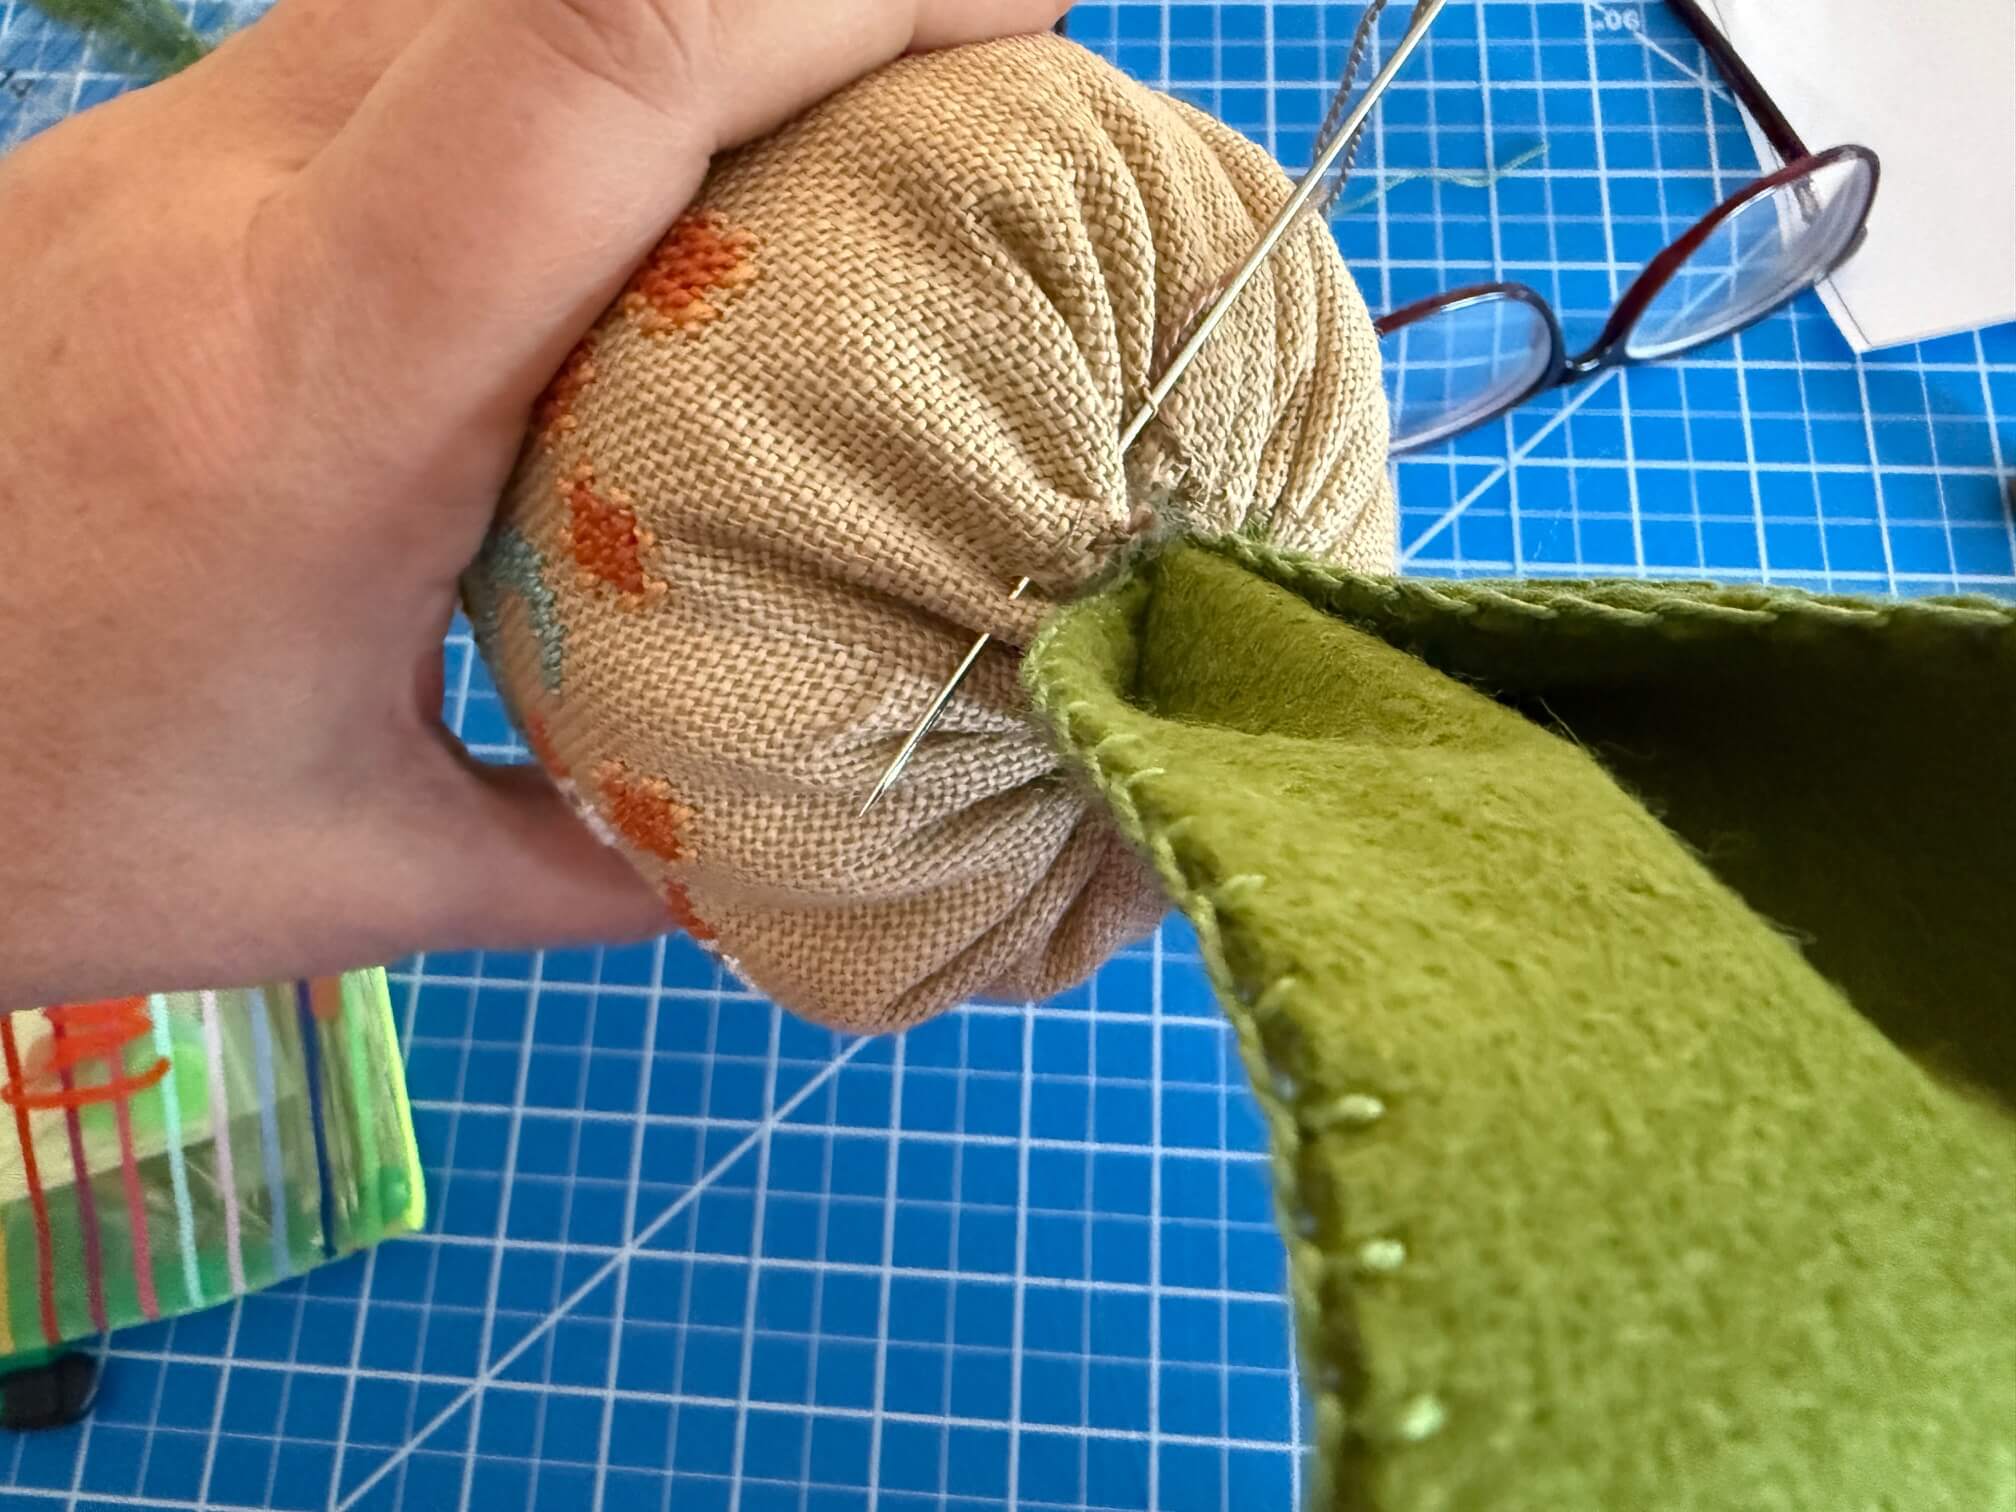
You may even need to baste around the top of the carrot again.
SEE ADDITIONAL PHOTOS BELOW AFTER THIS STEP
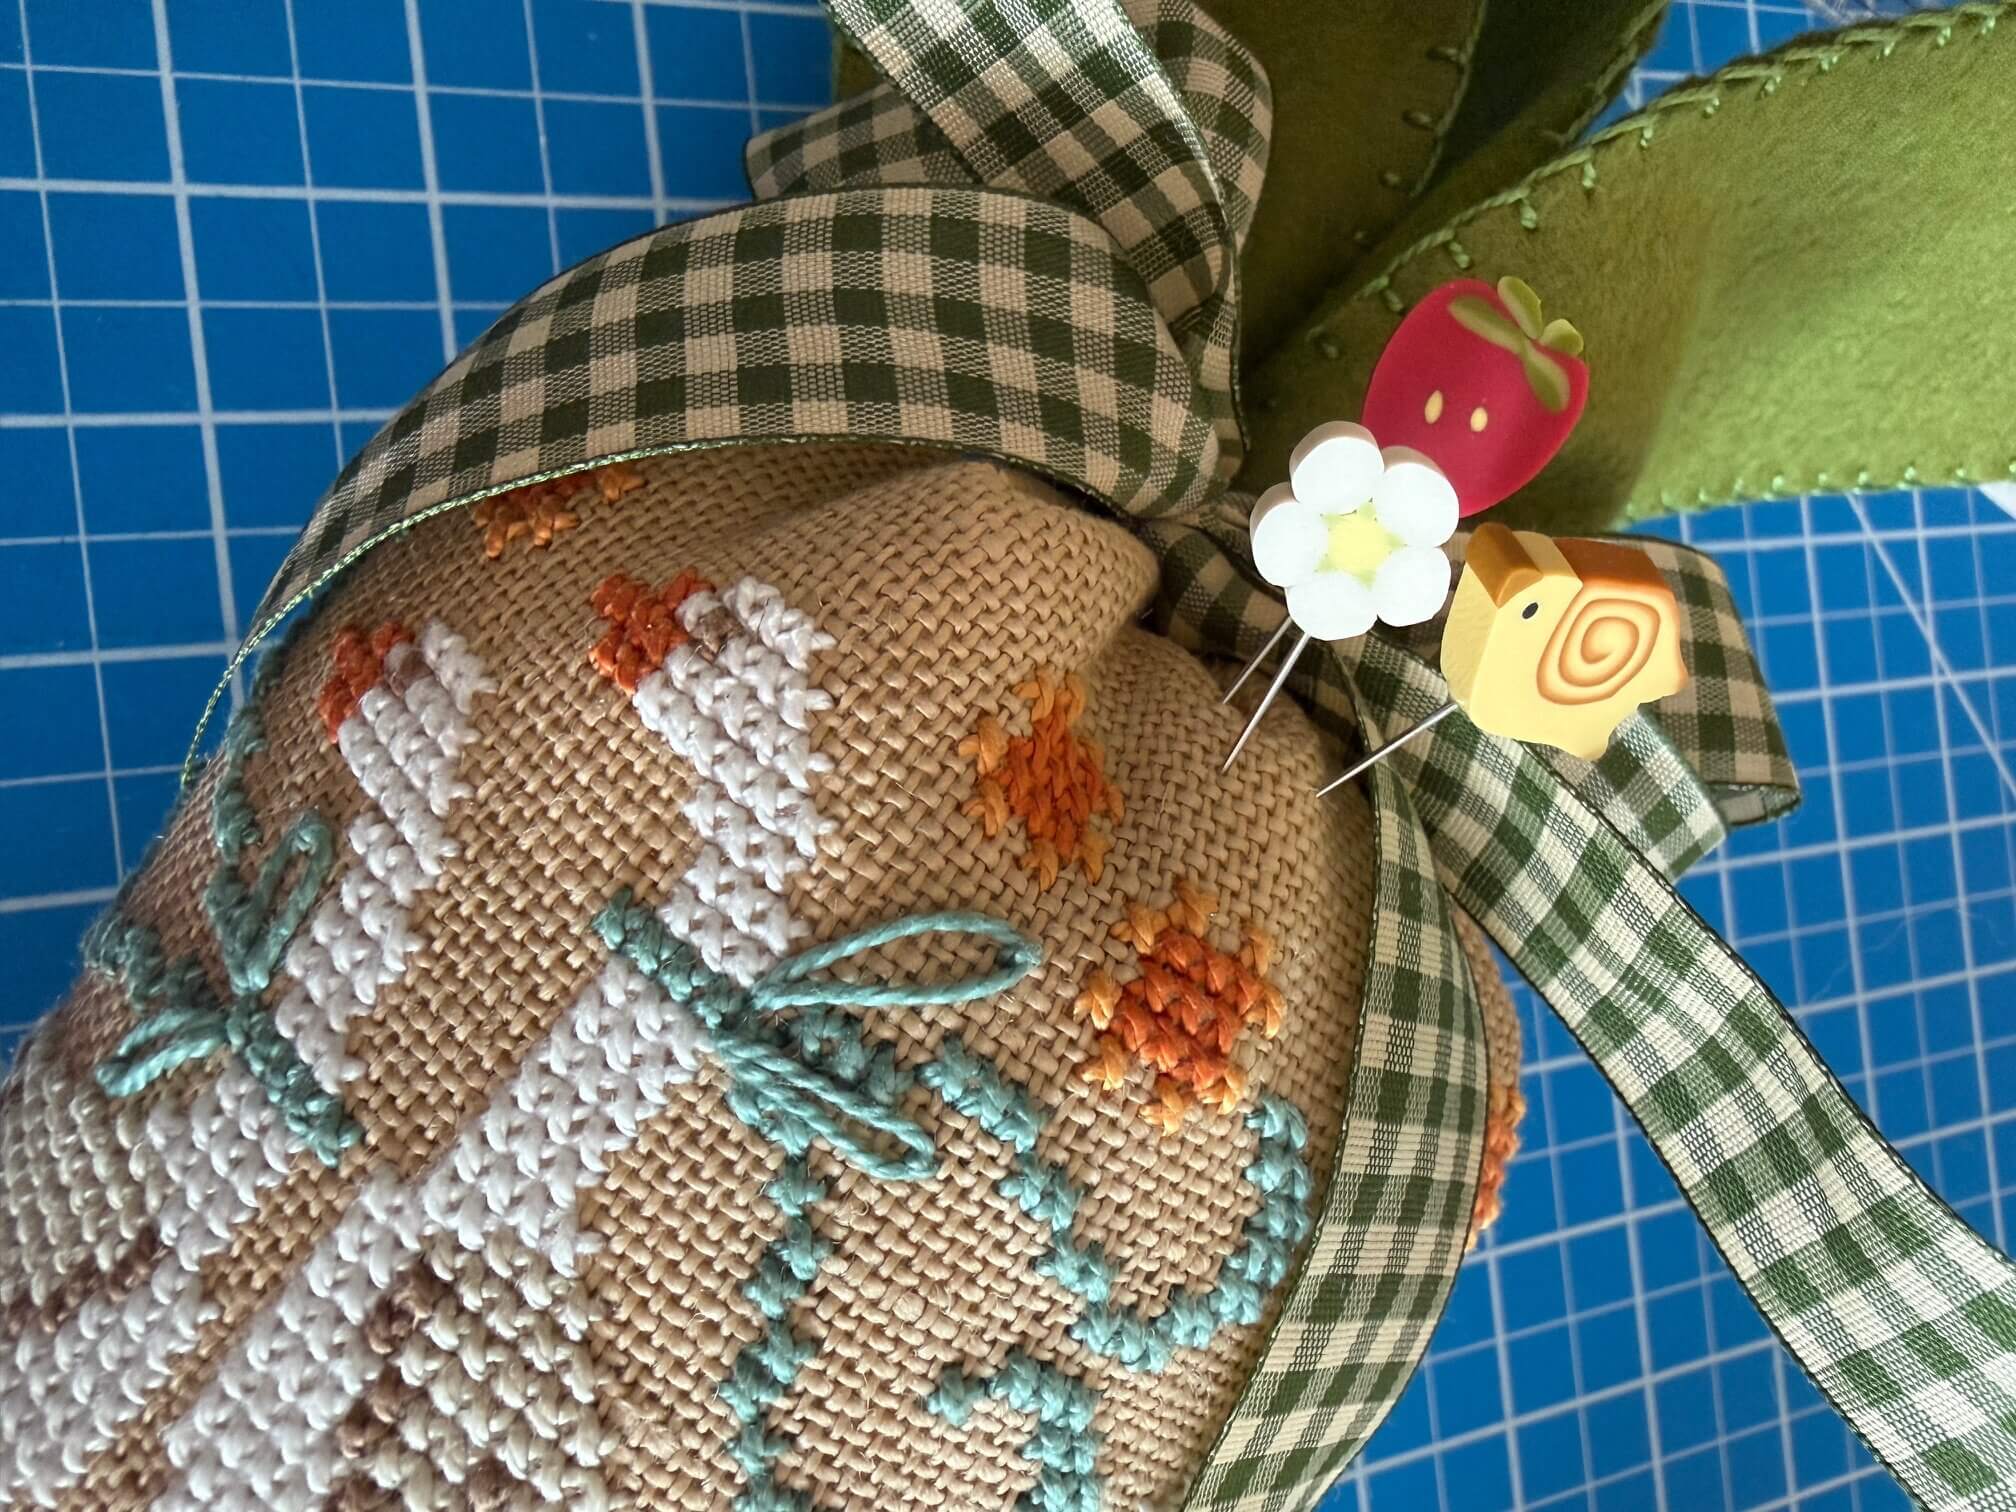
Tie a bow around the base (remove any basting threads if they are showing) – insert the coordinating Just Another Button Company Pin-Mini & you are all done!!
Leaf template: Print here! 🐇
Happy finishing – now go catch your loose goose! – Cathy, Hands On Design
I realized that I left a step out after I initially published this! I added some giant X’s along the seam in the carrot. I used the deeper orange pearl cotton for the larger carrot & the neutral brown floss for the smaller orange carrot. Follow the directions in the finish walk for the strawberry (a few posts ago). This time instead of spacing them out, I connected them almost like it has a corset!! Choose whichever style you prefer!


Leave a Reply