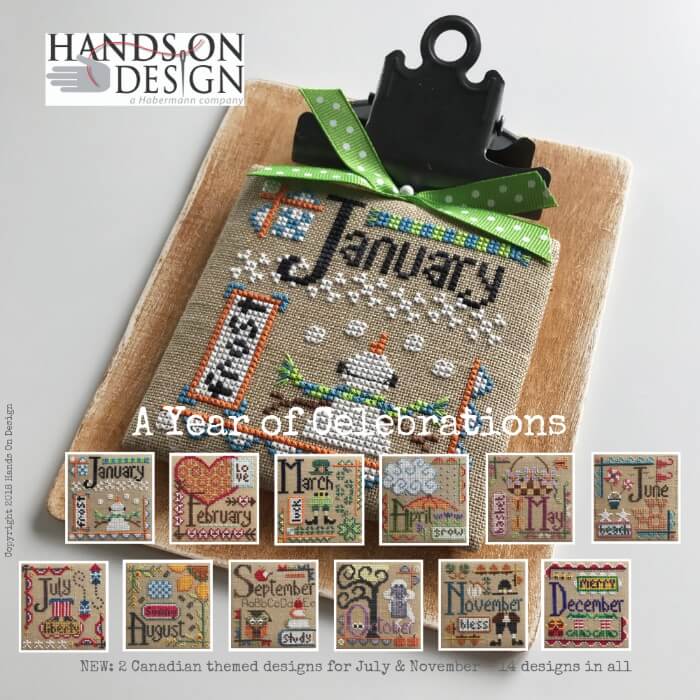
Welcome to A Year of Celebrations Finishing Tutorial
Click here for a printable version!
You will need the following supplies:
12 stitched pieces (pressed)
Plywood rectangle (mine are 5” x 6”- Woodpile Fun brand purchased at Hobby Lobby –come 6 to a pack)
Tim Holtz Clipboard Clips—these come 2 to a pack & measure 3” at the widest part of the clip
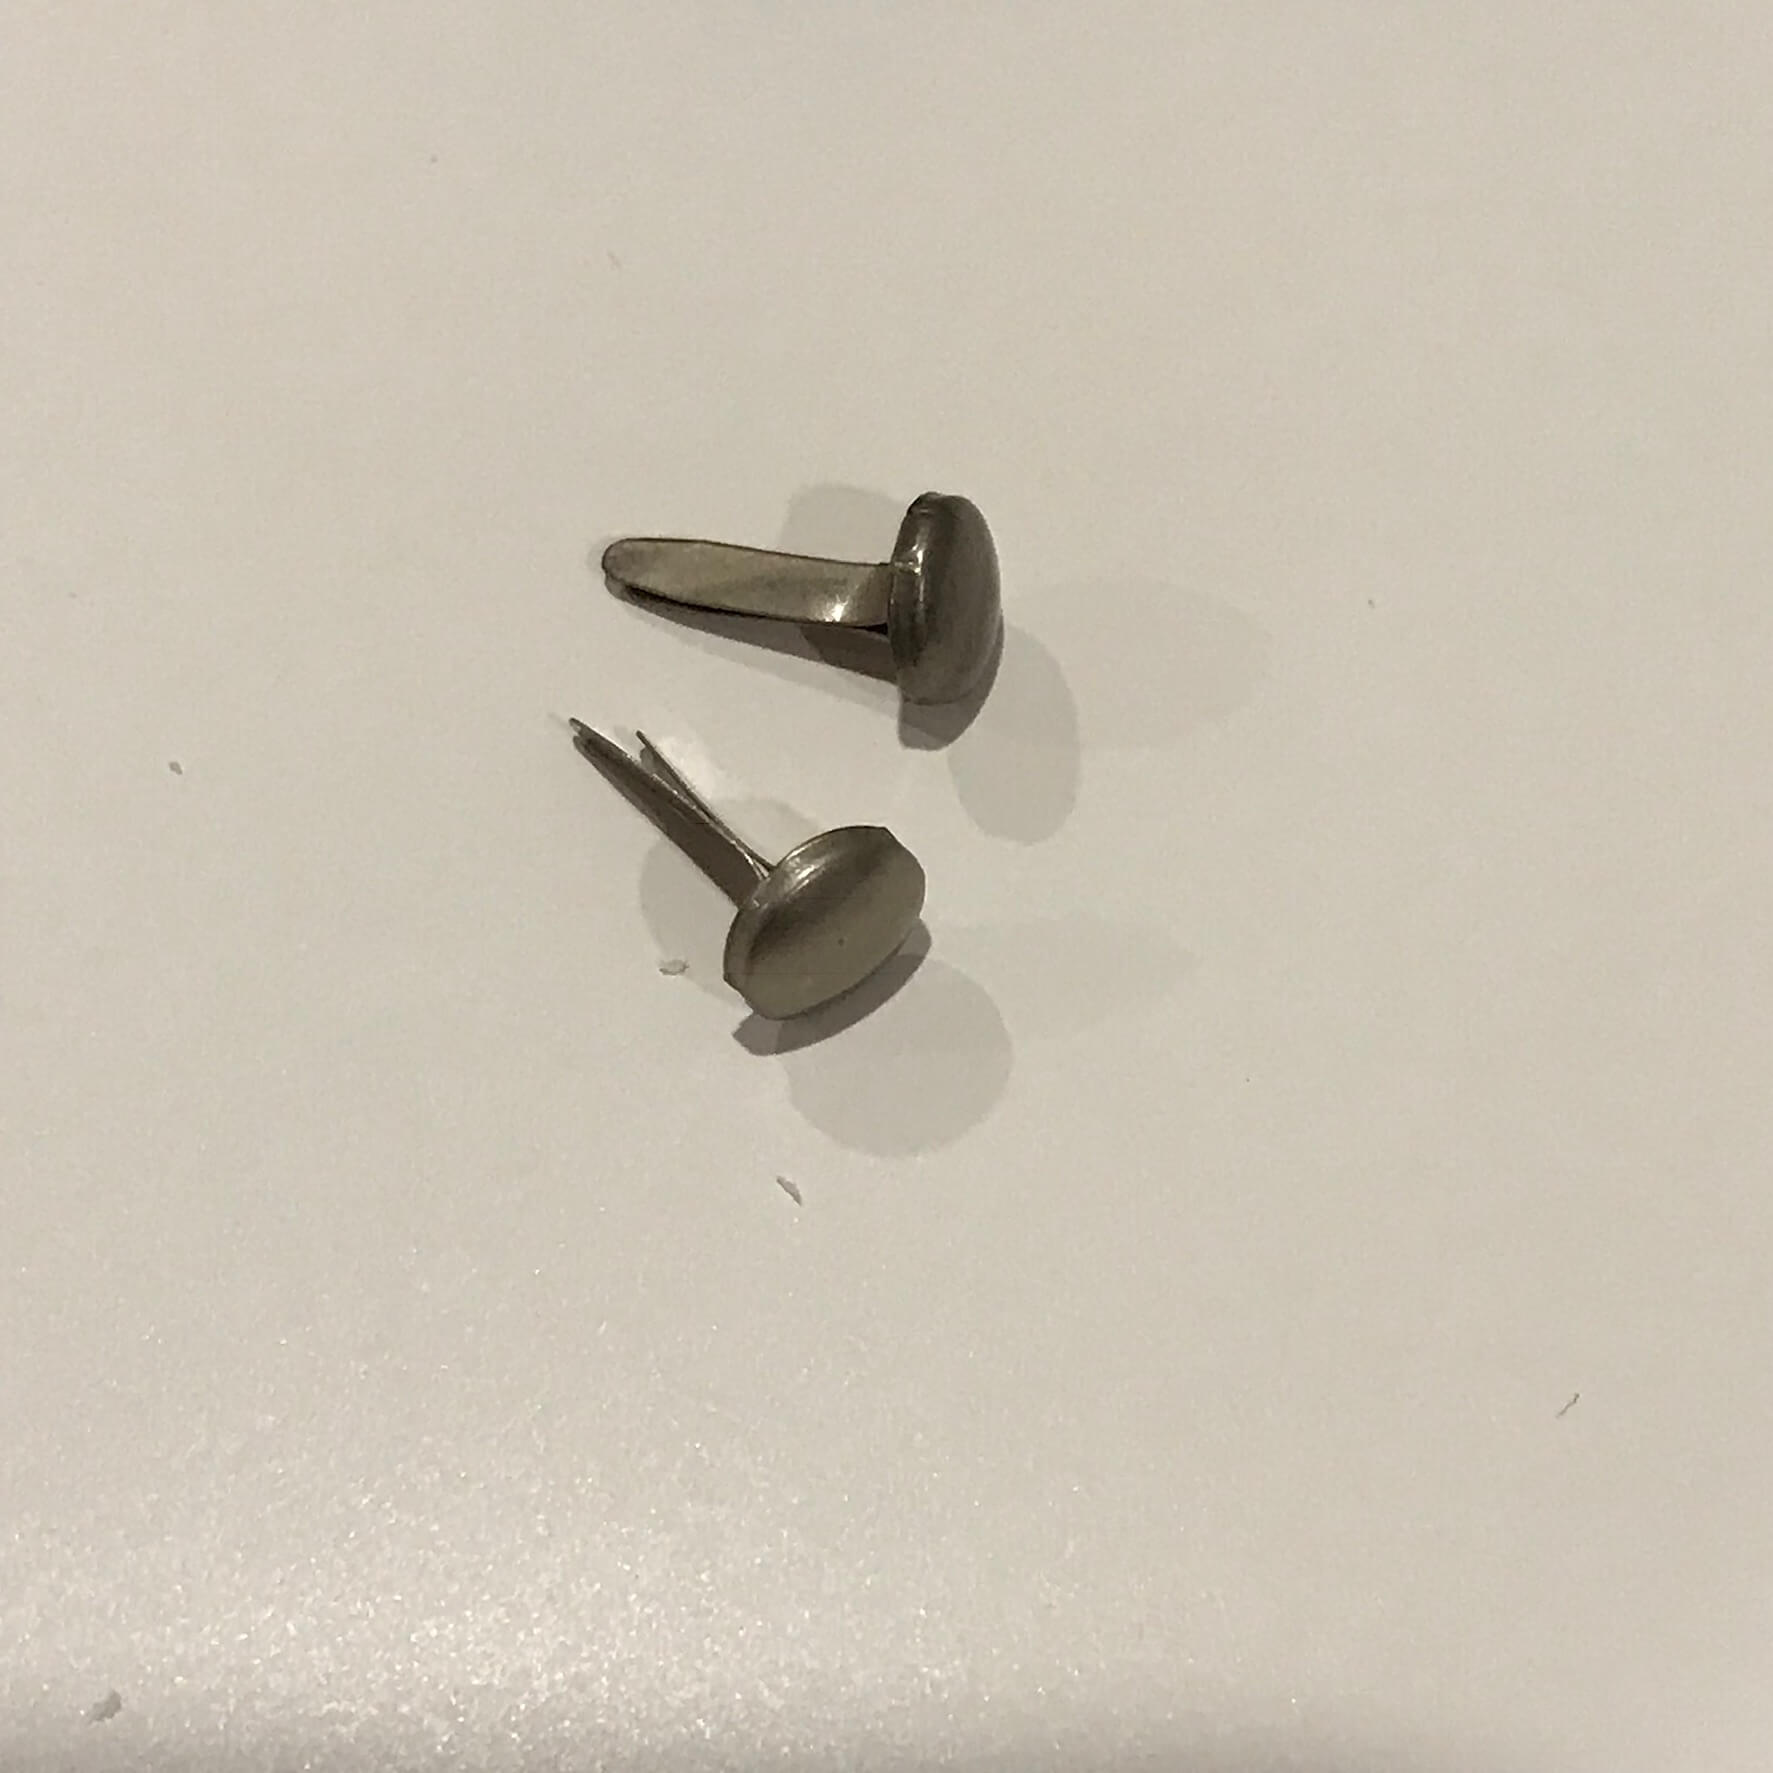
Brads from scrapbooking section—approx. 3/8”-1/2” long
Craft paint—I used Warm White. Crème Wax—Golden Brown. Foam brushes, sanding block, paper towels, paper plates, E6000, ribbons & straight pins, woolfelt, double sided acid free tape.
Have fun with your finishing!
1. Flat finish your 12 stitched pieces (refer to Flat Finishing Tutorials on this website.
– My matboard was cut 3 5/8” squared for a piece stitched on 16/32ct.
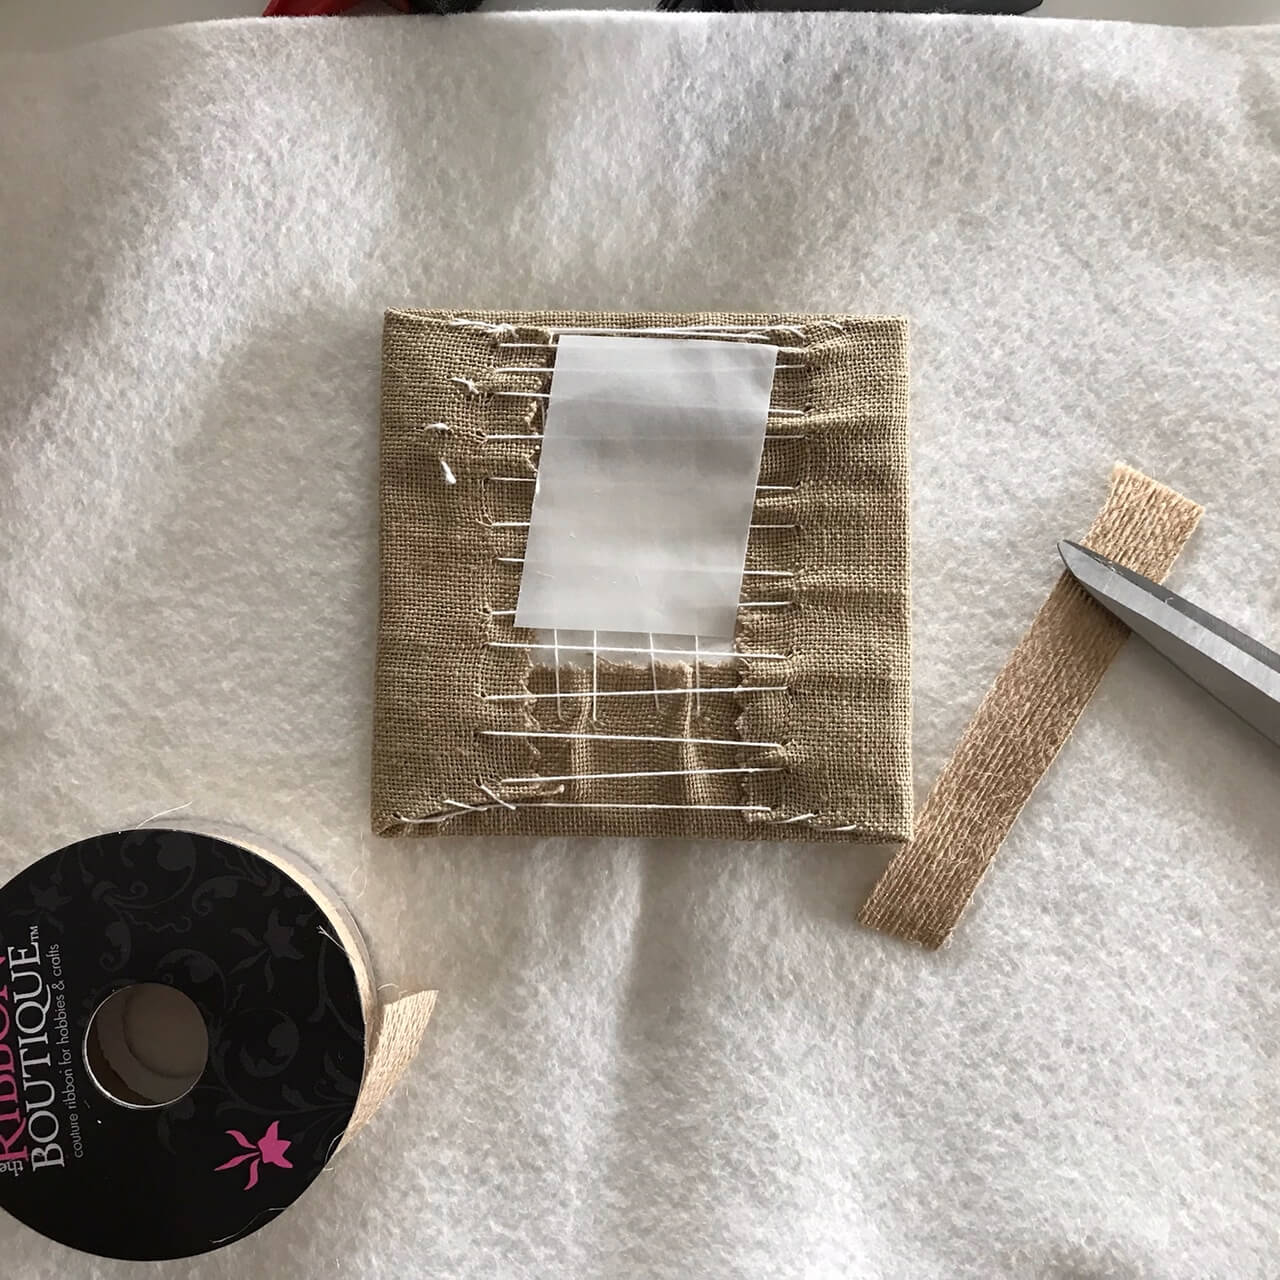
– Place a small piece of double sided acid-free tape (DS tape) on the top center back of each month. Remove backing paper.
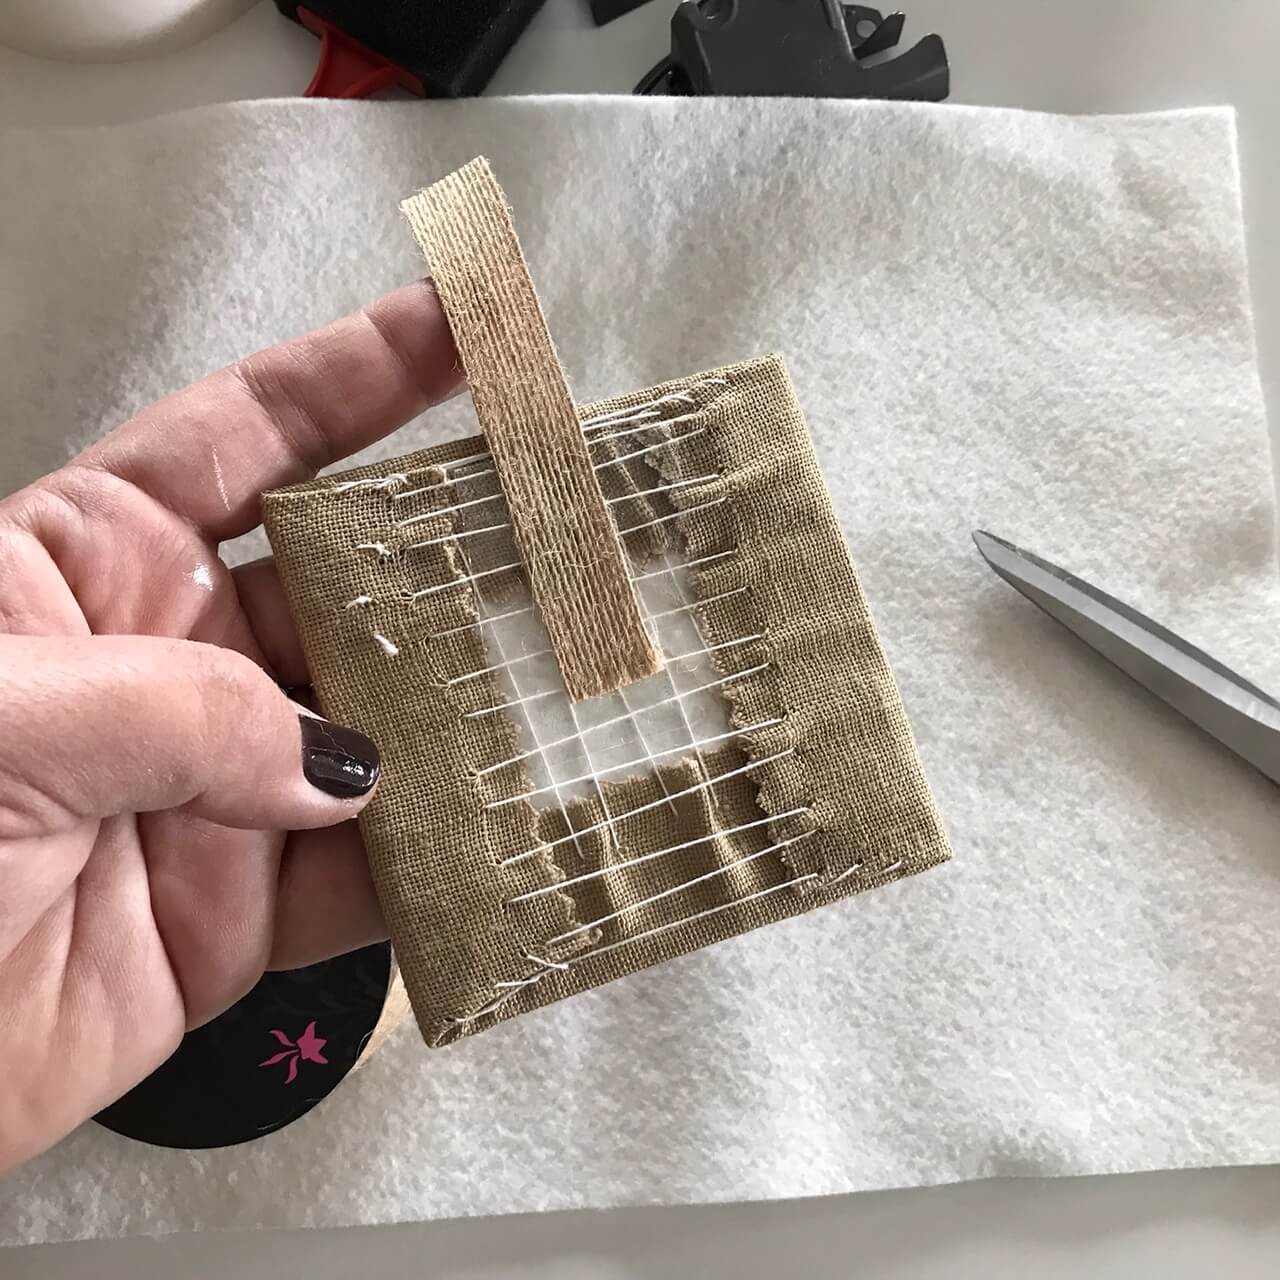
– Cut a piece of ribbon 3-4” (I used a burlap ribbon to match my Dirty linen) and place into sticky DS tape.
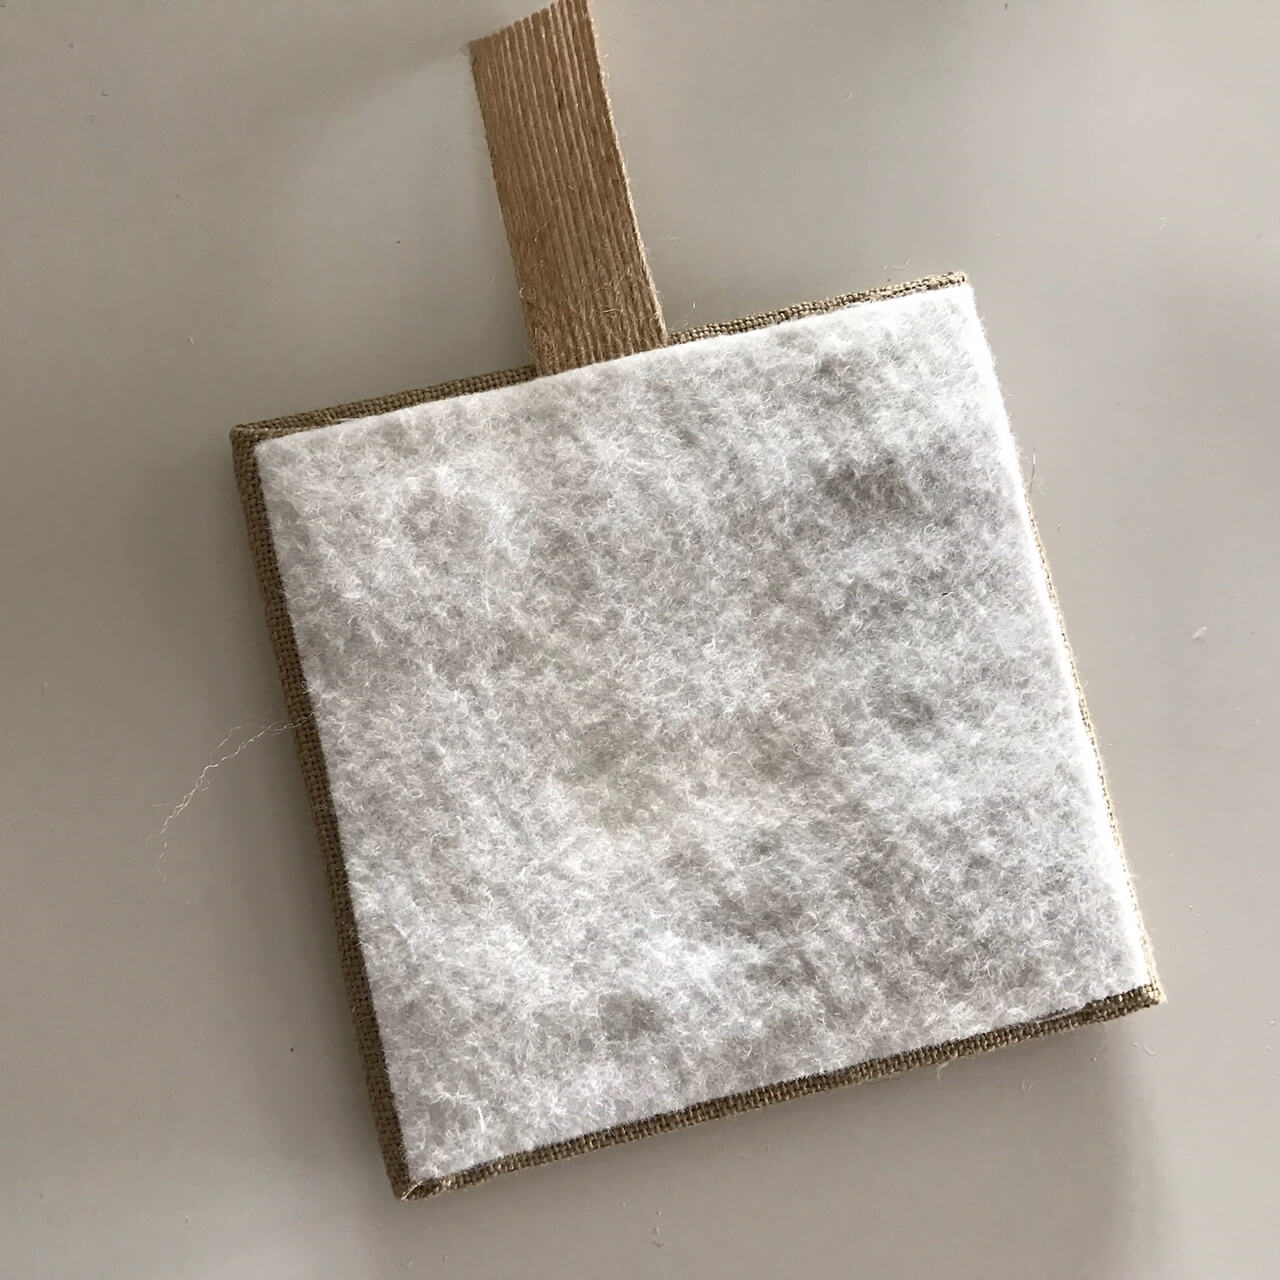
– Cut a piece of woolfelt (I used white woolfelt) to fit the back of your finished square. Attach with DS tape (you may also wish to use craft glue or a sticky back felt). Repeat these steps for all 12 months.
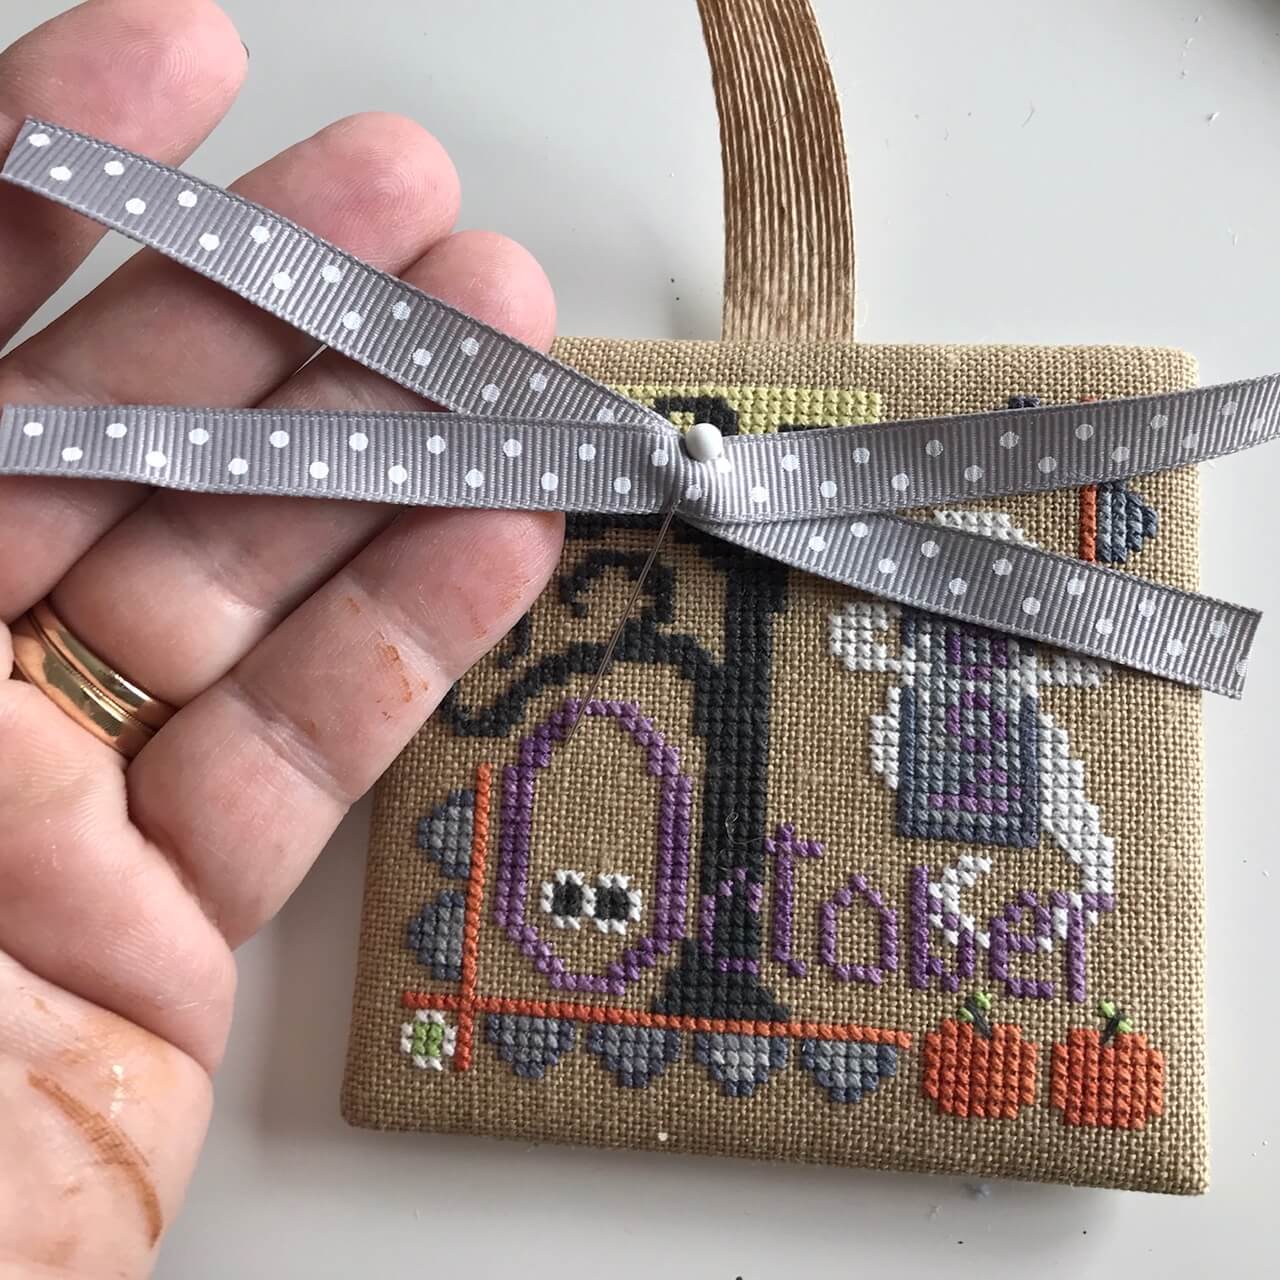 – Cut 2 lengths of coordinating ribbon. I put mine slightly askew and ran a straight pin in & out at the center point. Place your pin into the top edge of the matboard at the center point of the burlap ’handle’. Trim as desired.
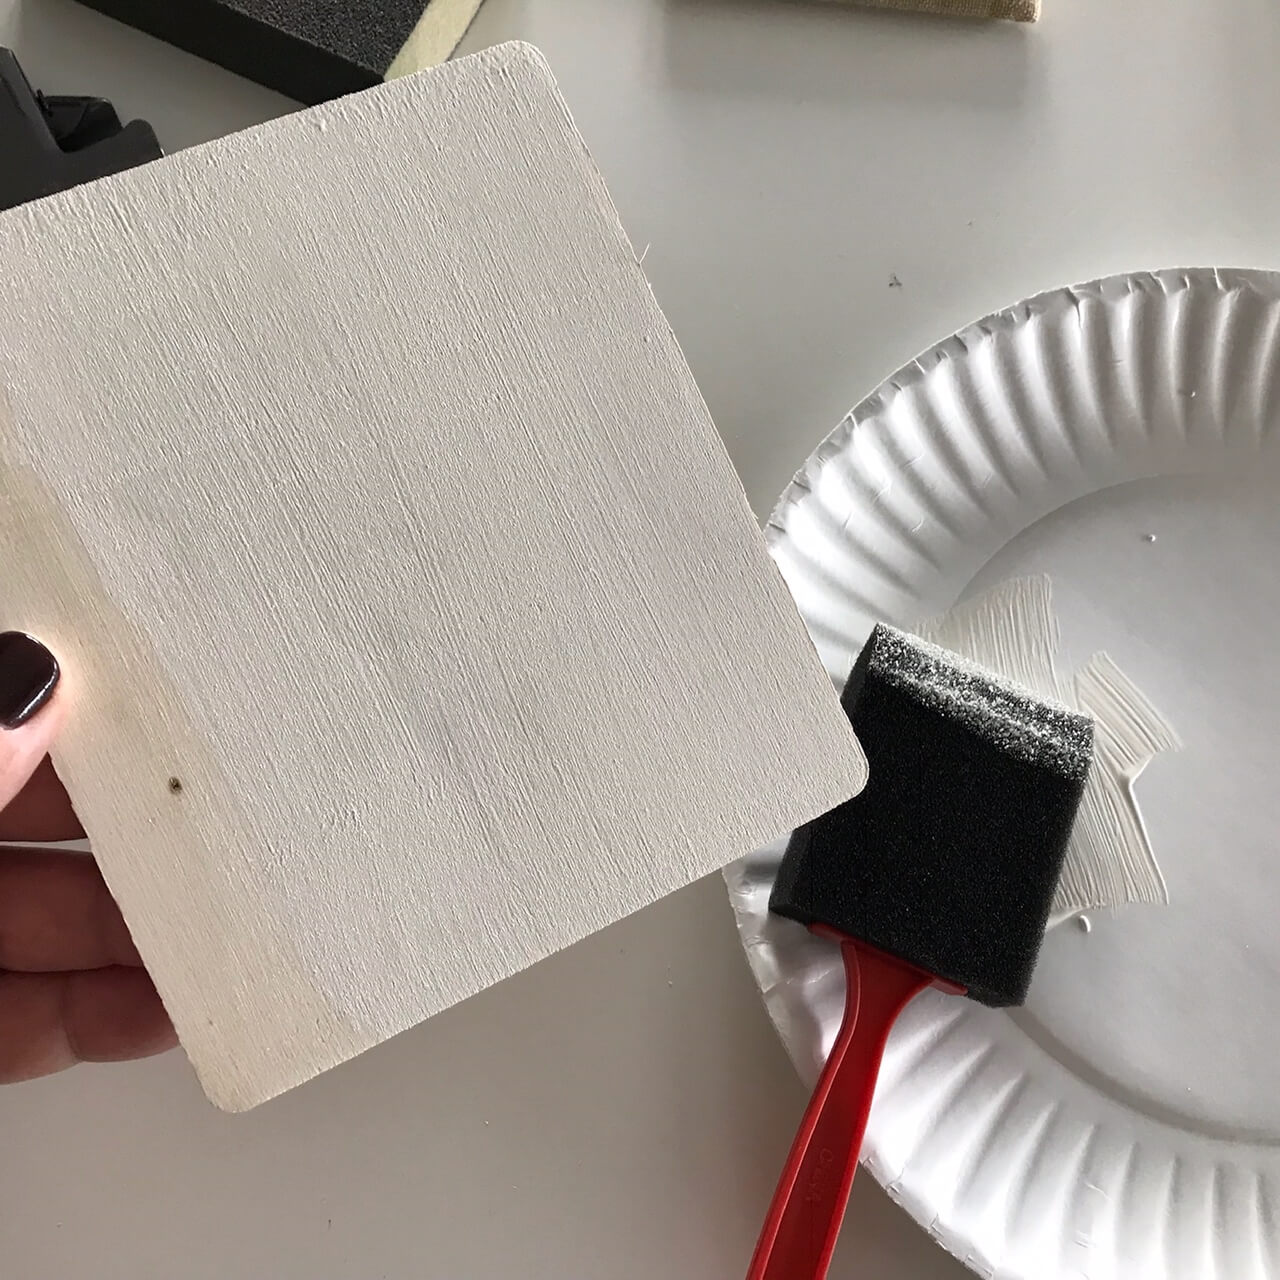
2. Painting
– Squirt a small amount of craft paint onto a paper plate. Use a foam brush to lightly paint both sides & edges of your board. Let dry.
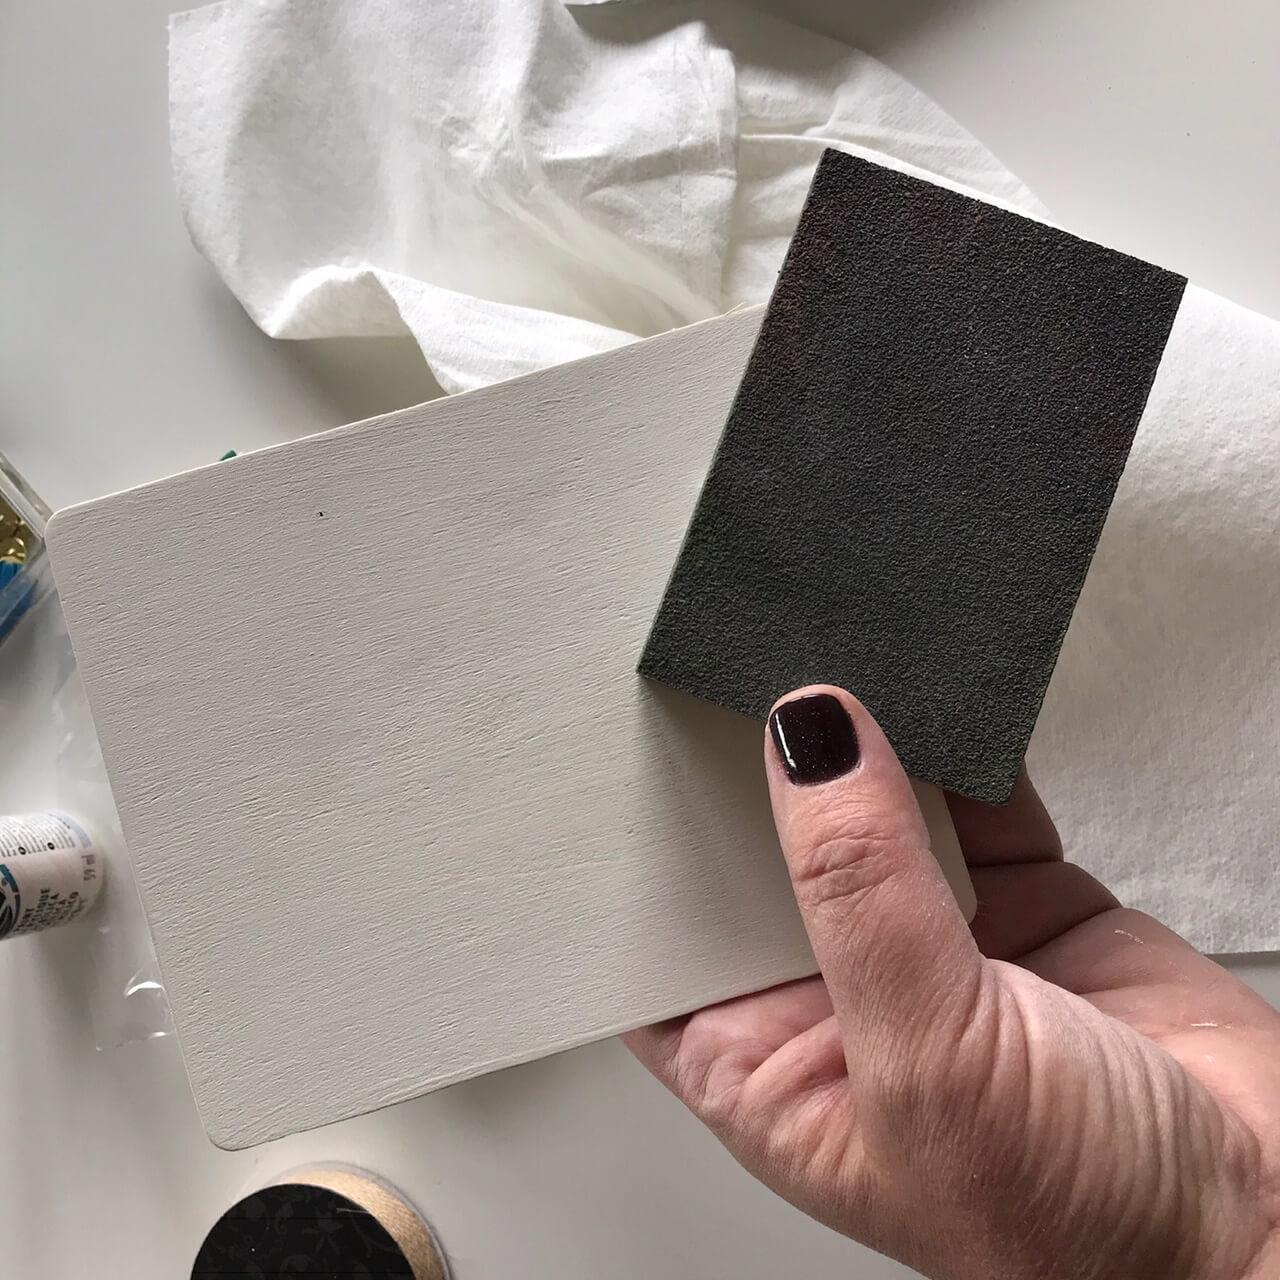
– It should take 10-15 minutes for the light coat of paint to dry enough for a light sanding.
– Repeat with a 2nd light coat of craft paint.
– Once dry, sand the entire board once again giving the corners a little more attention for an ’aged’ look.
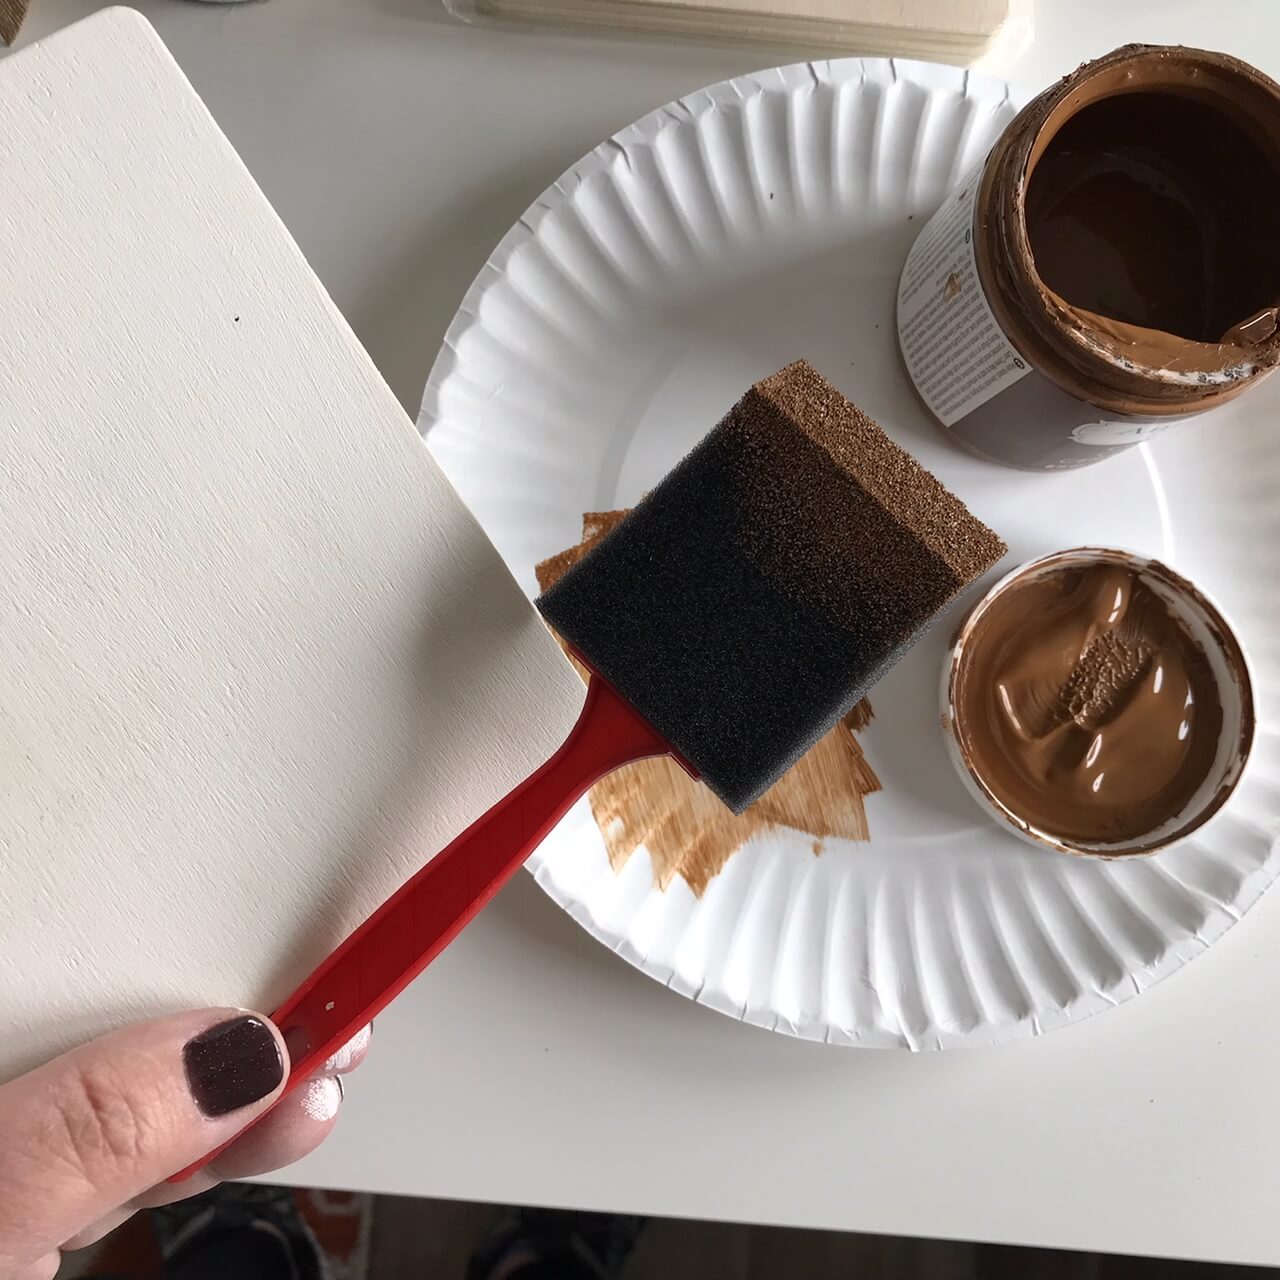
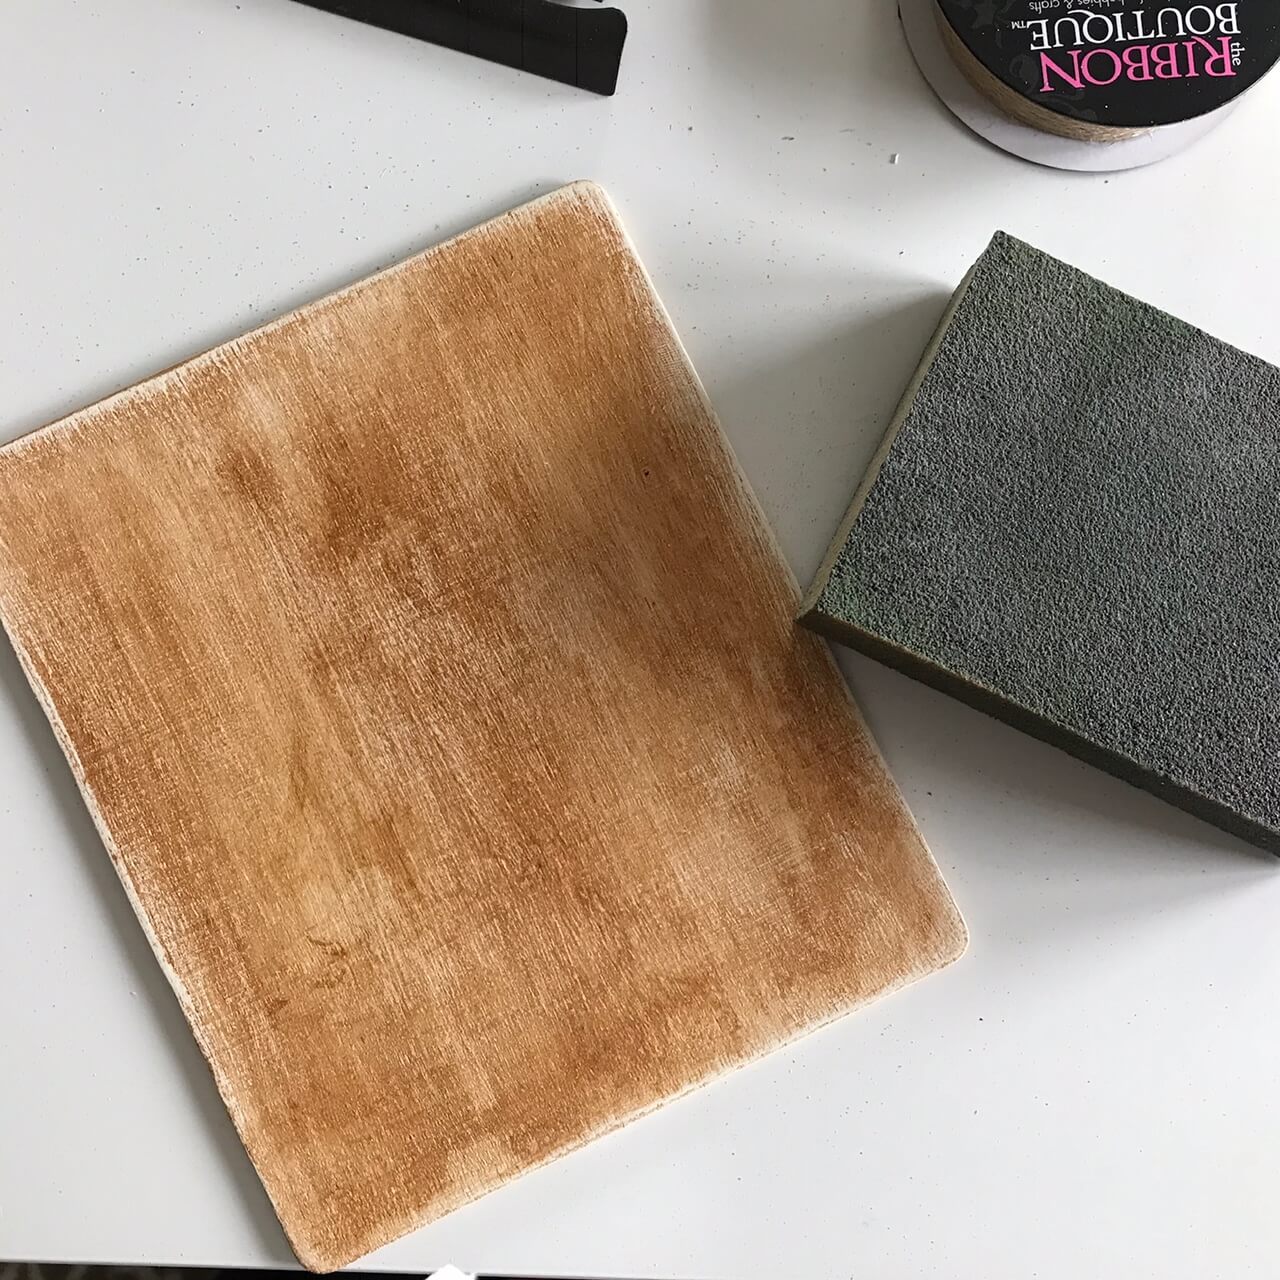
3. Staining
– Place a small amount of the Crème Wax on another paper plate.
– Dip a new foam brush into the thick paint-like texture & dab the foam brush onto the paper plate to remove excess. We want to dry brush the Crème Wax onto the board.
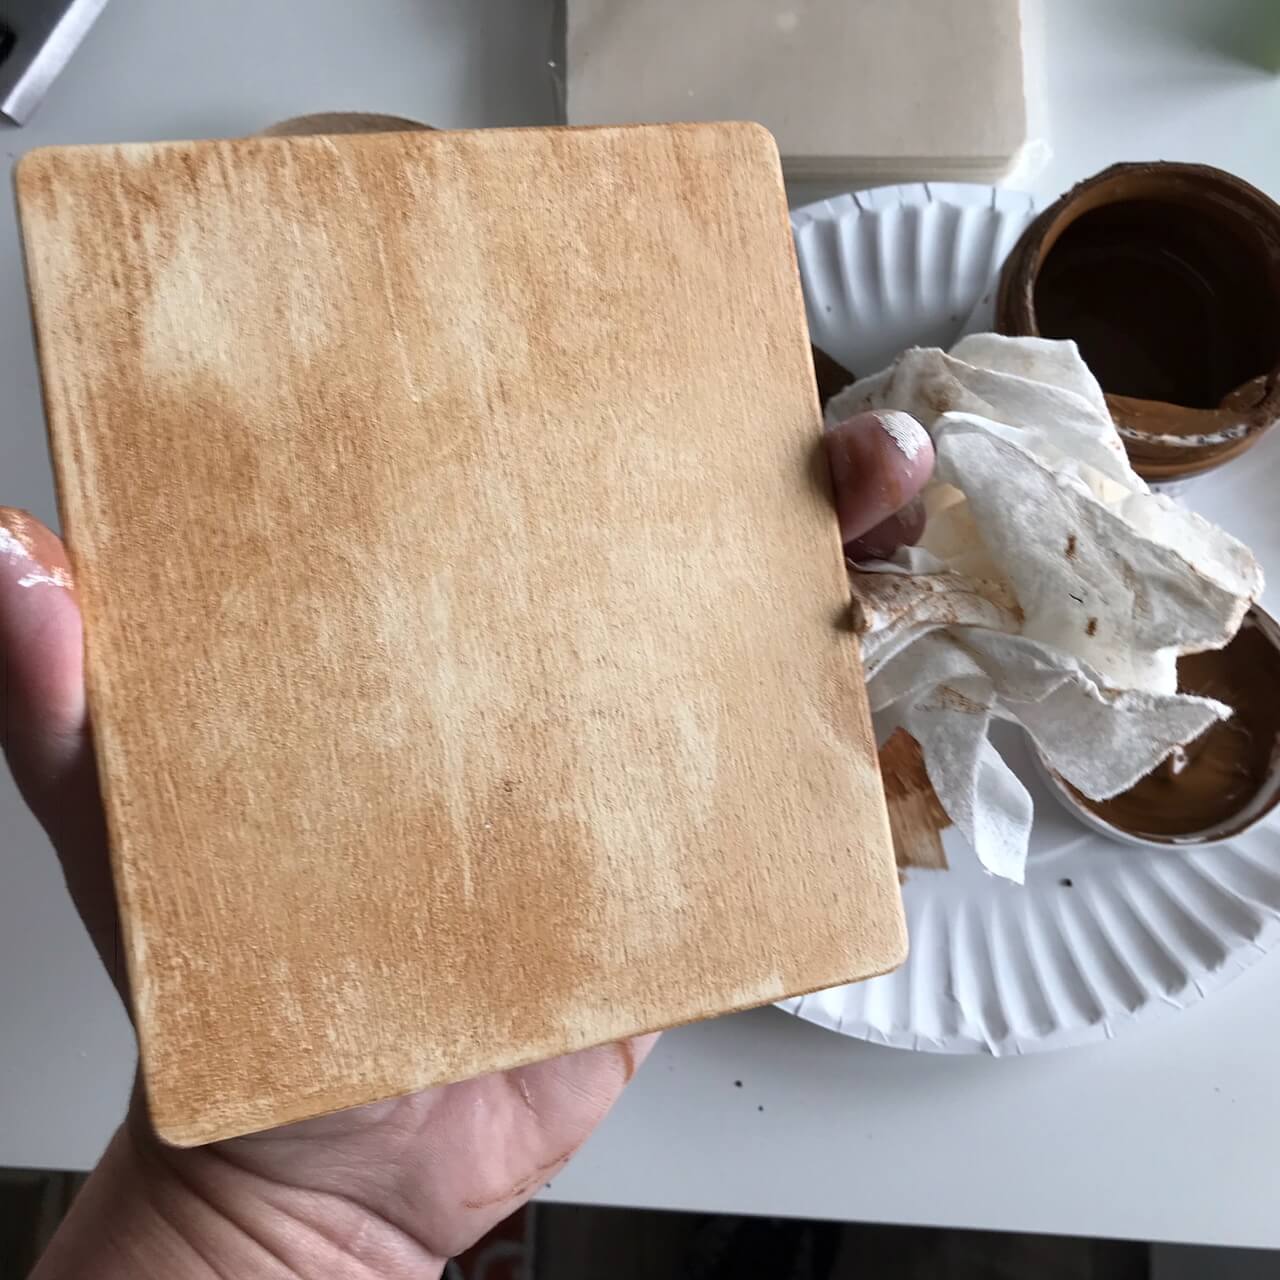
– Keep a paper towel handy as you brush the wax onto the board. Paint wax on & remove it as you se fit with the paper towel.
– Let your 1st light coat dry—I waited about 15 minutes. Repeat with a 2nd coat if desired. Let dry. Board is sealed.
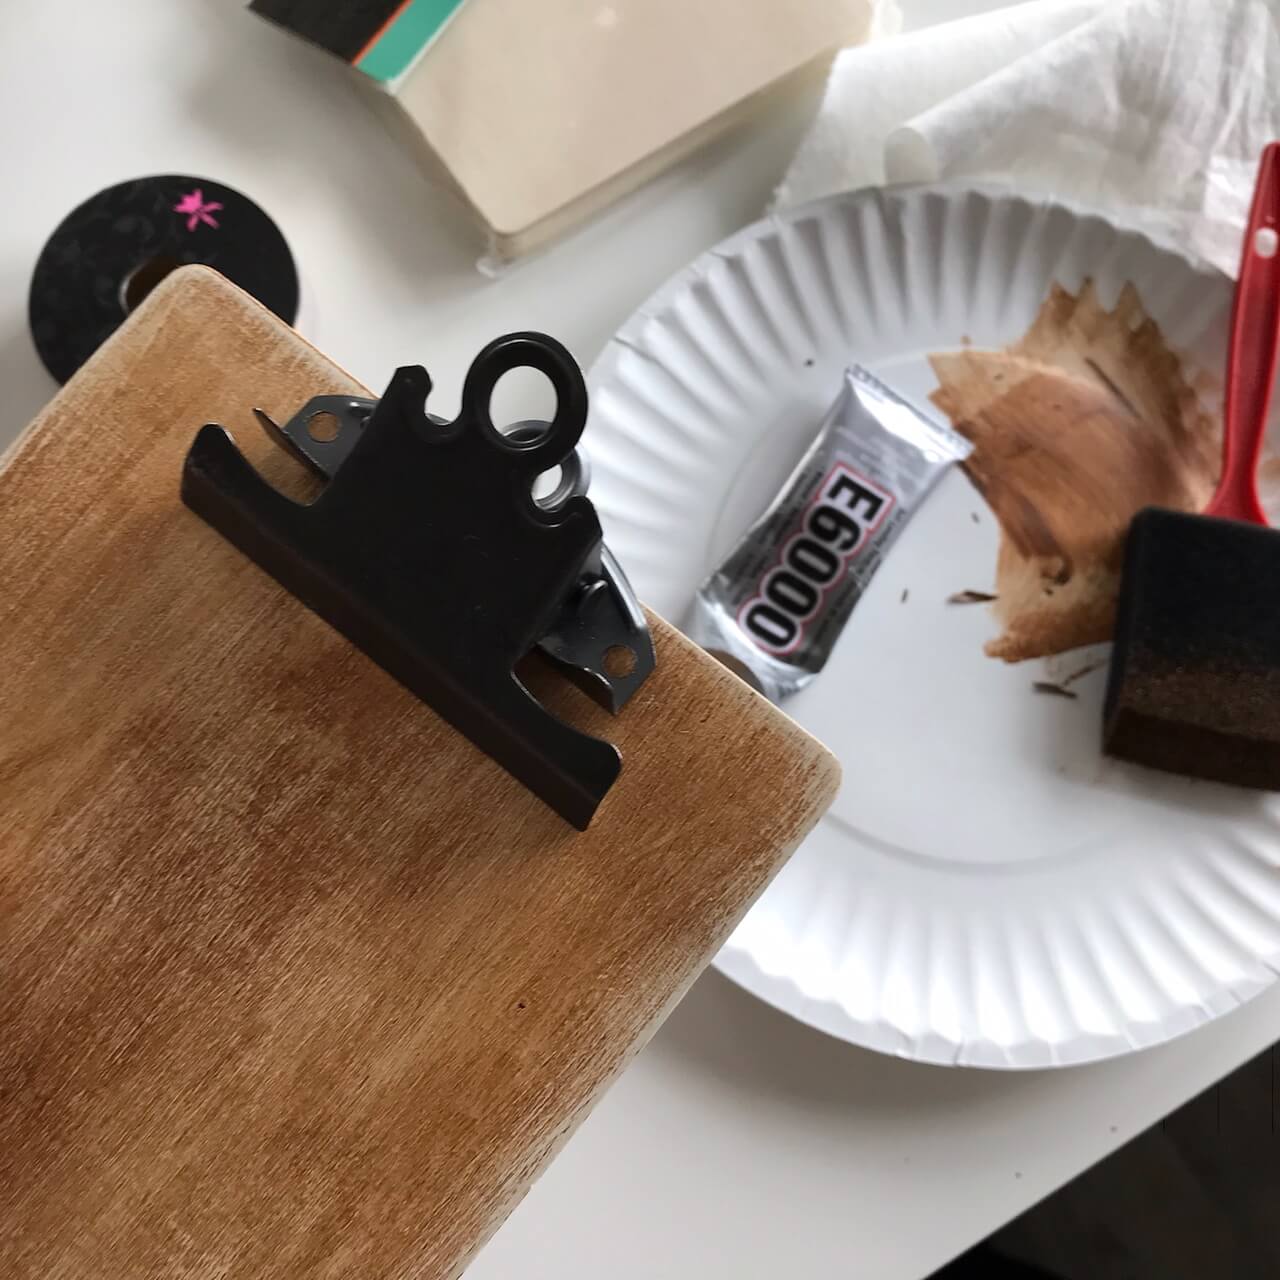
 4. Clipboard Assembly
– I glued my clipboard clip to the top of the stained board with a generous amount of E6000. If you are just using yours as décor—this may be enough to stay attached, however, I wanted to get an even more secure fit.
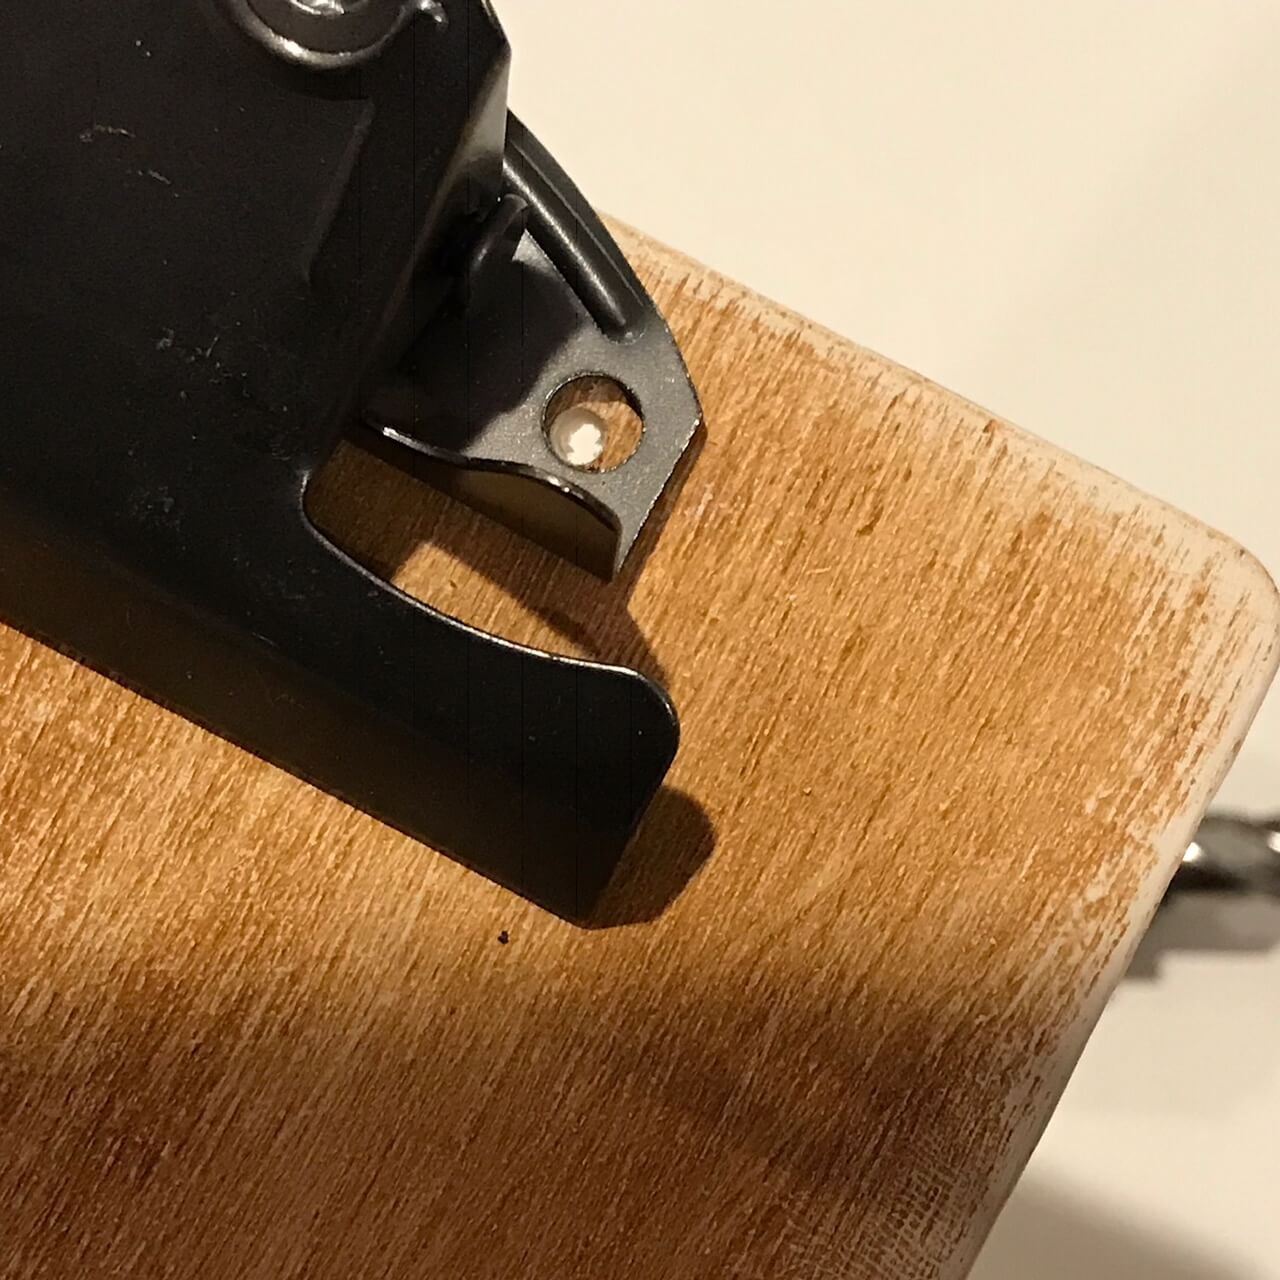
Drill a small hole through the board to match up to the holes in the clip. A hand held drill or even a hammer & an awl should go through the chip board easily. Open the hole up a bit with a knitting needle or pencil. This will help you fit the brads through the hole.

Clipboard Assembly cont.
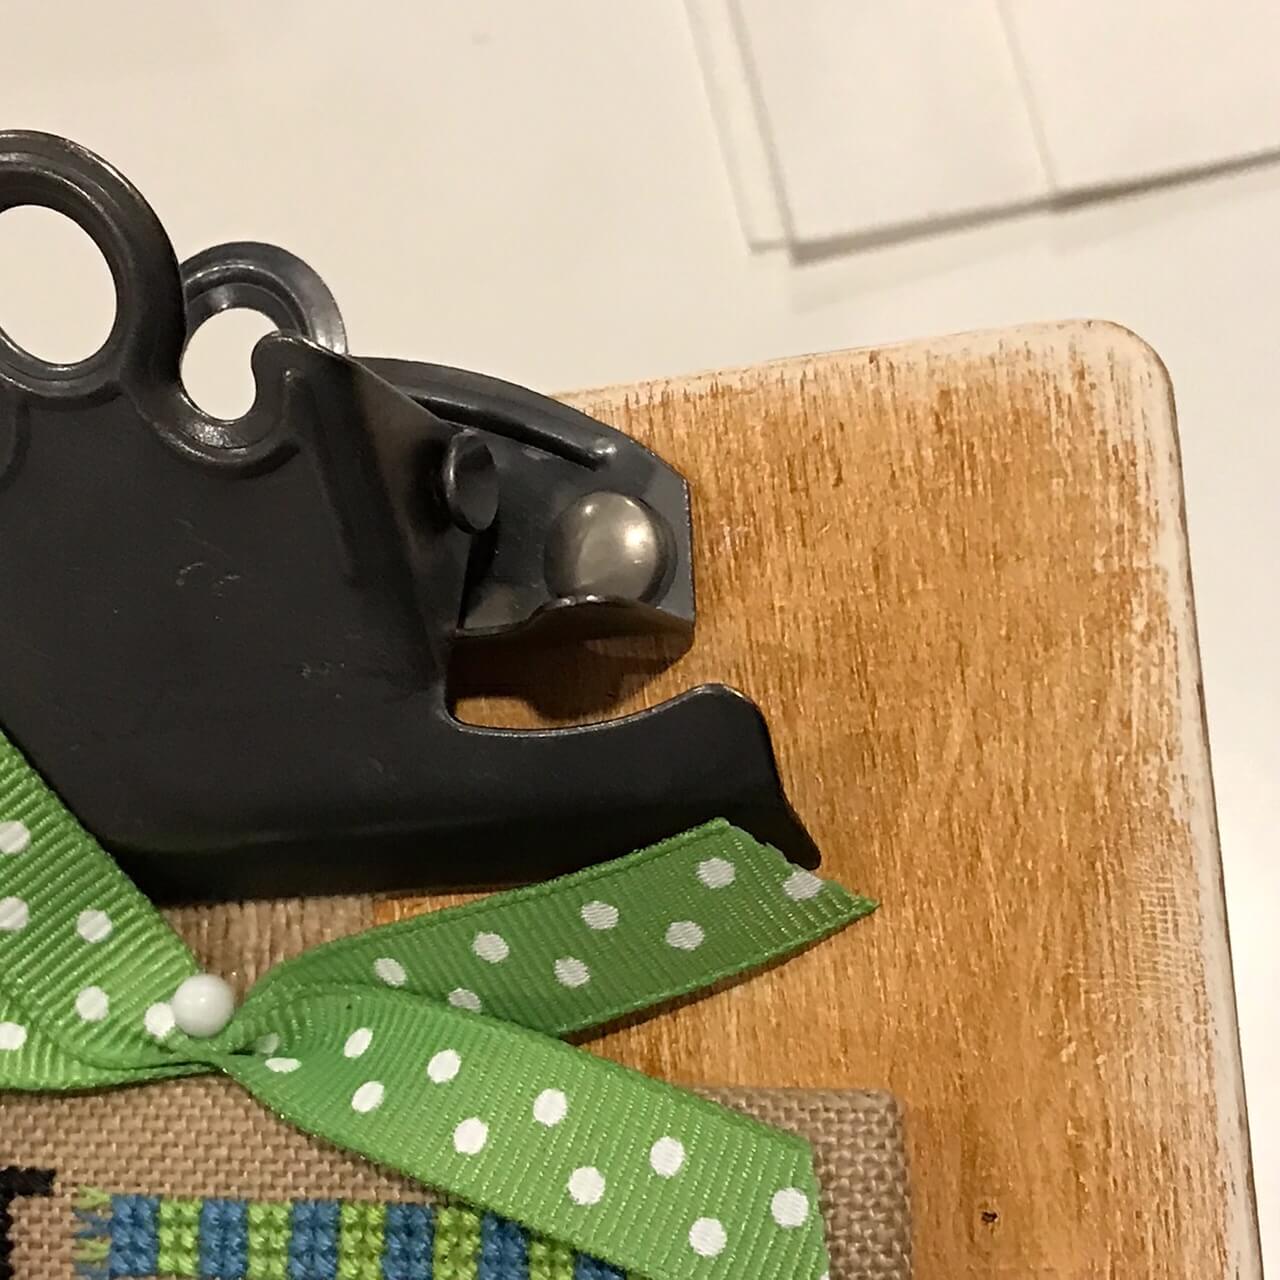
– Insert brad through the hole, front to back & open the tabs to secure.
– Close up photo shows what the brad will look like from the front.
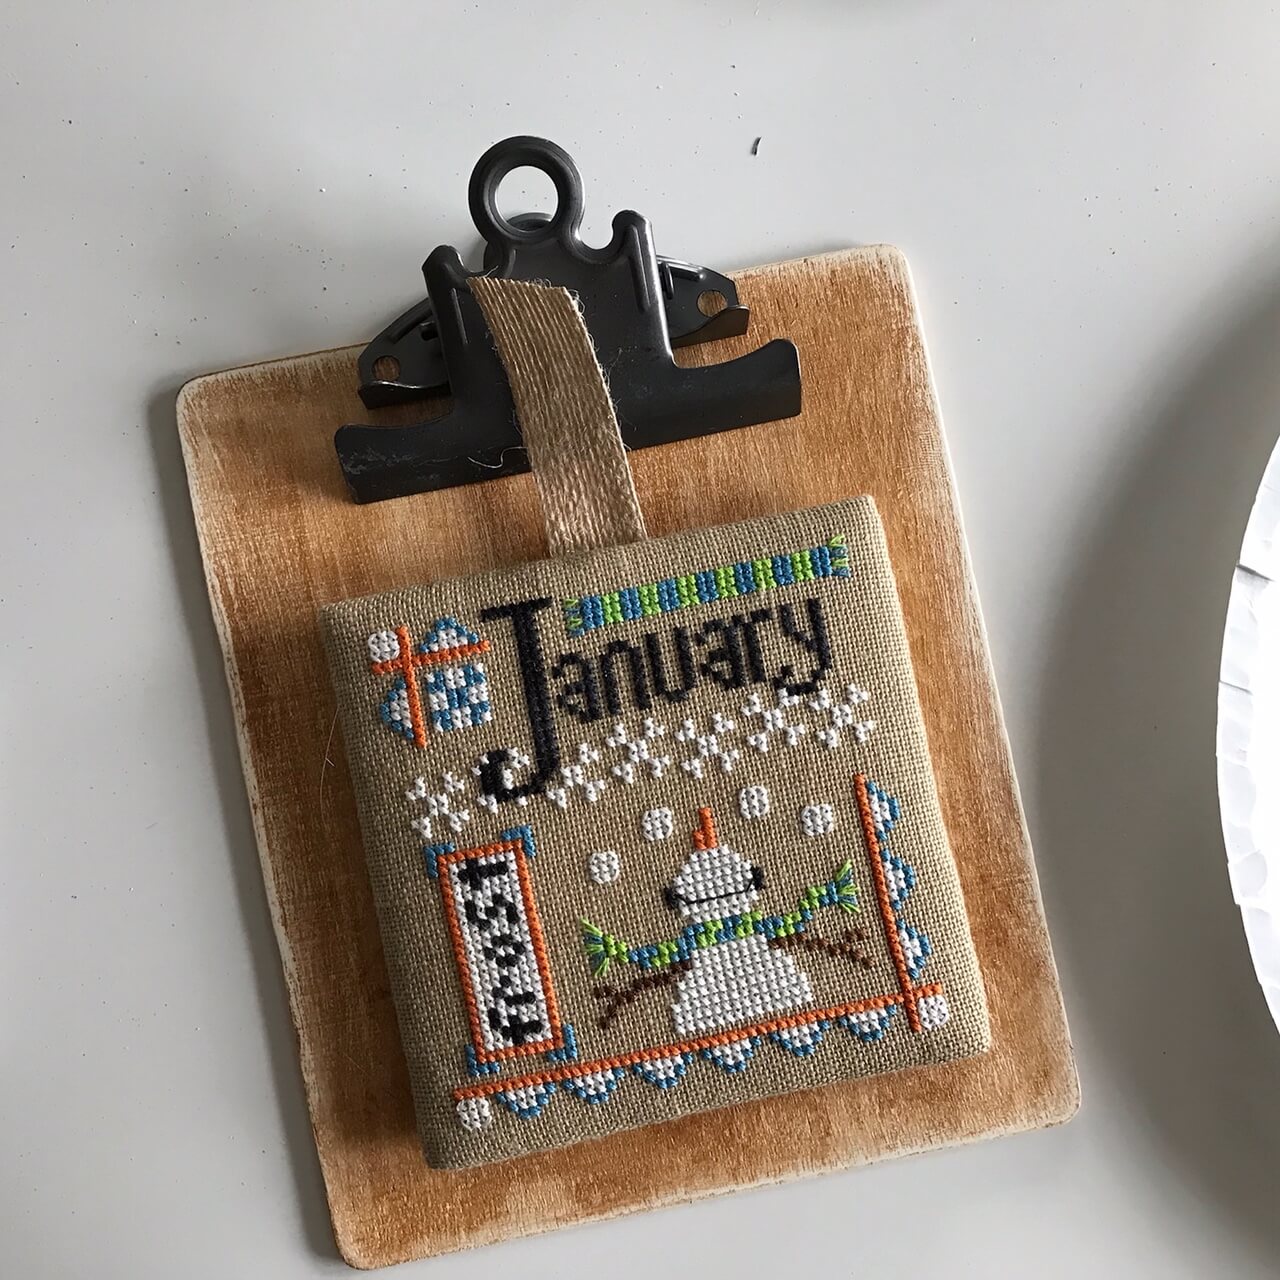
– Slip the ribbon hanger under the clip to enjoy your month of stitching! HINT: I folded my ribbon hanger over to be a little more secure under the pressure of the clipboard clip.
Enjoy your Year of Celebrations! These were so much fun to design in 2013 when they originally were set to publish in Cross Stitch & Needlework magazine throughout 2014. I’m so glad that you like these timeless designs—they are very quick stitches and a great way to use up those bits & bobs of extra floss colors!
Please post your photos as you finish ! Enjoy the stitch, -Cathy Hands On Design
A Year of Celebrations Finishing Tutorial ©2018 Hands On Design & Cathy Habermann. Permission is granted for Shops & Stitchers to print & distribute for classes & personal use. Reposting is permitted with proper reference to http://www.handsondesign.biz These instructions are complimentary & not for resale. Images are the property of Hands On Design & Cathy Habermann.


I cannot find the brads. Could anyone share a link to them?
Kate – I found mine in a scrapbook section of a big box store. You can also get them in office supplies & color the brass with a brown sharpie!! – c
Can I find all the parts for the clipboard at Hobby lobby?
Mary – I did! Cathy
the printable link is not working for me. Just opens up a blank window.
Patty, I checked the link which appears to be working. Try refreshing or reloading the site. Cathy
I am stitching my pieces on 14 count Aida, has anyone done theirs on Aida? I have just finished my first month and am moving on to the second, I am hoping the aida cloth is not too stiff to fold neatly over the mat board. Any thoughts?
Linda- quite a few stitchers are working their months on aida. You might join the SAL on FB to see all of the different stitches & finishes that folks are doing. – Cathy
THANK YOU CATHY.
Can you give us a link to the Sal?
How cute is this?!? Thank you, so much, for the tutorial! Stitchy hugs~Donna Lizbeth
i WAS GIVEN ‘a yEAR OF cELEBRATIONS FOR cHRISTMAS THIS YEAR (WITH A TON OF FLOSS).tHE REASON i REQUESTED IT WAS THAT YOU HAD THE BONUS cANADIAN DESIGNS – i NEVER BUY MONTHLY STITCH PATTERNS AS THEY ARE USUALLY GEARED TO aMERICAN HOLIDAYS AND SINCE i’M cANADIAN, i WAS THRILLED THAT YOU INCLUDED US IN YOUR DESIGNS! nOTHING AGAINST THE ‘RED, WHITE AND BLUE’, IT JUST DOESN’T MEAN ANYTHING TO THOSE OF US UP NORTH AND OUR tHANKSGIVING ISN’T IN nOVEMBER.
i CAN’T WAIT TO START STITCHING!!
I’m so glad that you like the series! Enjoy stitching your way through the year! Cathy
Oops! my caps lock was on in my previous post…. I didn’t mean to shout. That said, when I type a comment, it only shows up in capitals…..
ihave all the patterns FROM THE CS& N maGaziNes, i am won if there is a Dmc conversion chart that goes along with these?
Try 123stitch.com
If i wanted to stitch this as one piece are there DIRECTIONS for that
I have a border for the Season 2 Year of Celebrations. Some stitchers are adapting that for the original version (you need to add a square to each monthly border). Each square is about 3″ when finished so it’s easy to stitch them each with a few squares in between each month! Are you in the HOD Stitchers group on FB – I have seen some examples there!
Hi,
I love your patterns. I was WONDERING if any of the them would fit the backer you are using for mad for plaid.
Example The calendars series ?
You bet – most of monthly marker type of series would fit on this finishing board!!