Welcome to my picture walk finishing tutorial for how I completed the cap on my strawberries in The Berry Basket series. I plan to finish each one in the same manner so hopefully, you will be a pro by the time I fill the fruit basket with these berries! (Yes, that is a hint to the ‘theme’ of each of the planned berries!)
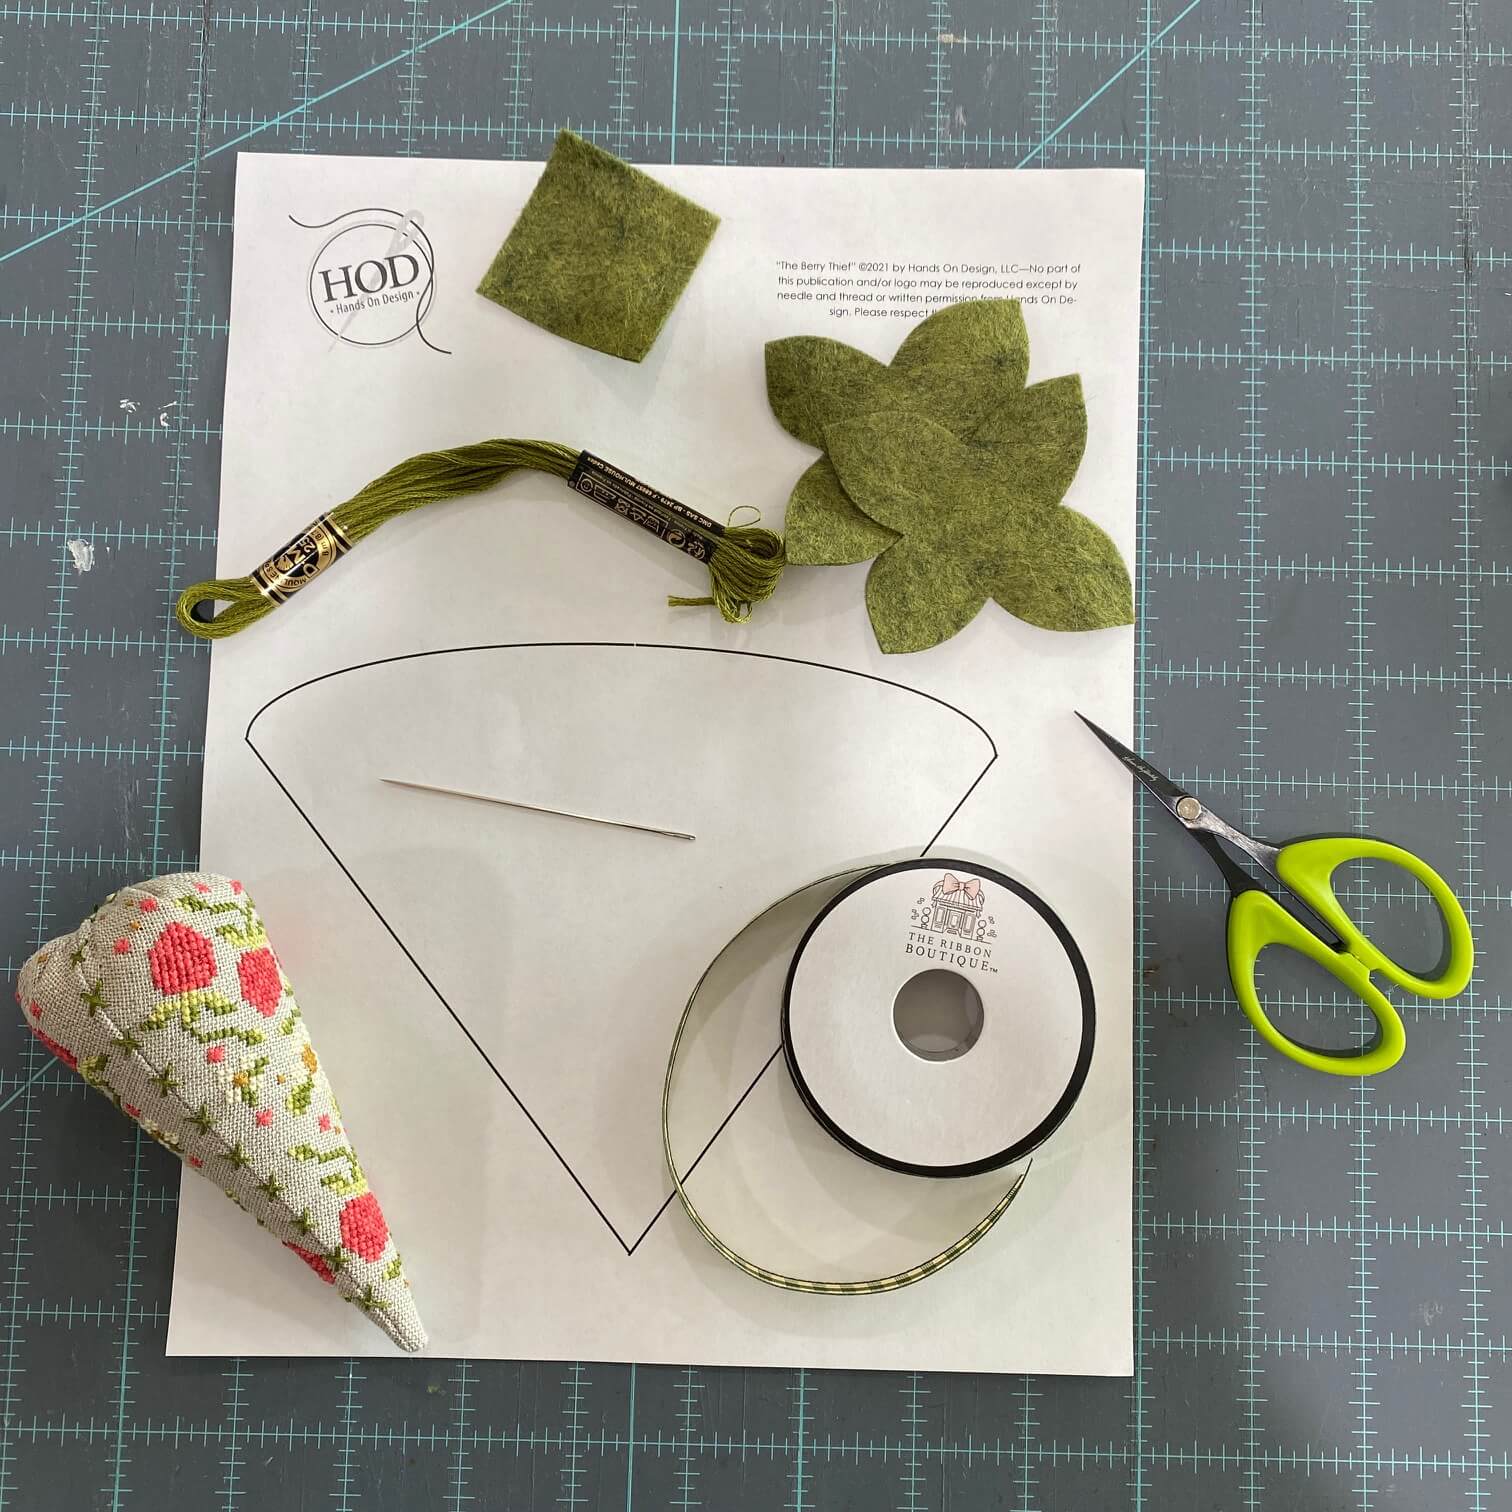
The template & instruction for how to assemble the body of the berry is included in the chart. For the cap, I gathered some bits of woolfelt, coordinating DMC, ribbon & a longer doll-making needle. (the doll-making needle isn’t a requirement, it just makes part of the process a little easier.)
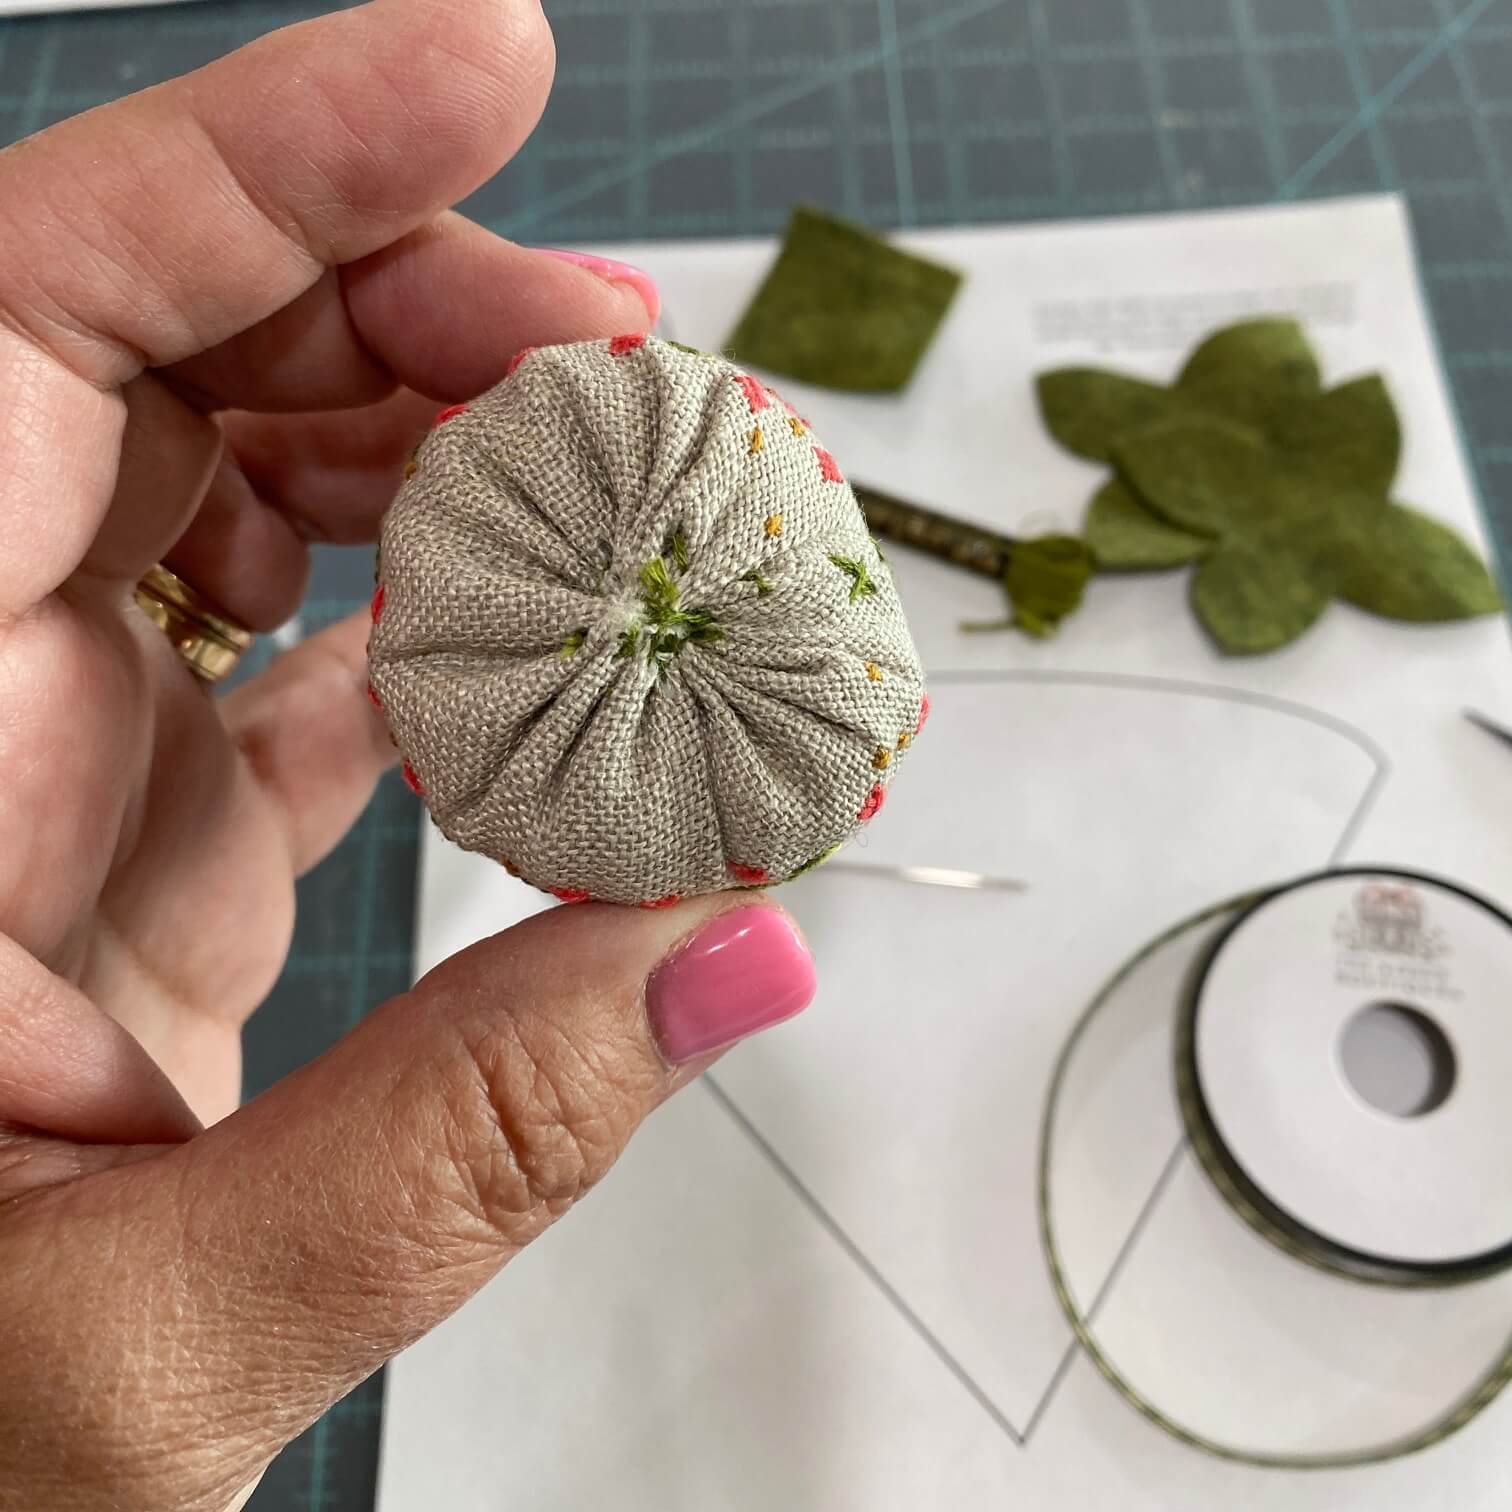
Here’s a peek at what the top of my strawberry looks like after I assemble the body. A few of the cross stitches at the top of the berry will be covered with the cap. If you don’t wish to cover any of those stitches, just scootch the curved line on your pattern a little higher to make a taller berry. (yes, scootch is a technical term)
Thread up with 2 strands of floss – I used the called for green in the pattern. I used 1 long strand & double it, placing both cut ends through the eye of the needle so I could anchor with the loop method. A knot at the end of the 2 strands is also acceptable. (I am using the doll-making needle through all of these steps, I am not call it a doll-making needle each time)

Run the needle through the top center of the berry & anchor with the loop method. (pull needle through until the looped thread end appears. Needle goes through the loop & pulls to cinch.
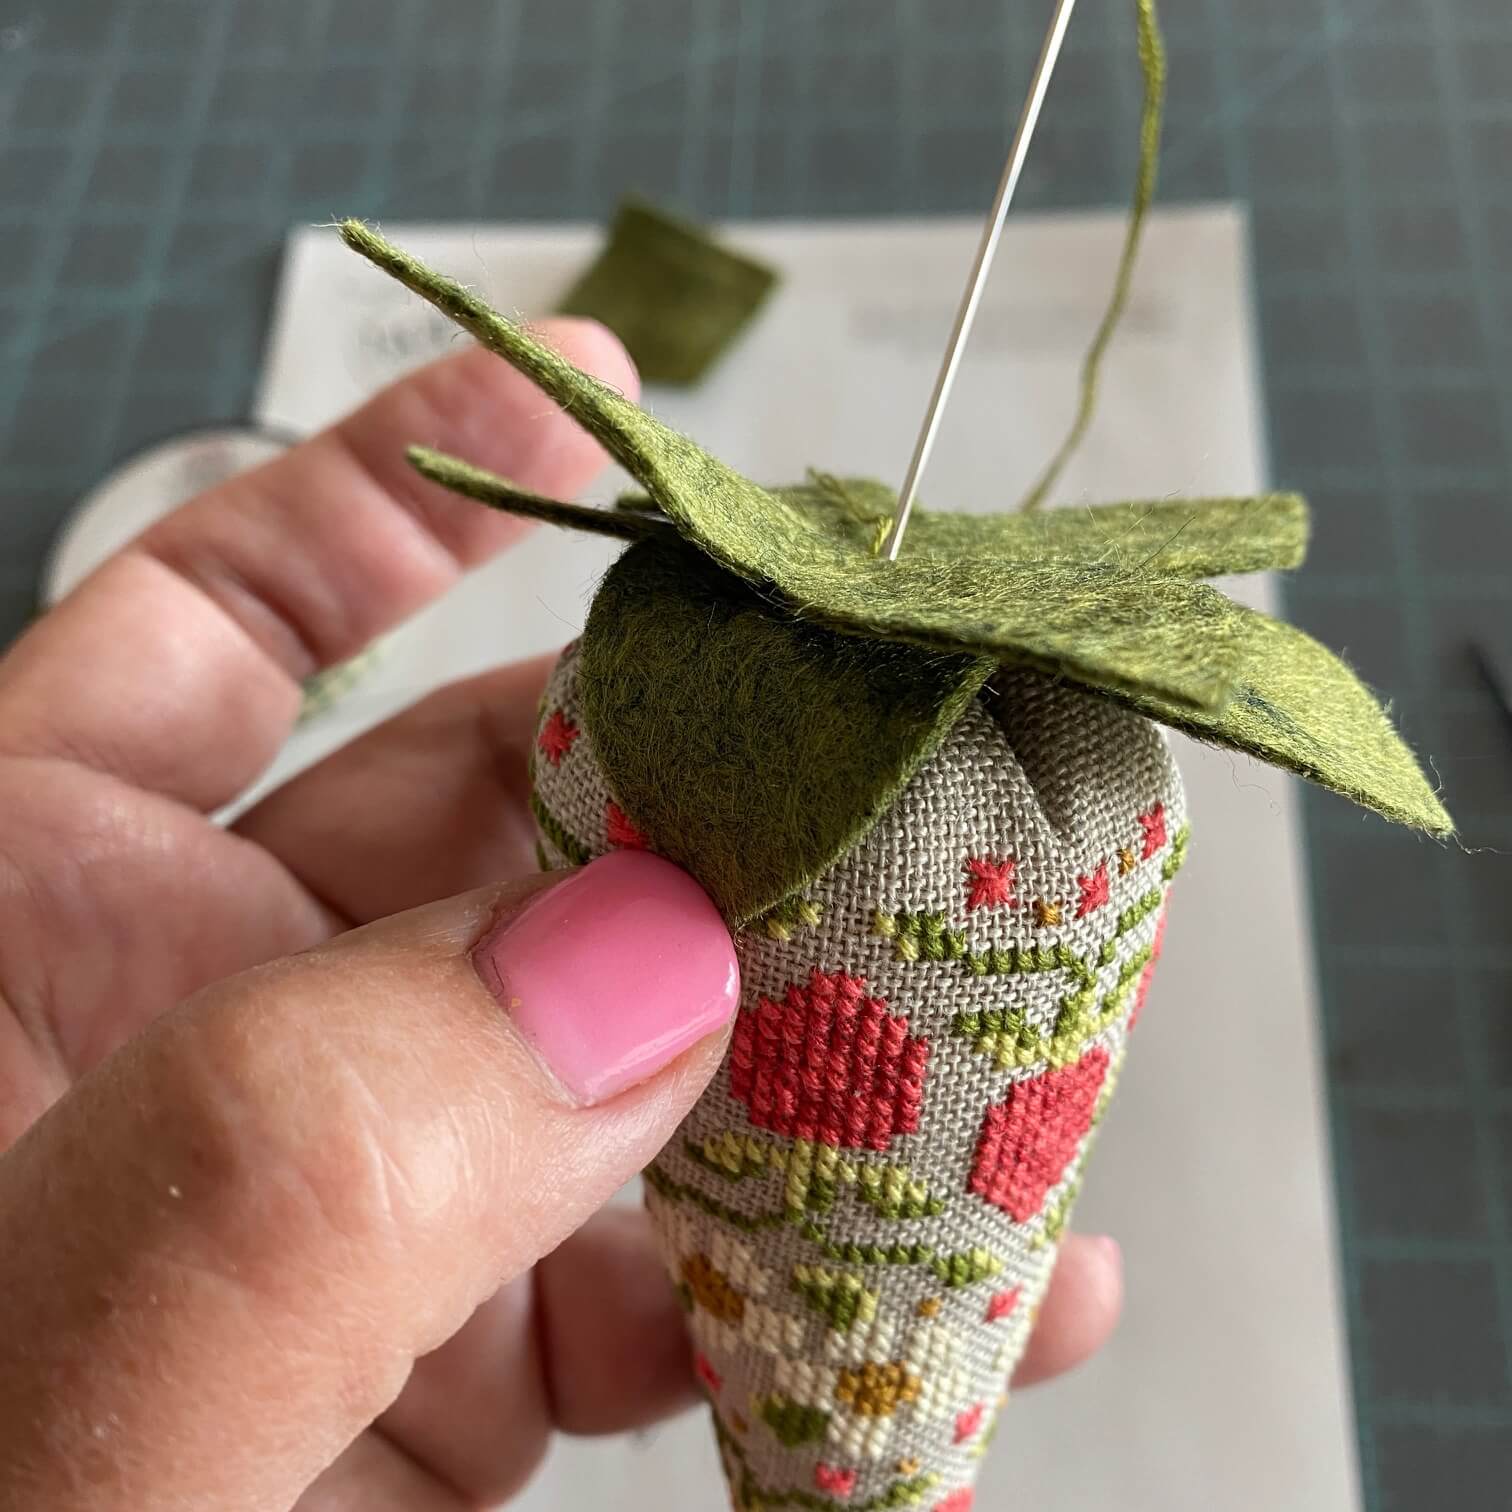
I used 2 pre-cut woolfelt flowers from Benzie Design. The website is www.benziedesign.com – I used zucchini colored woolfelt. Packs of precut flowers can be purchased in the ‘felt-fetti’ section. They include different sizes which could be fun to experiment with. You can also just purchase it by the sheet & cut your own cap. You will need a small piece for the stem.
Layer the 2 flowers in an offset manner & run the needle through the center as in picture (thread is anchored in the berry top).

Cinch the flowers down to the berry top. Take another anchoring stitch by scooping the needle in & out of the top center through all of the layers. Knot to secure.
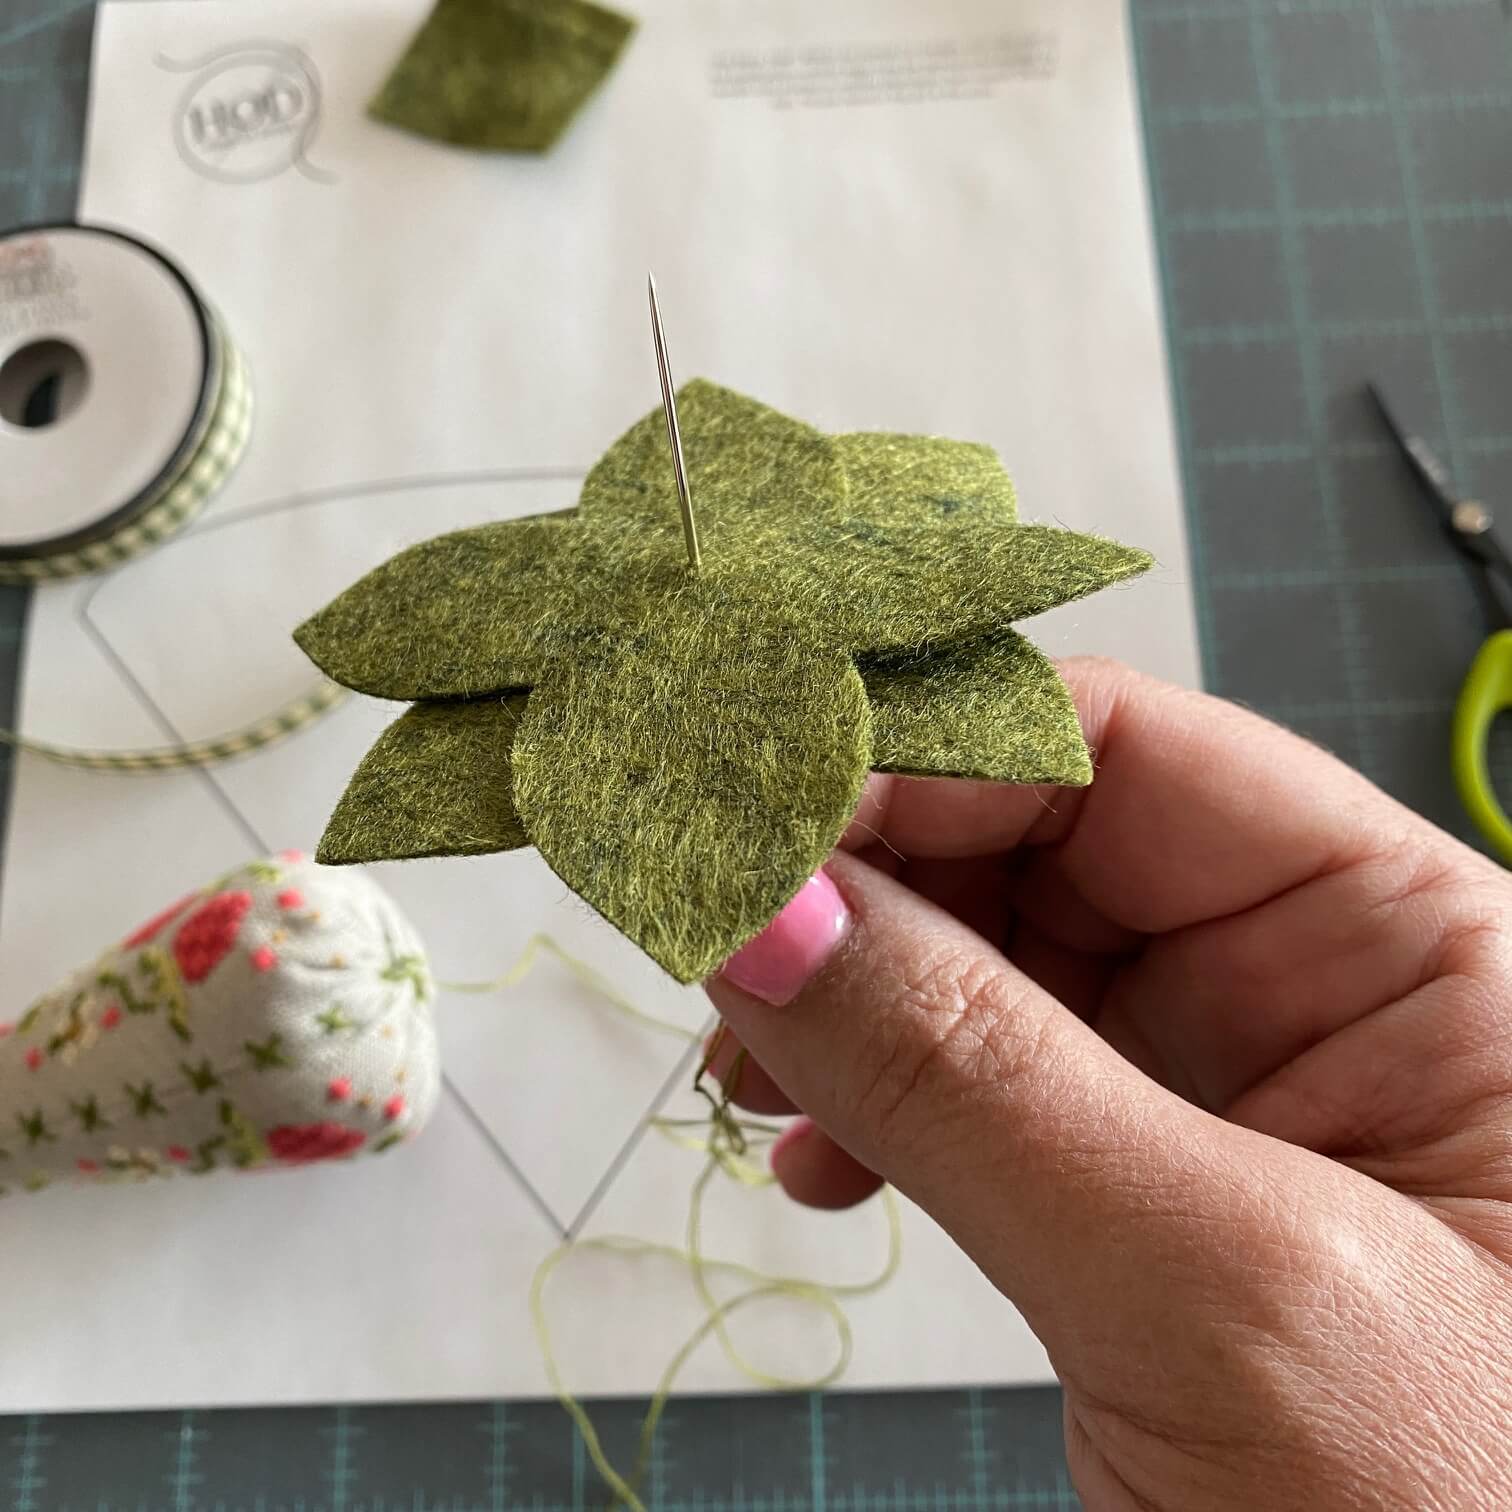
I secured the petals next. The needle is pushed down into the top center of the berry & directed to come out at the base of one of the leaves. You can see that I started with the lower leaves. I came out close to the lower tip.
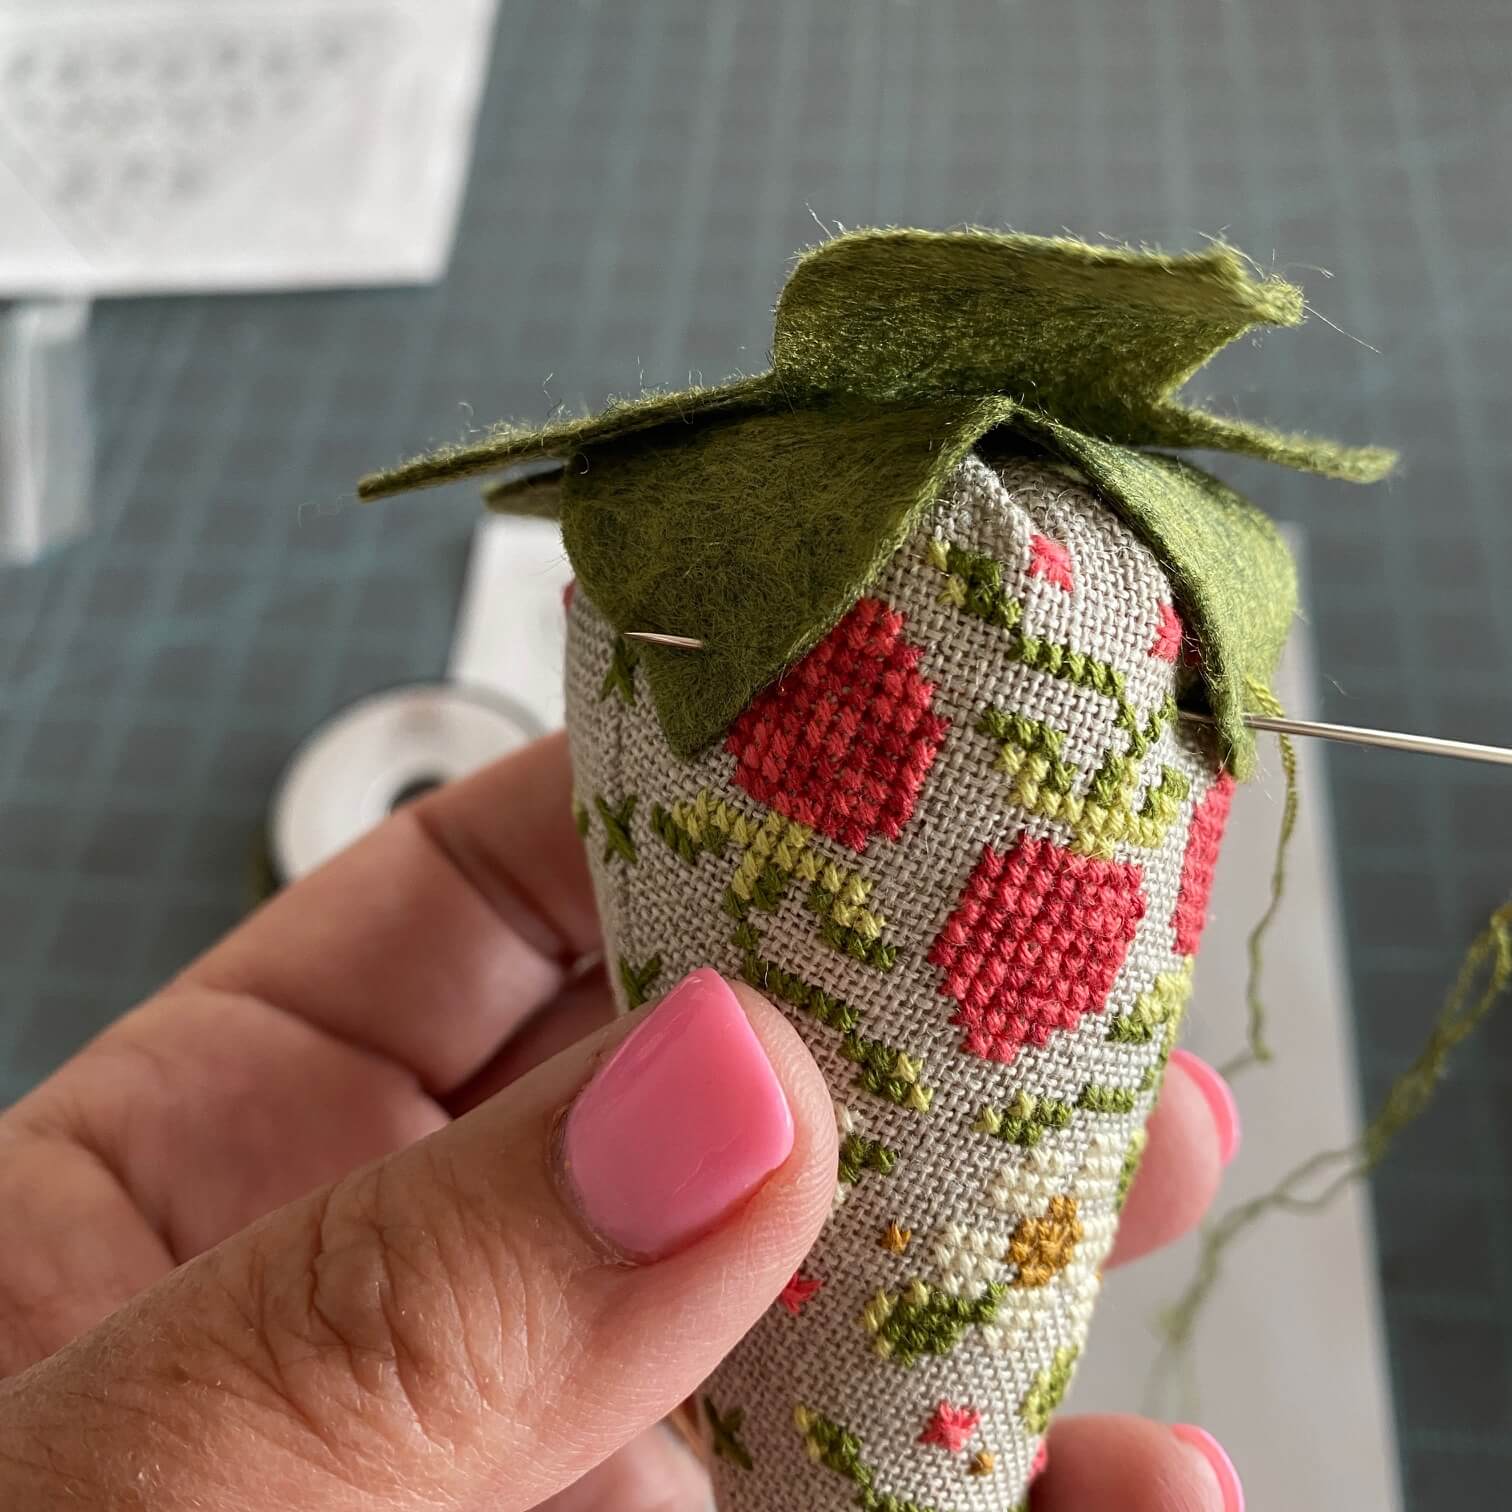
I completed the small stitch to tack the leaf into place by running the needle back through the leaf, close to where the needle came out, and directed it towards the next leaf & again, came out close to the tip. I secured all the petals on the lower flower 1st.
 Here you can see that I have secured the lower flower tips & am now securing the upper flower.
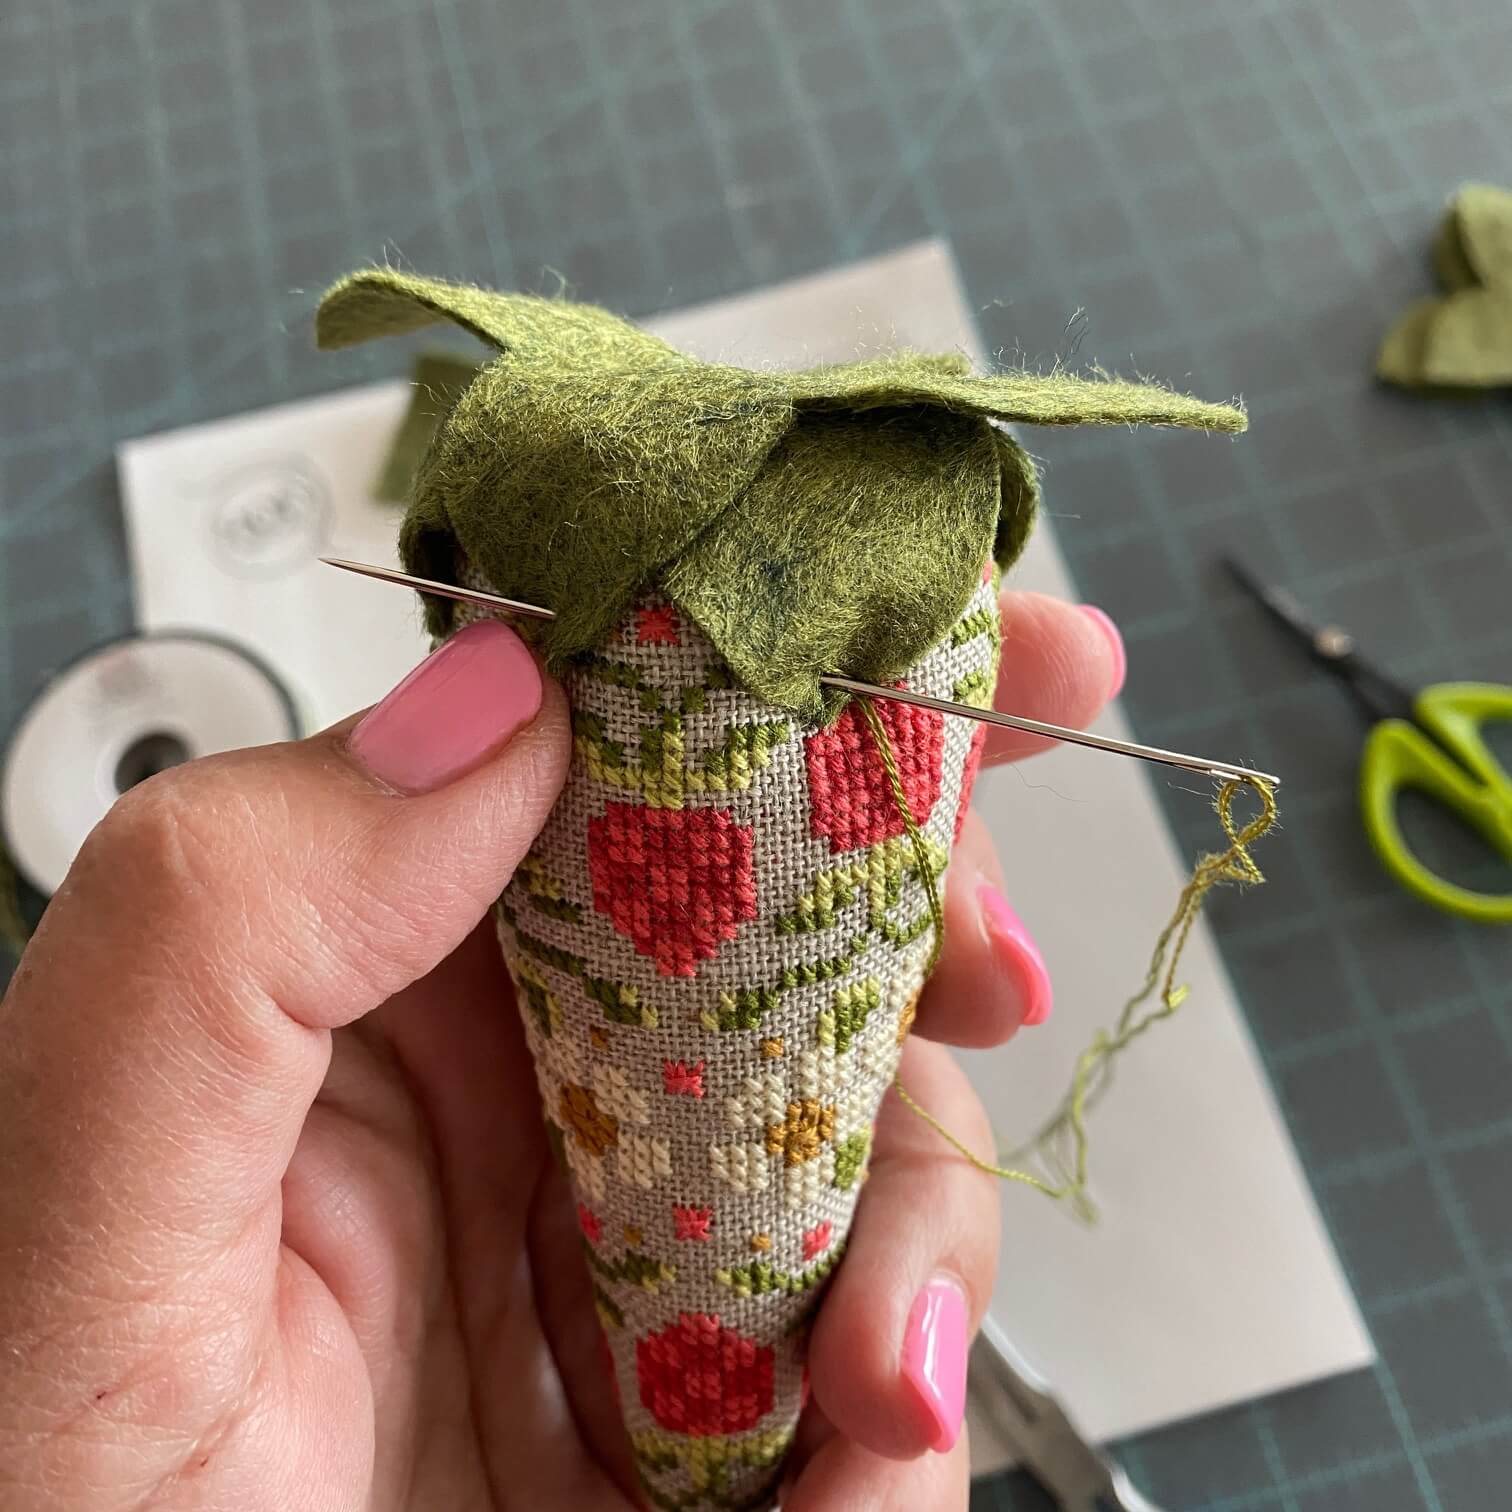
Once you secure the final flower tip, direct the needle back to the top center of the berry. I secured the thread with a knot & trimmed.
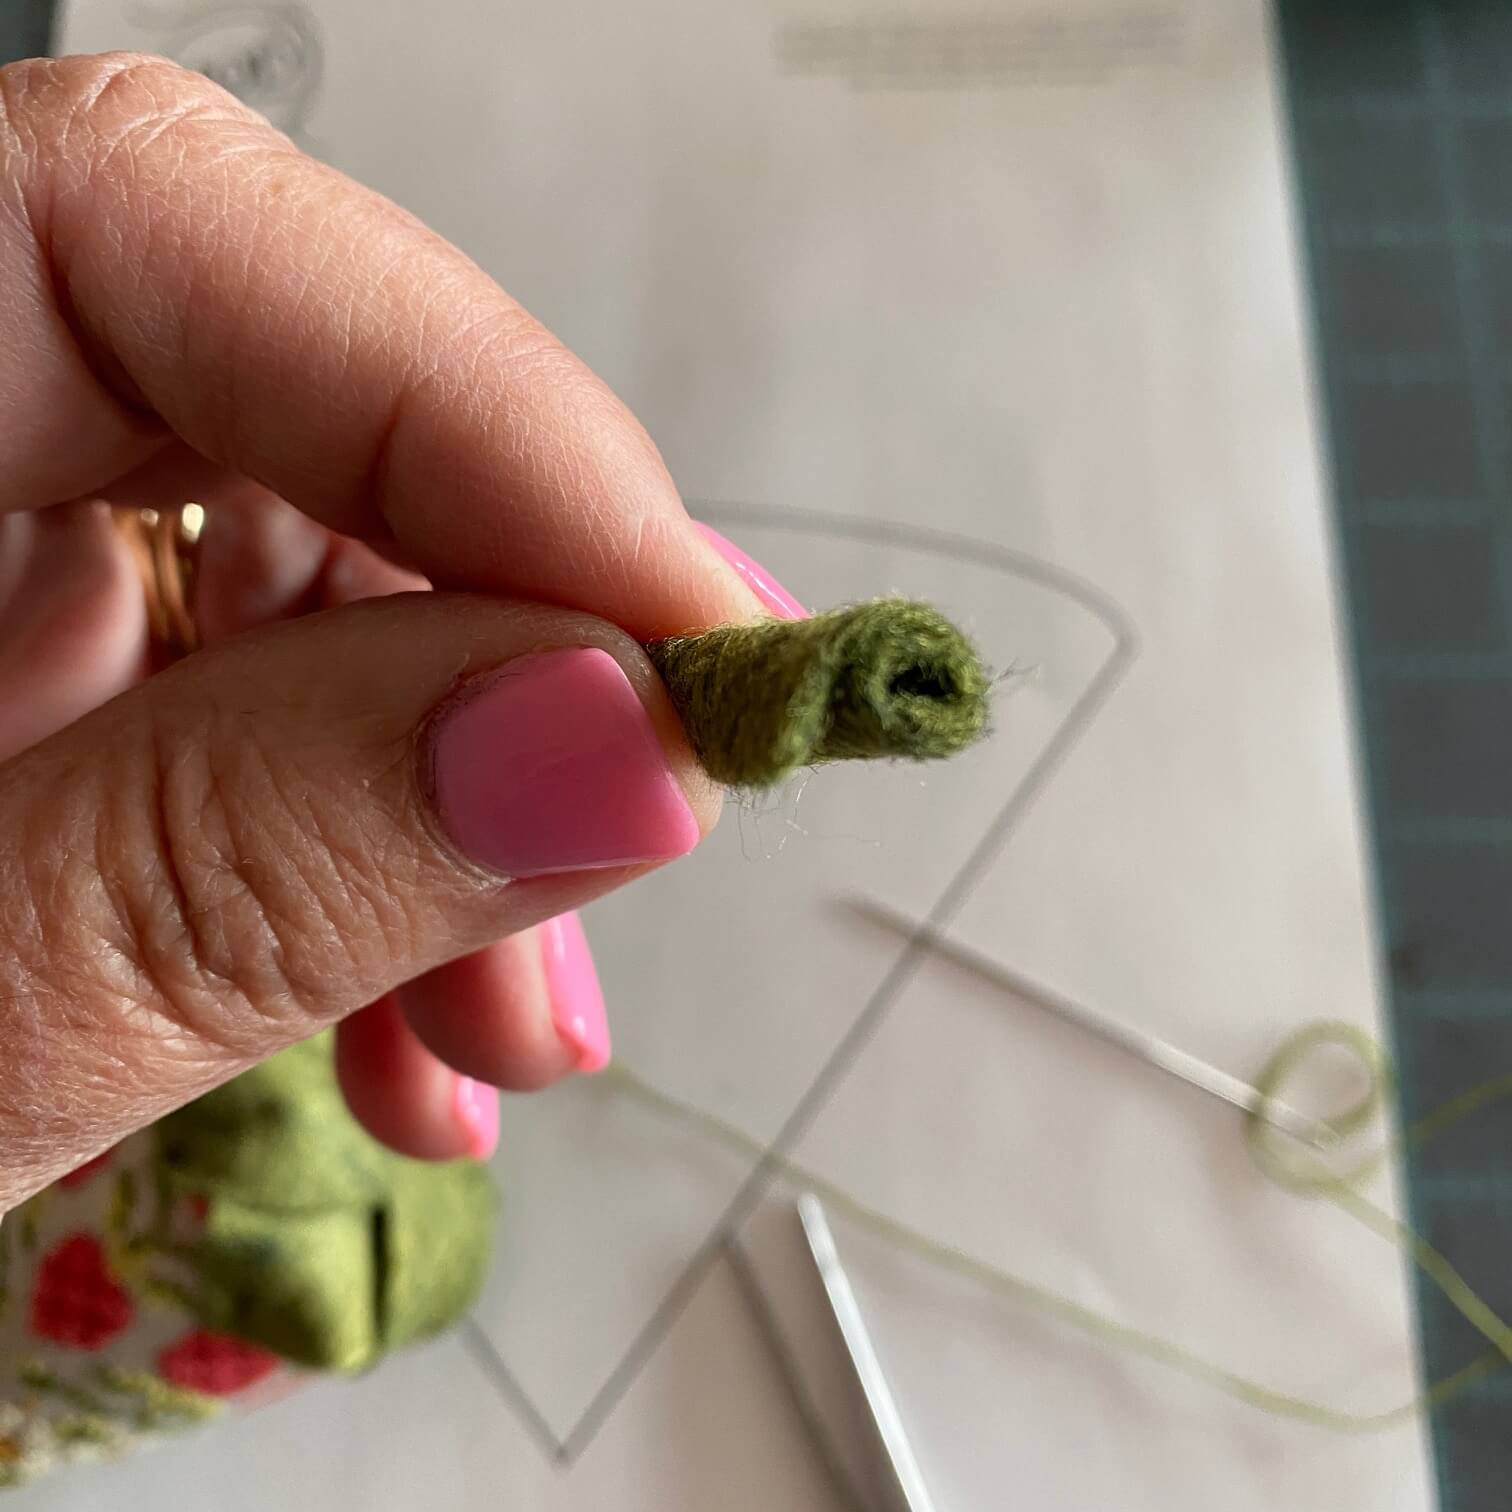
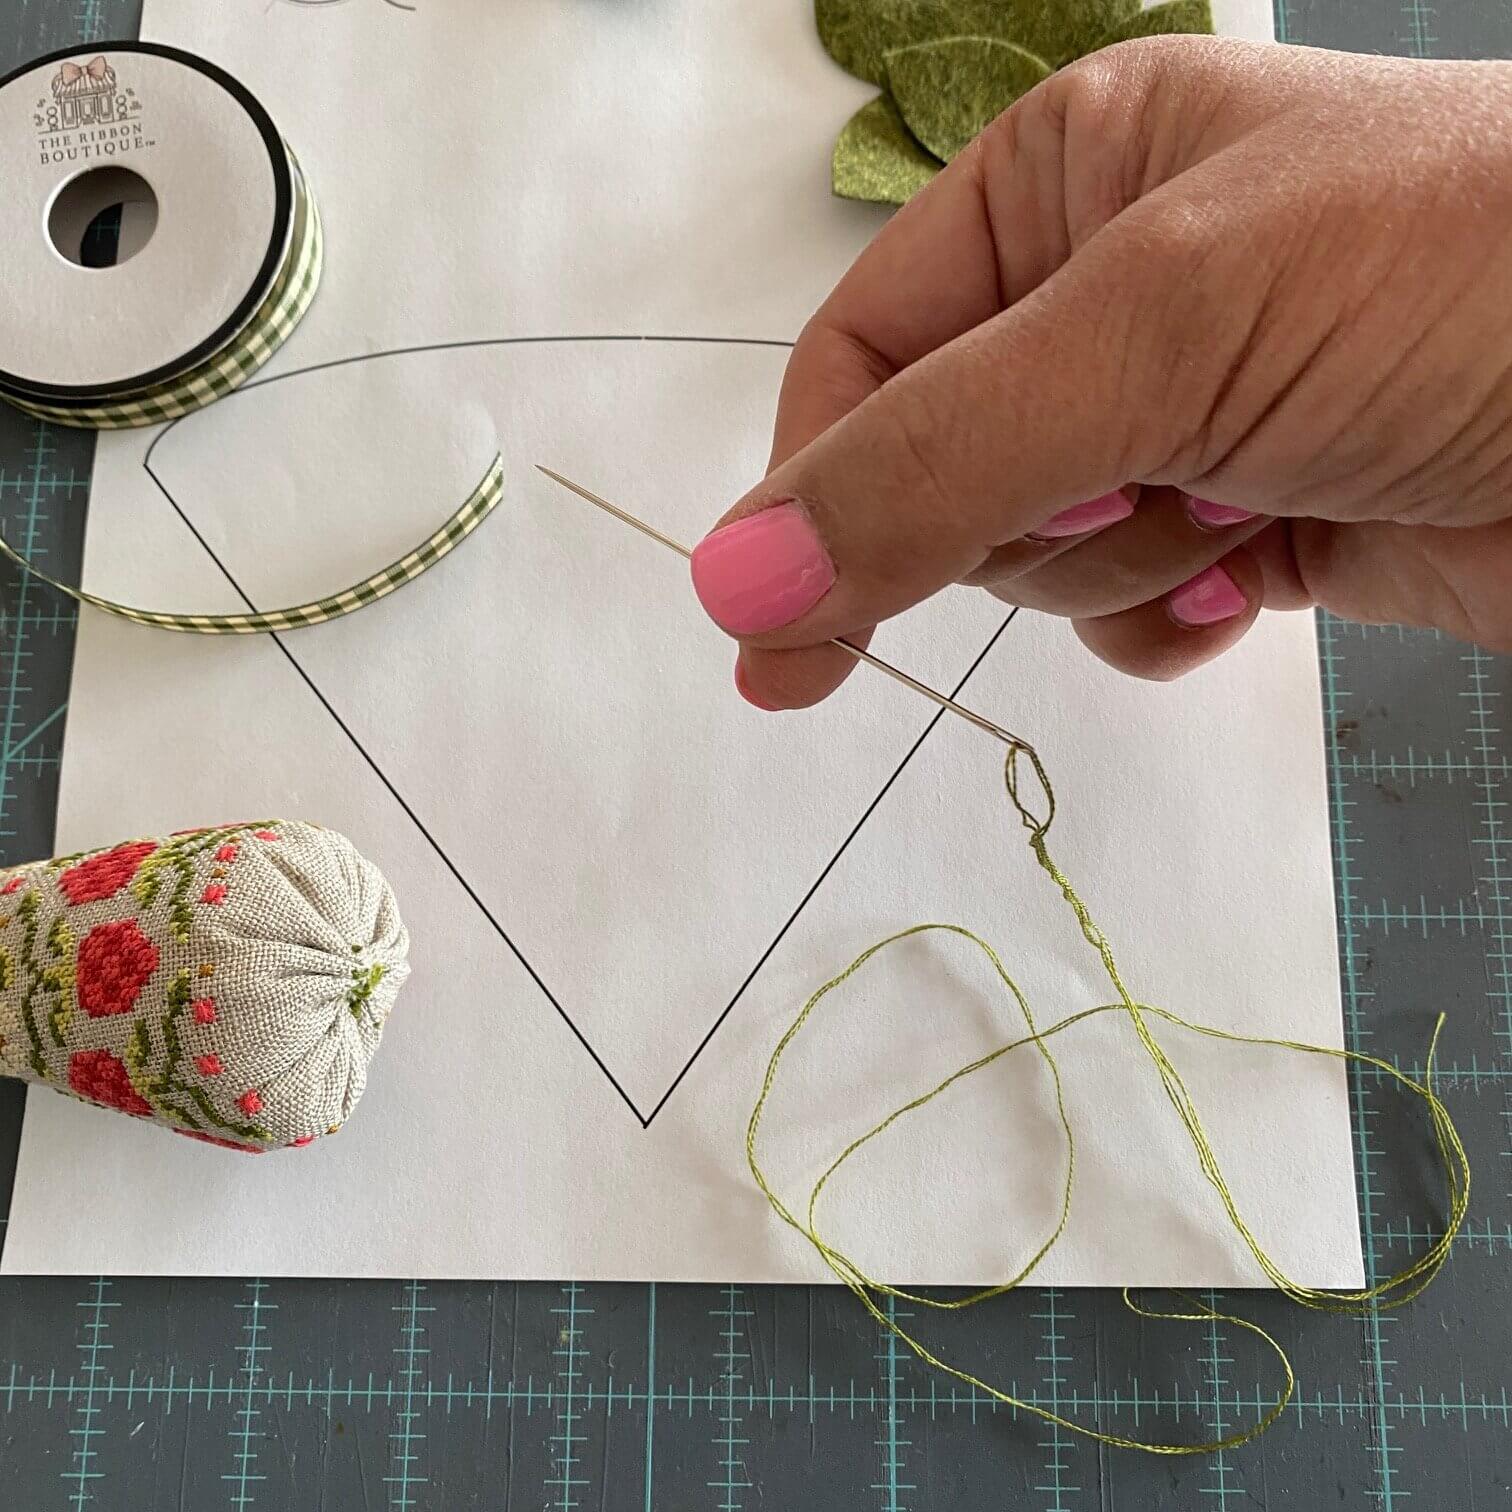
Cut a small piece of woolfelt – about 1 x 1.5″. Roll the felt tightly into a stem so it’s approx 1″ tall.
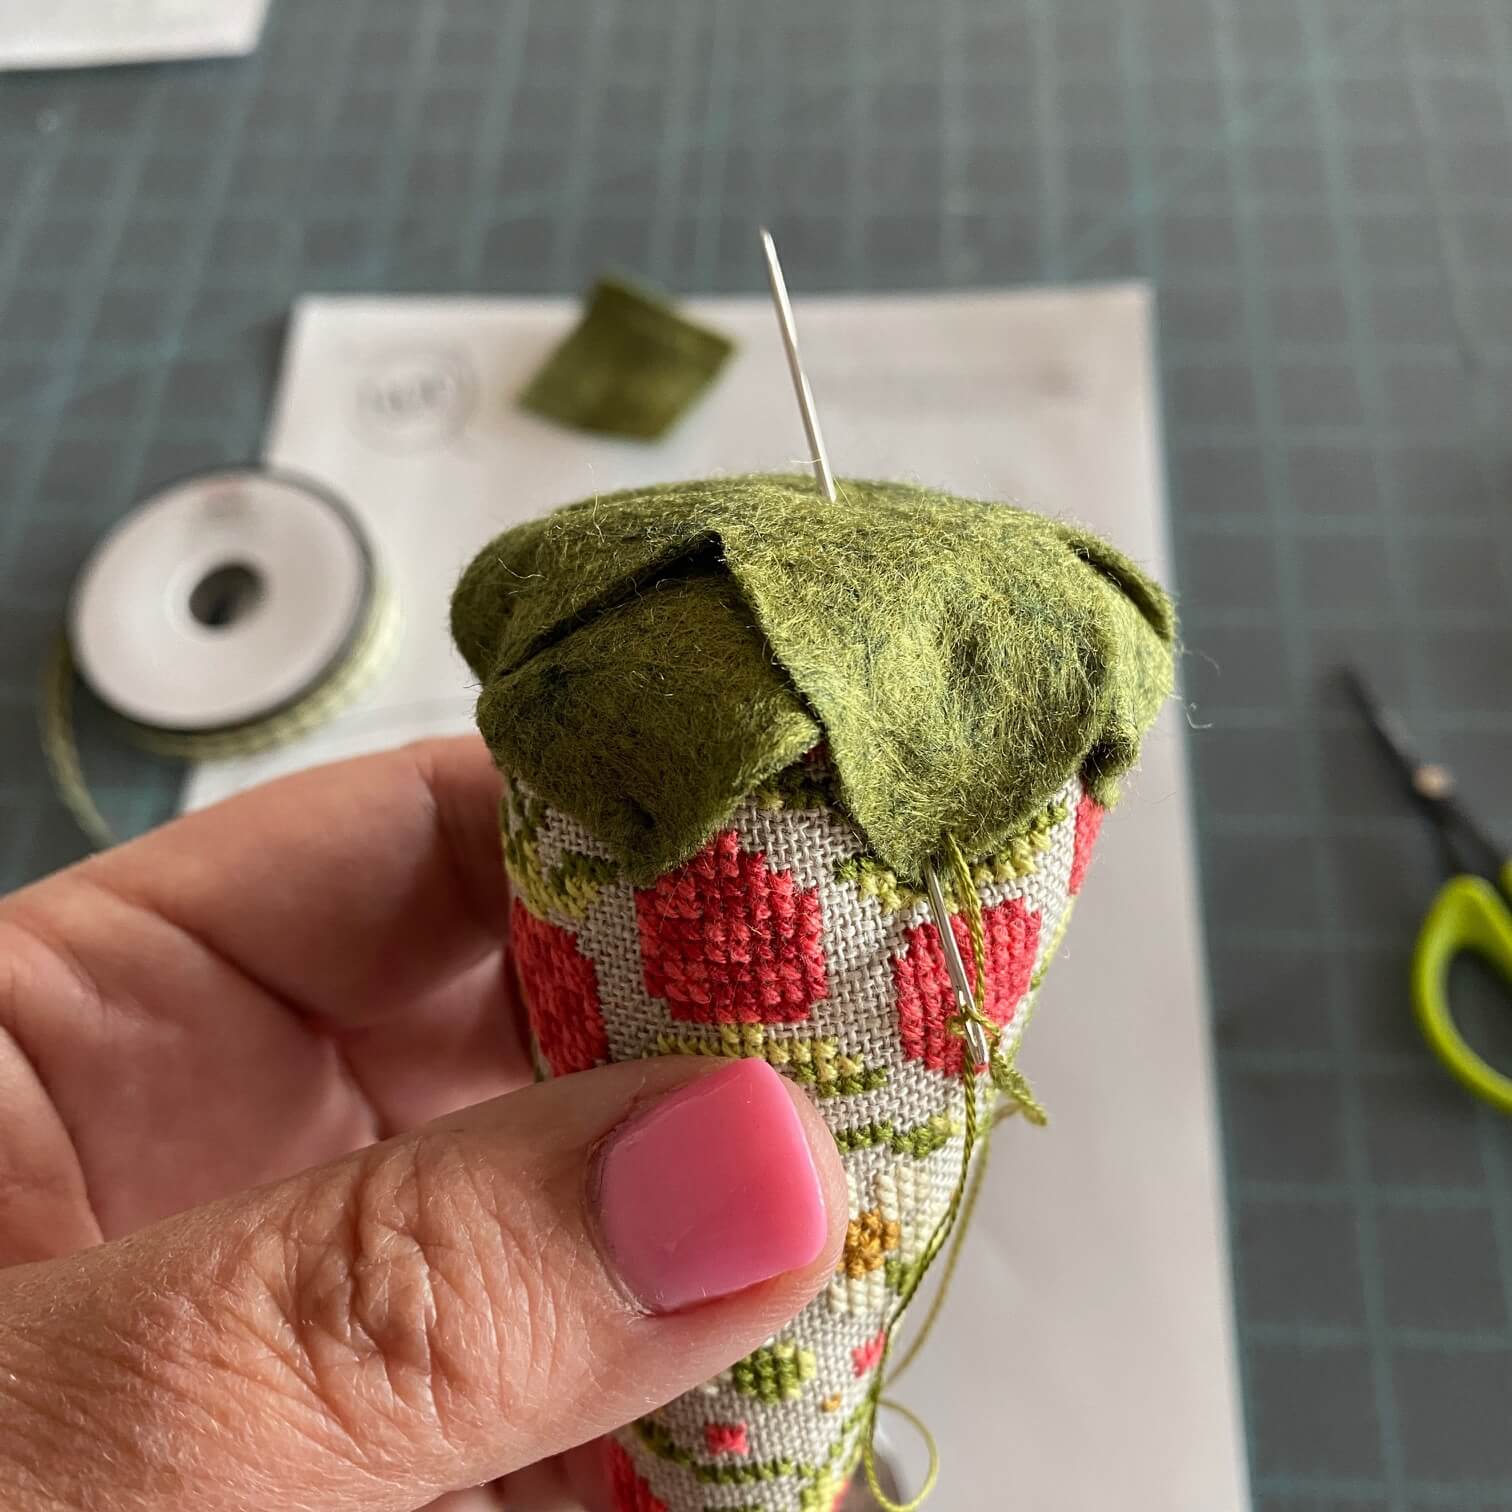
Forget that you should have threaded the needle again, put rolled stem down (it will unroll), thread needle in same manner as previous steps, re-roll stem, anchor thread to secure the rolled stem as in picture above.
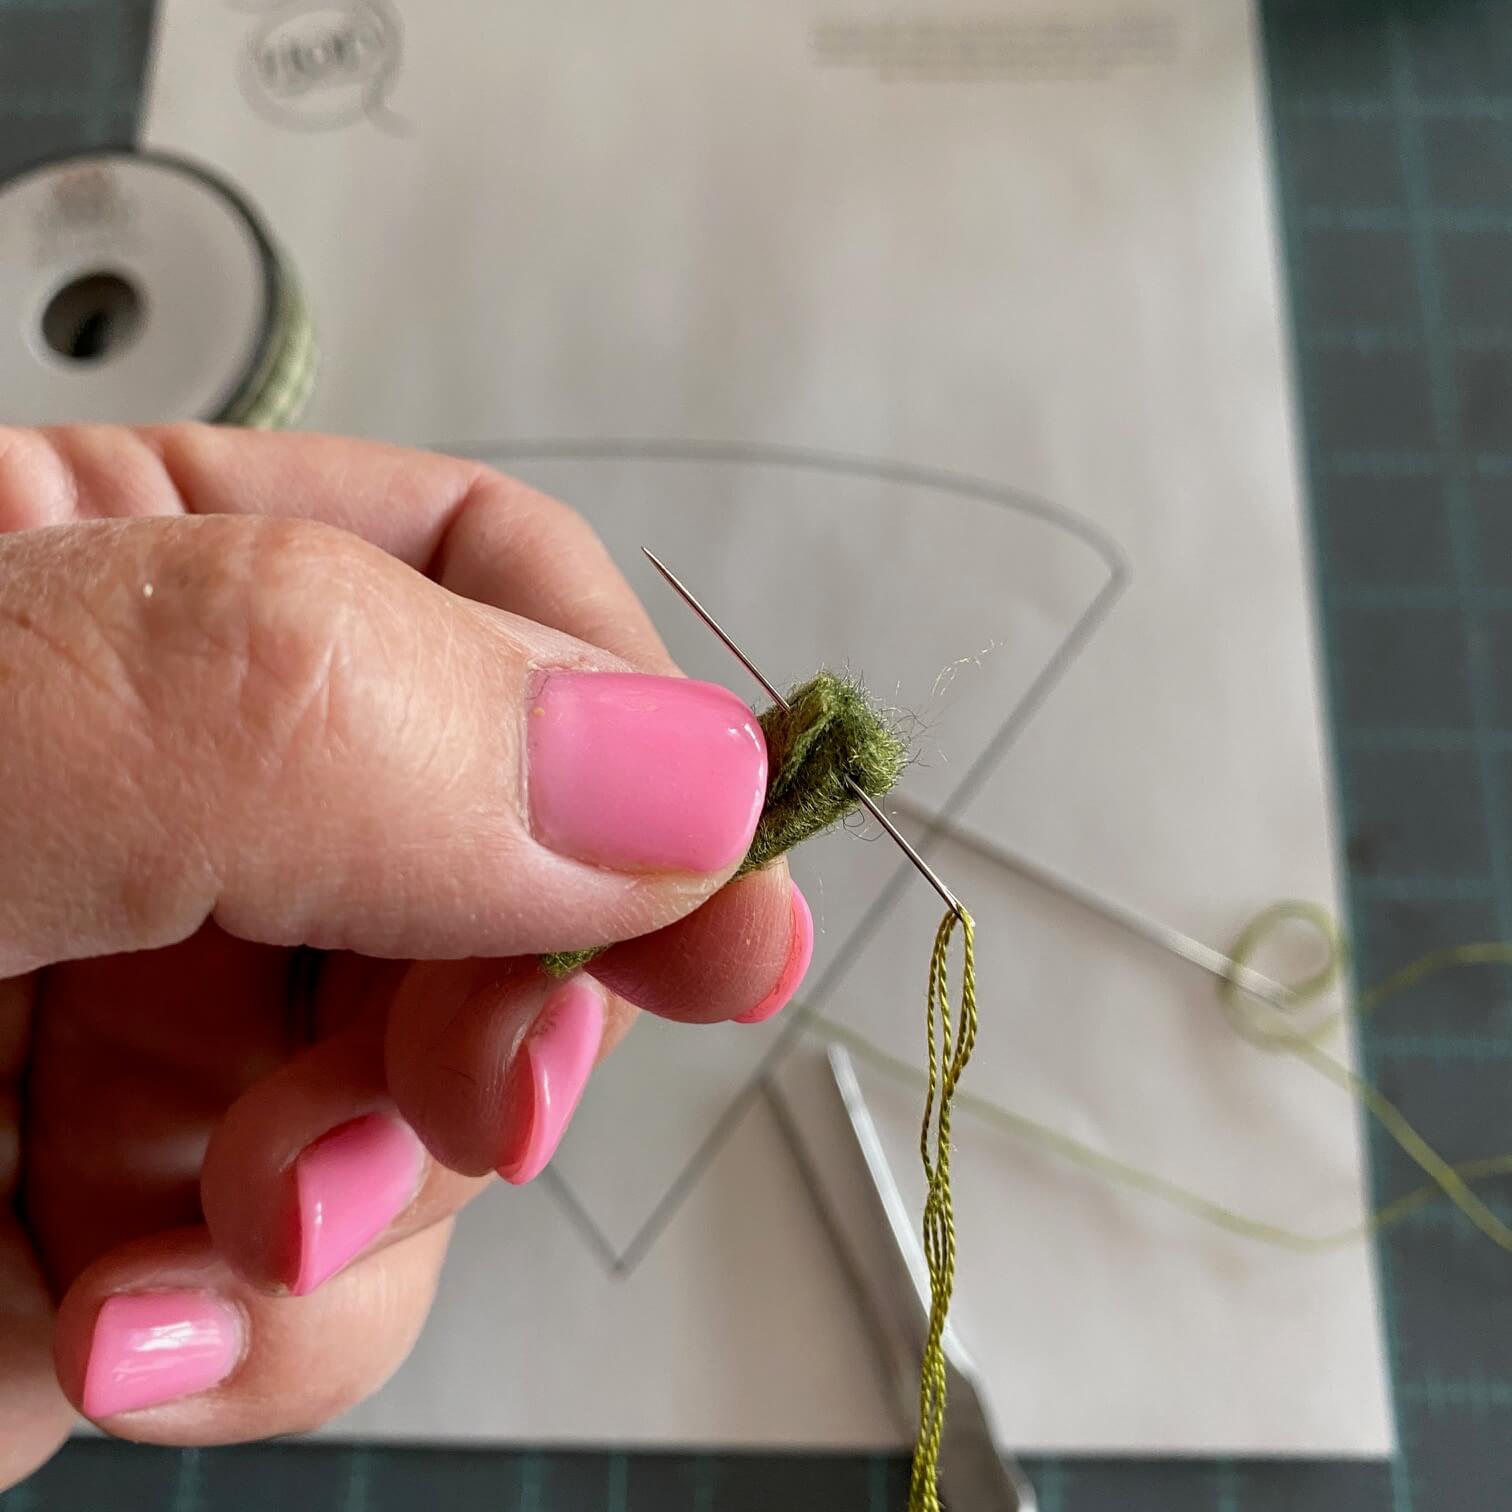
Here’s a close-up of the stitches that I took in the stem to secure the fold. Make sure your final stitches are at one end of the stem. Make a knot to secure previous stitches, do not cut the thread.
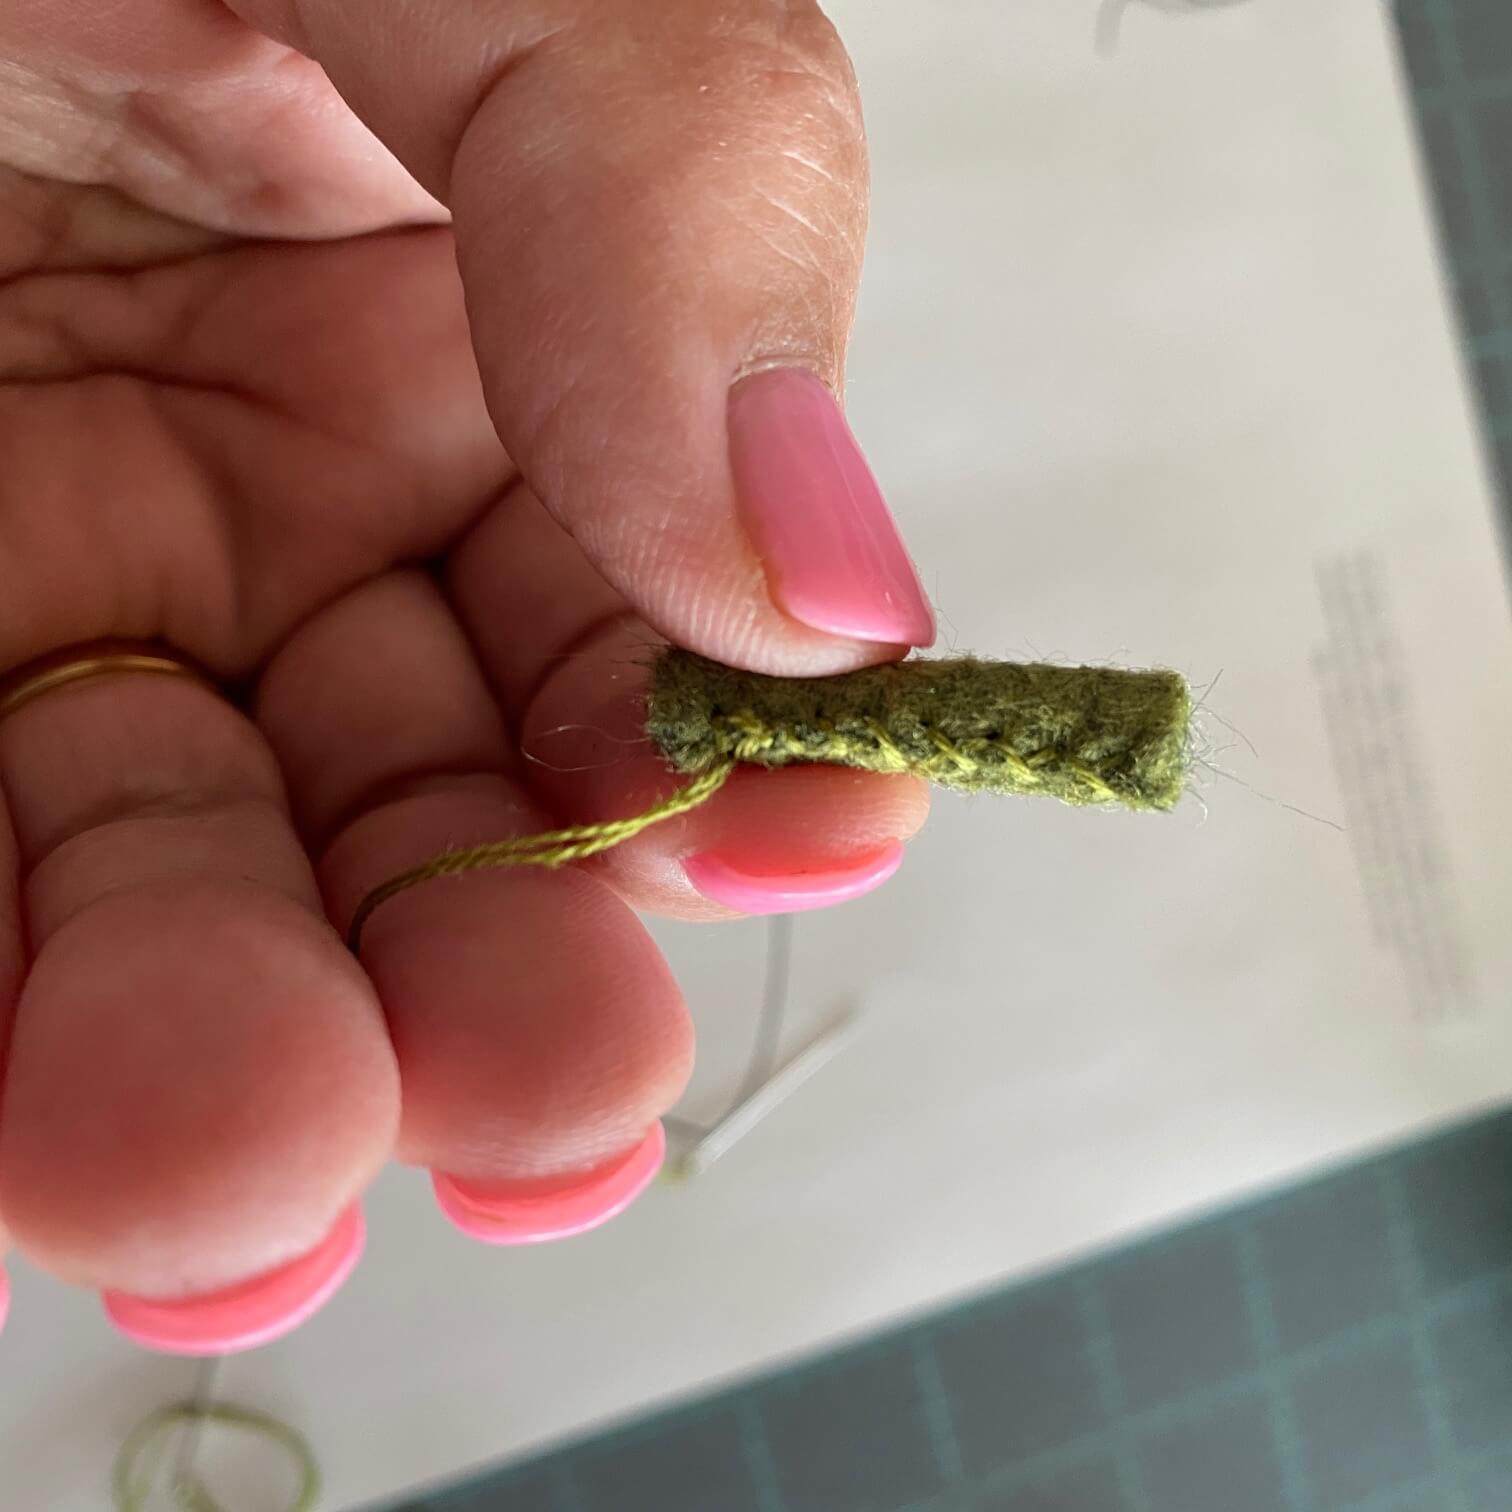
Scoop through the top center of the cap once again – you can see that the stem is on the table top on the other end of this thread.
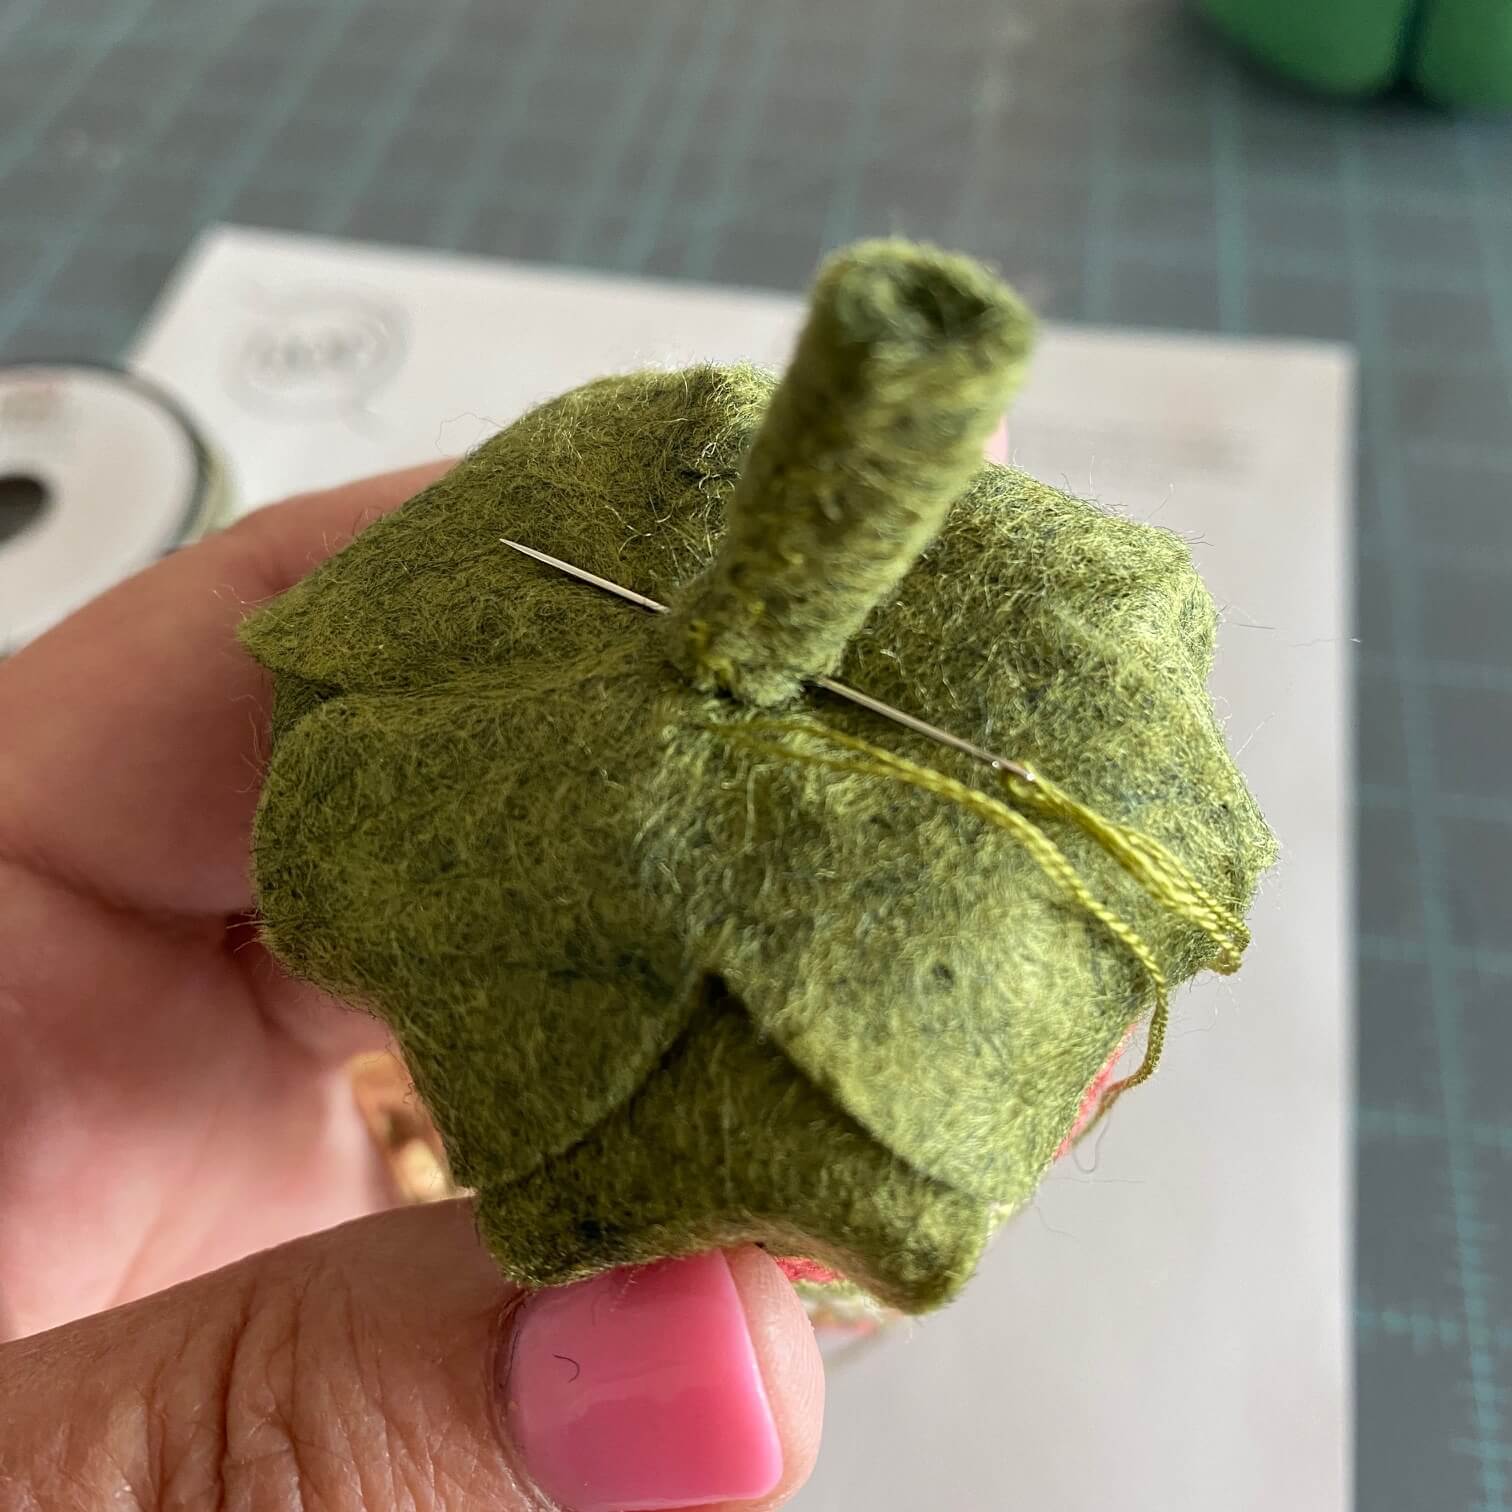
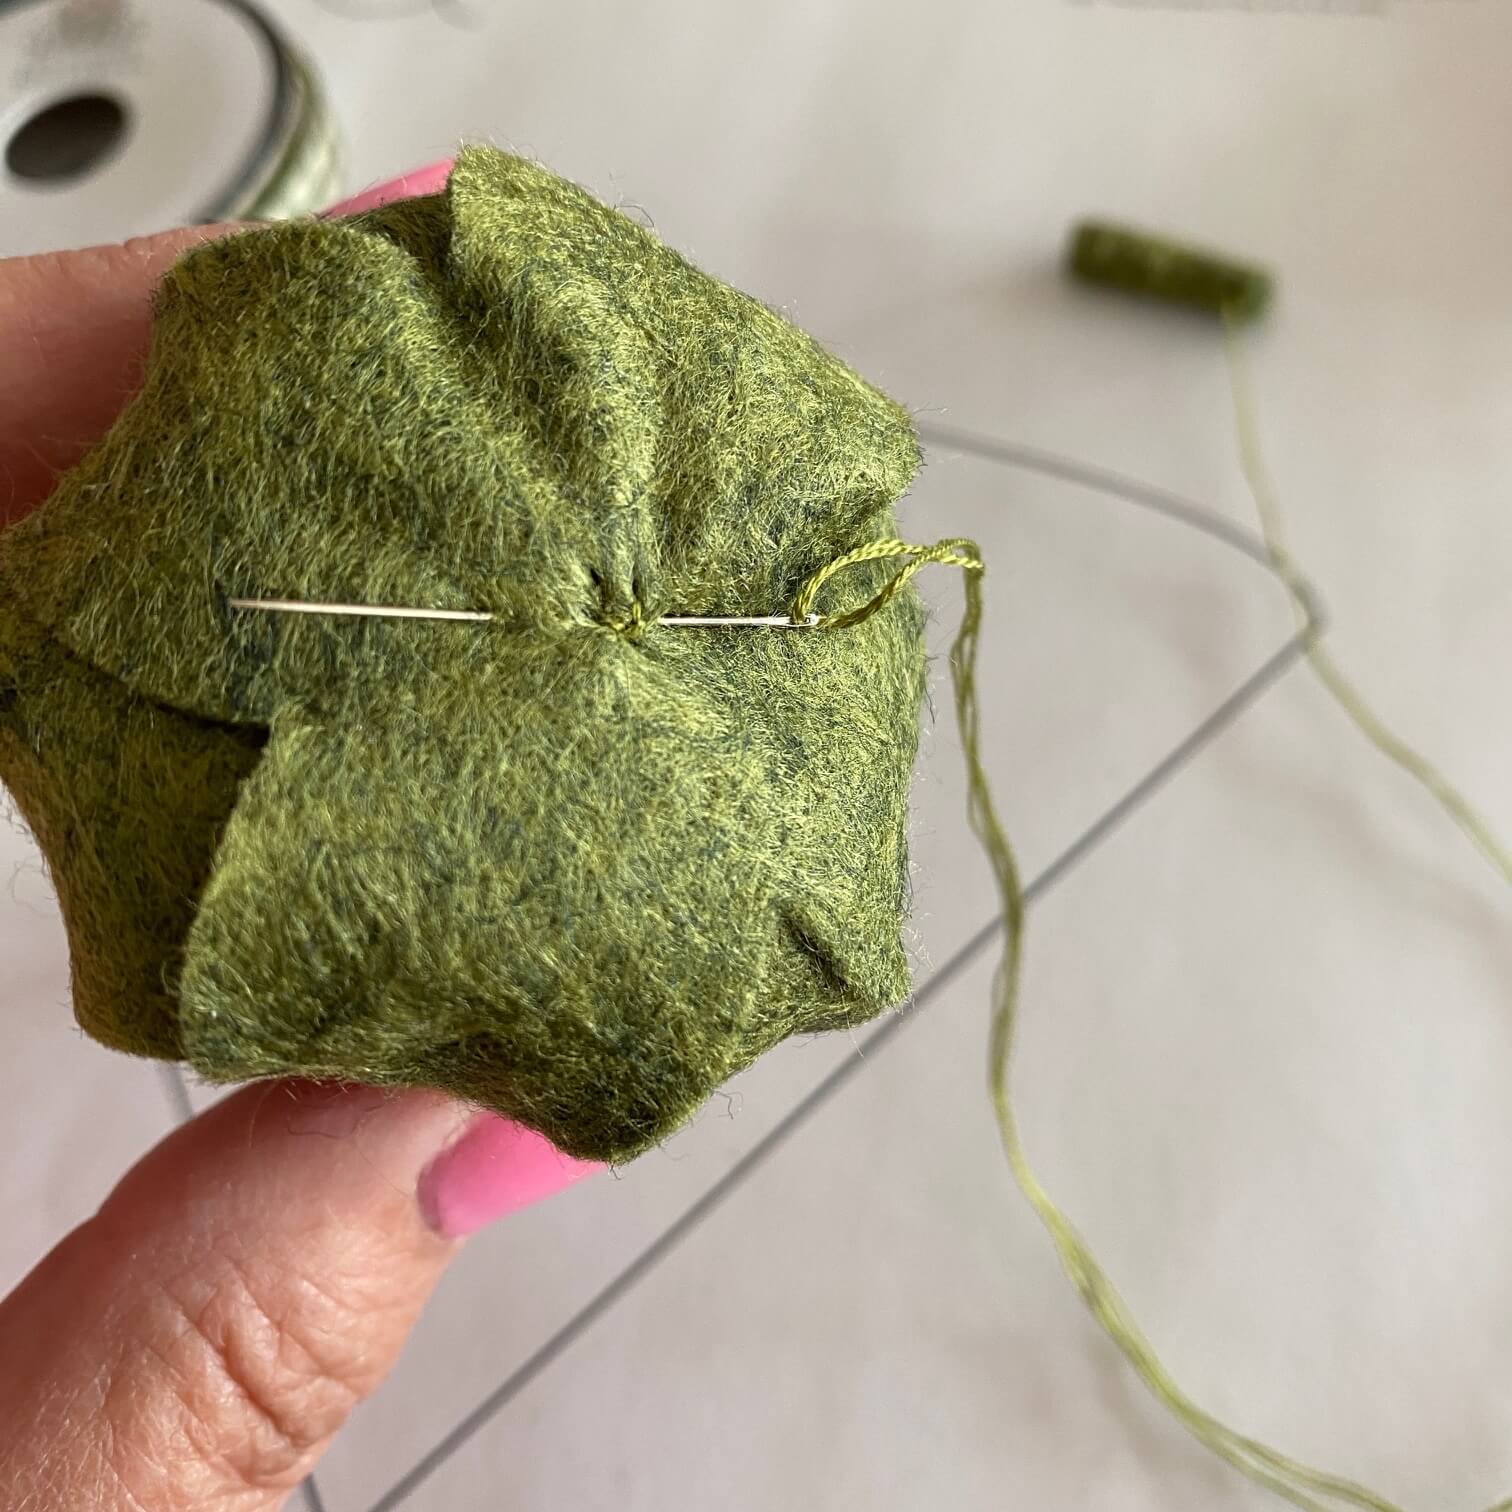
Pull the thread through the cap until the stem is flush with the top of the berry. Run the needle through the base of the stem several times making sure to catch some of the woolfelt cap each time. I try to take the stitches in different directions each time.
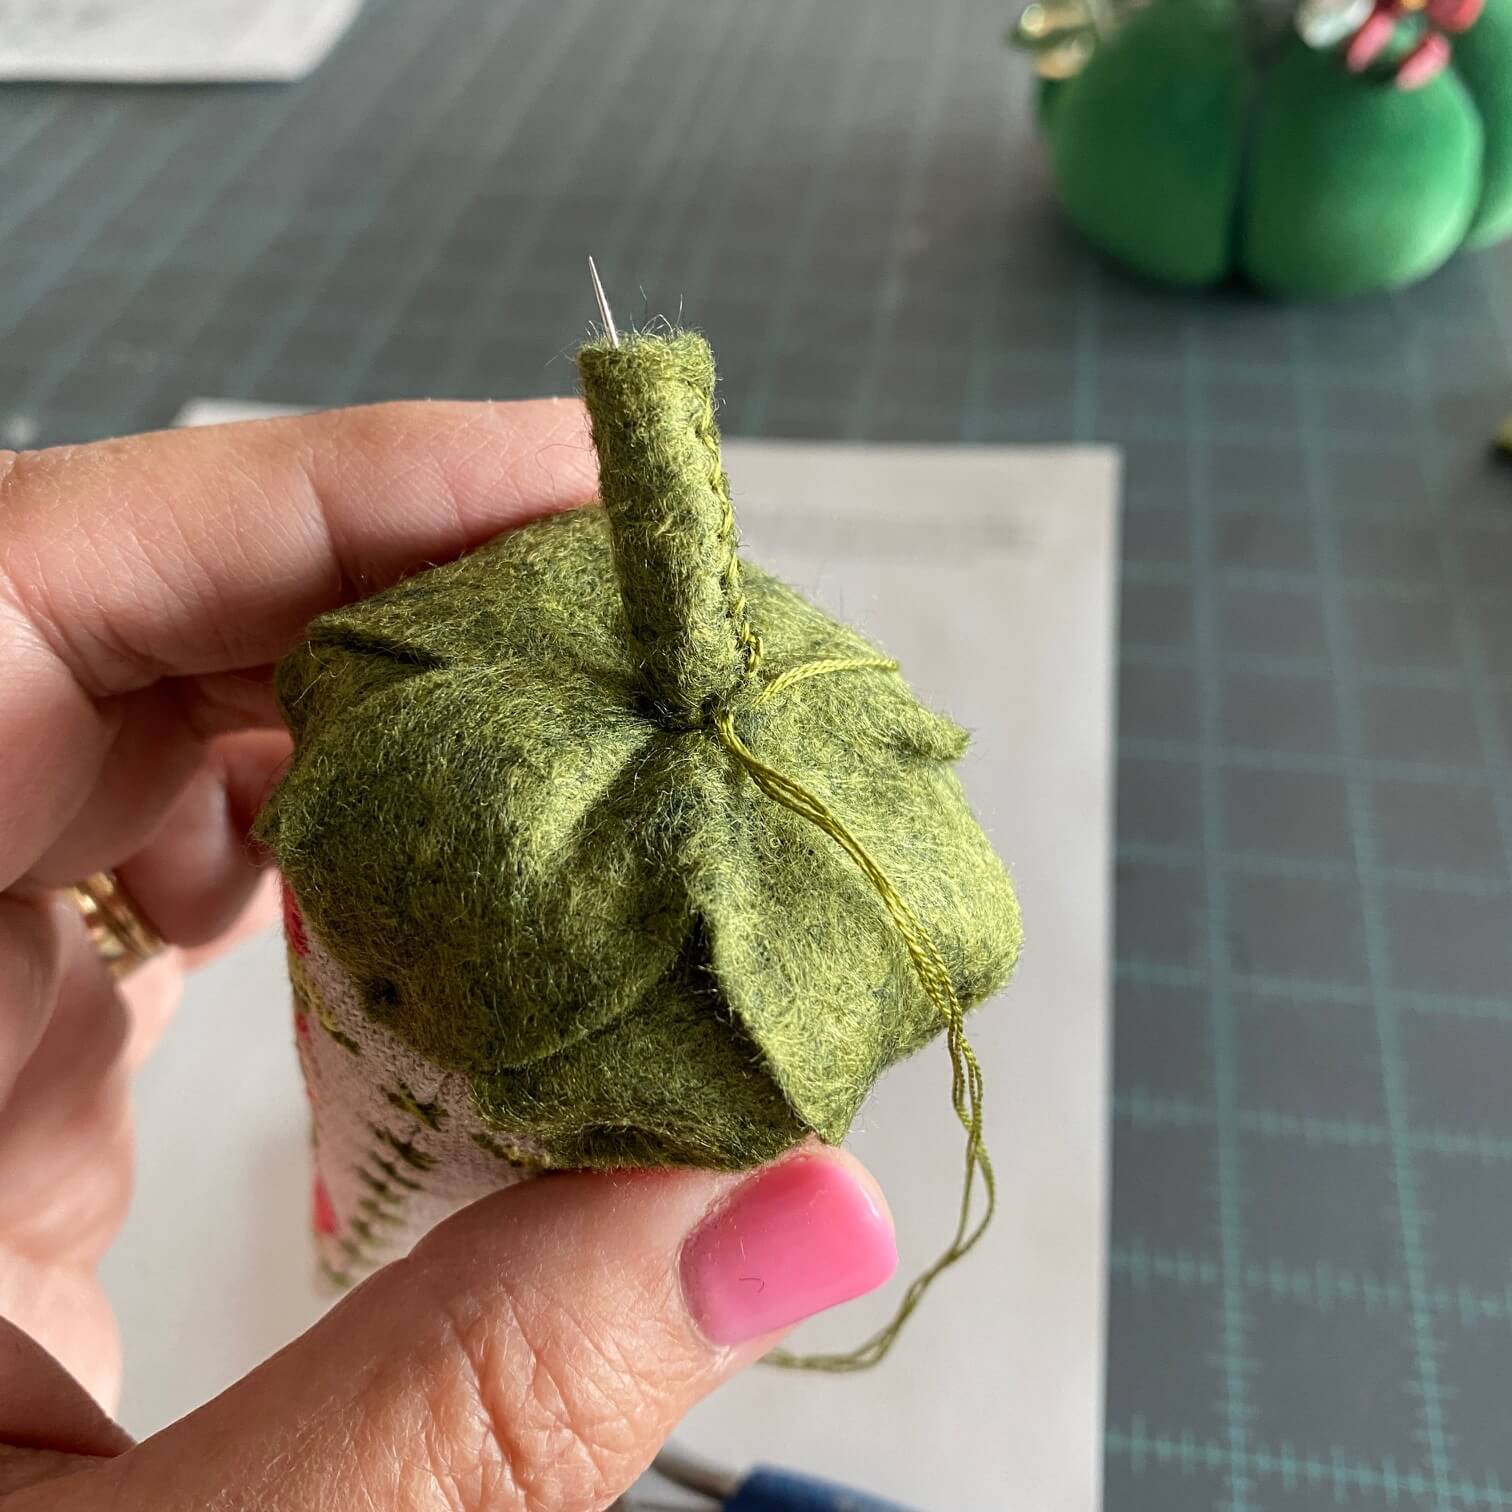
After the stem is secure, run the needle up through the center of the stem.
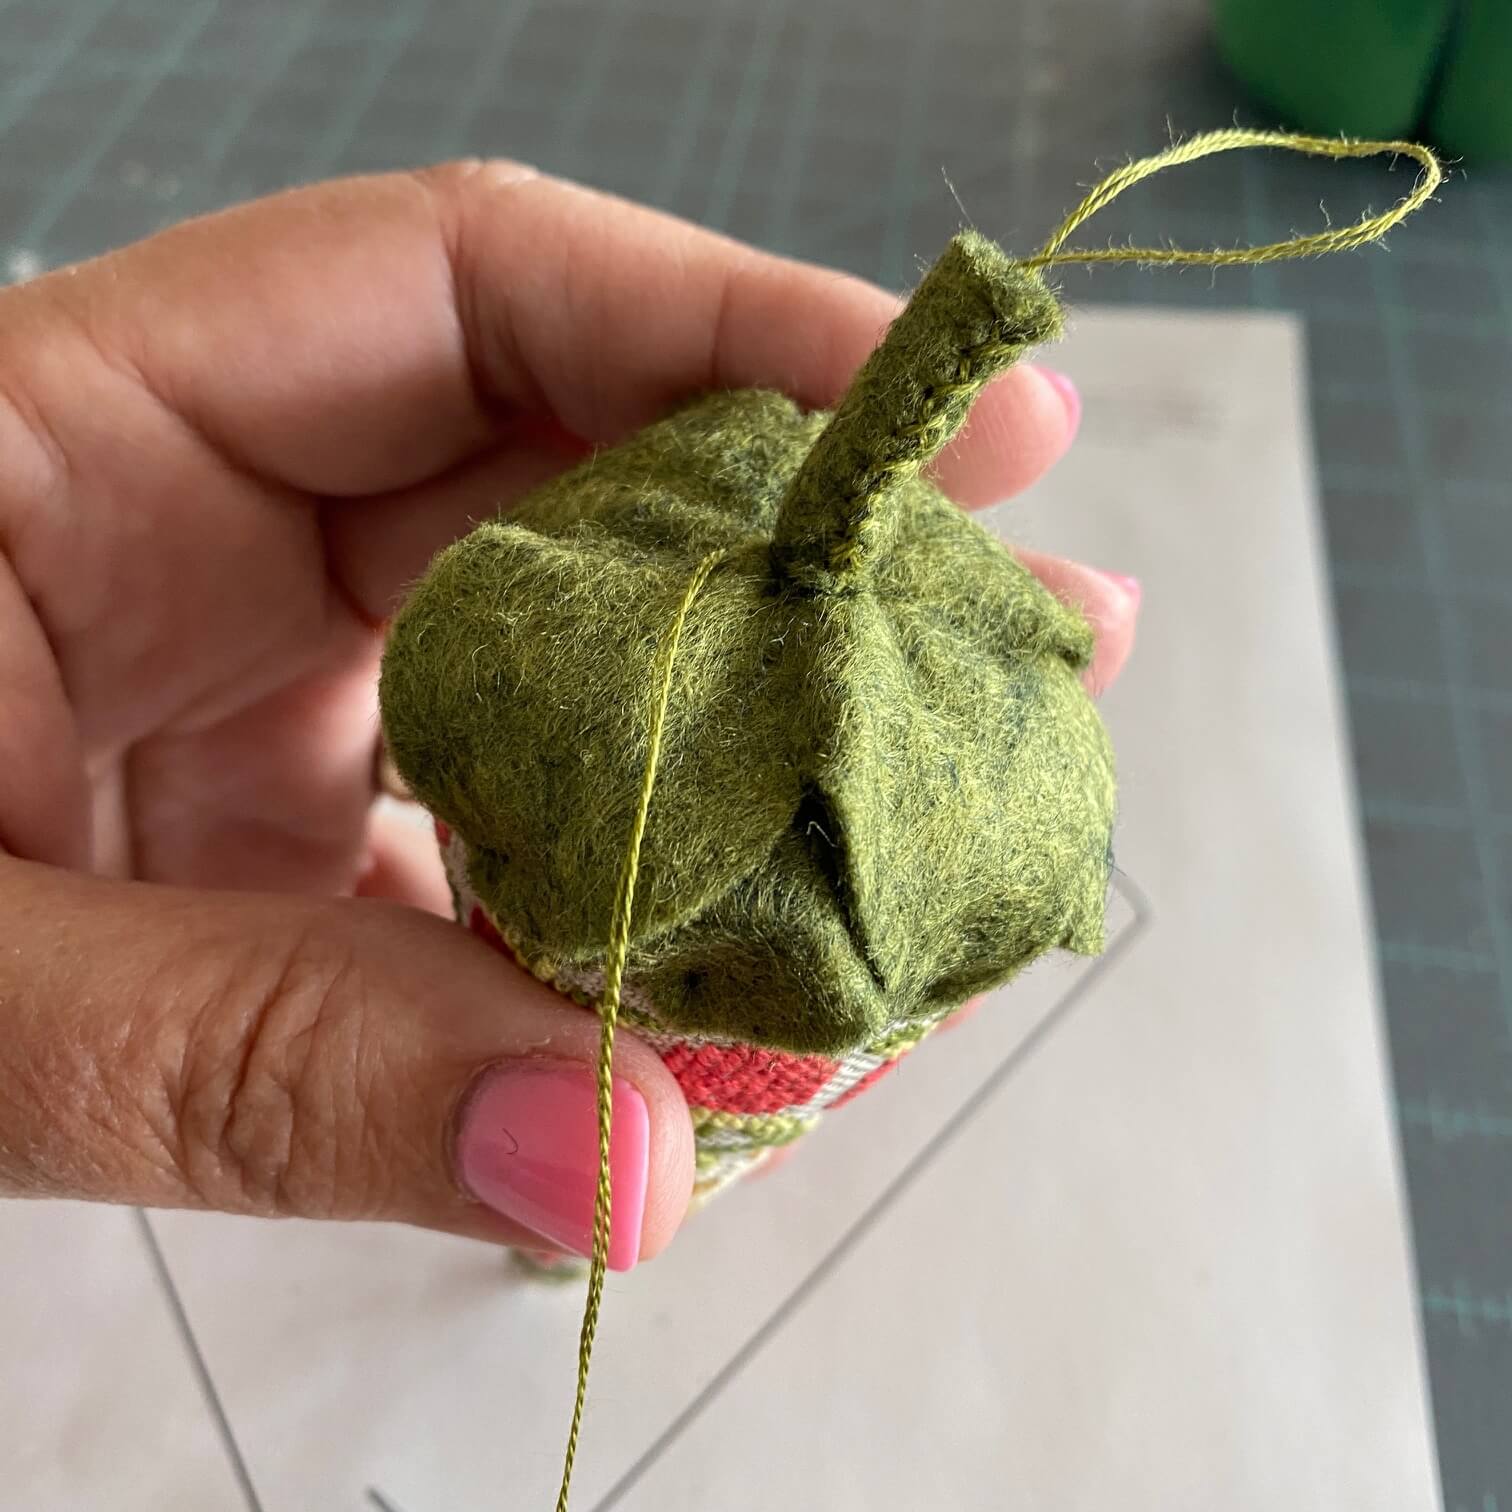
Bring your needle back down through the stem (not in the same hole/path) & through the woolfelt at the base of the stem. I pulled tightly on the thread to make sure everything was secure. Make a knot through the cap at the base of the stem. Trim.
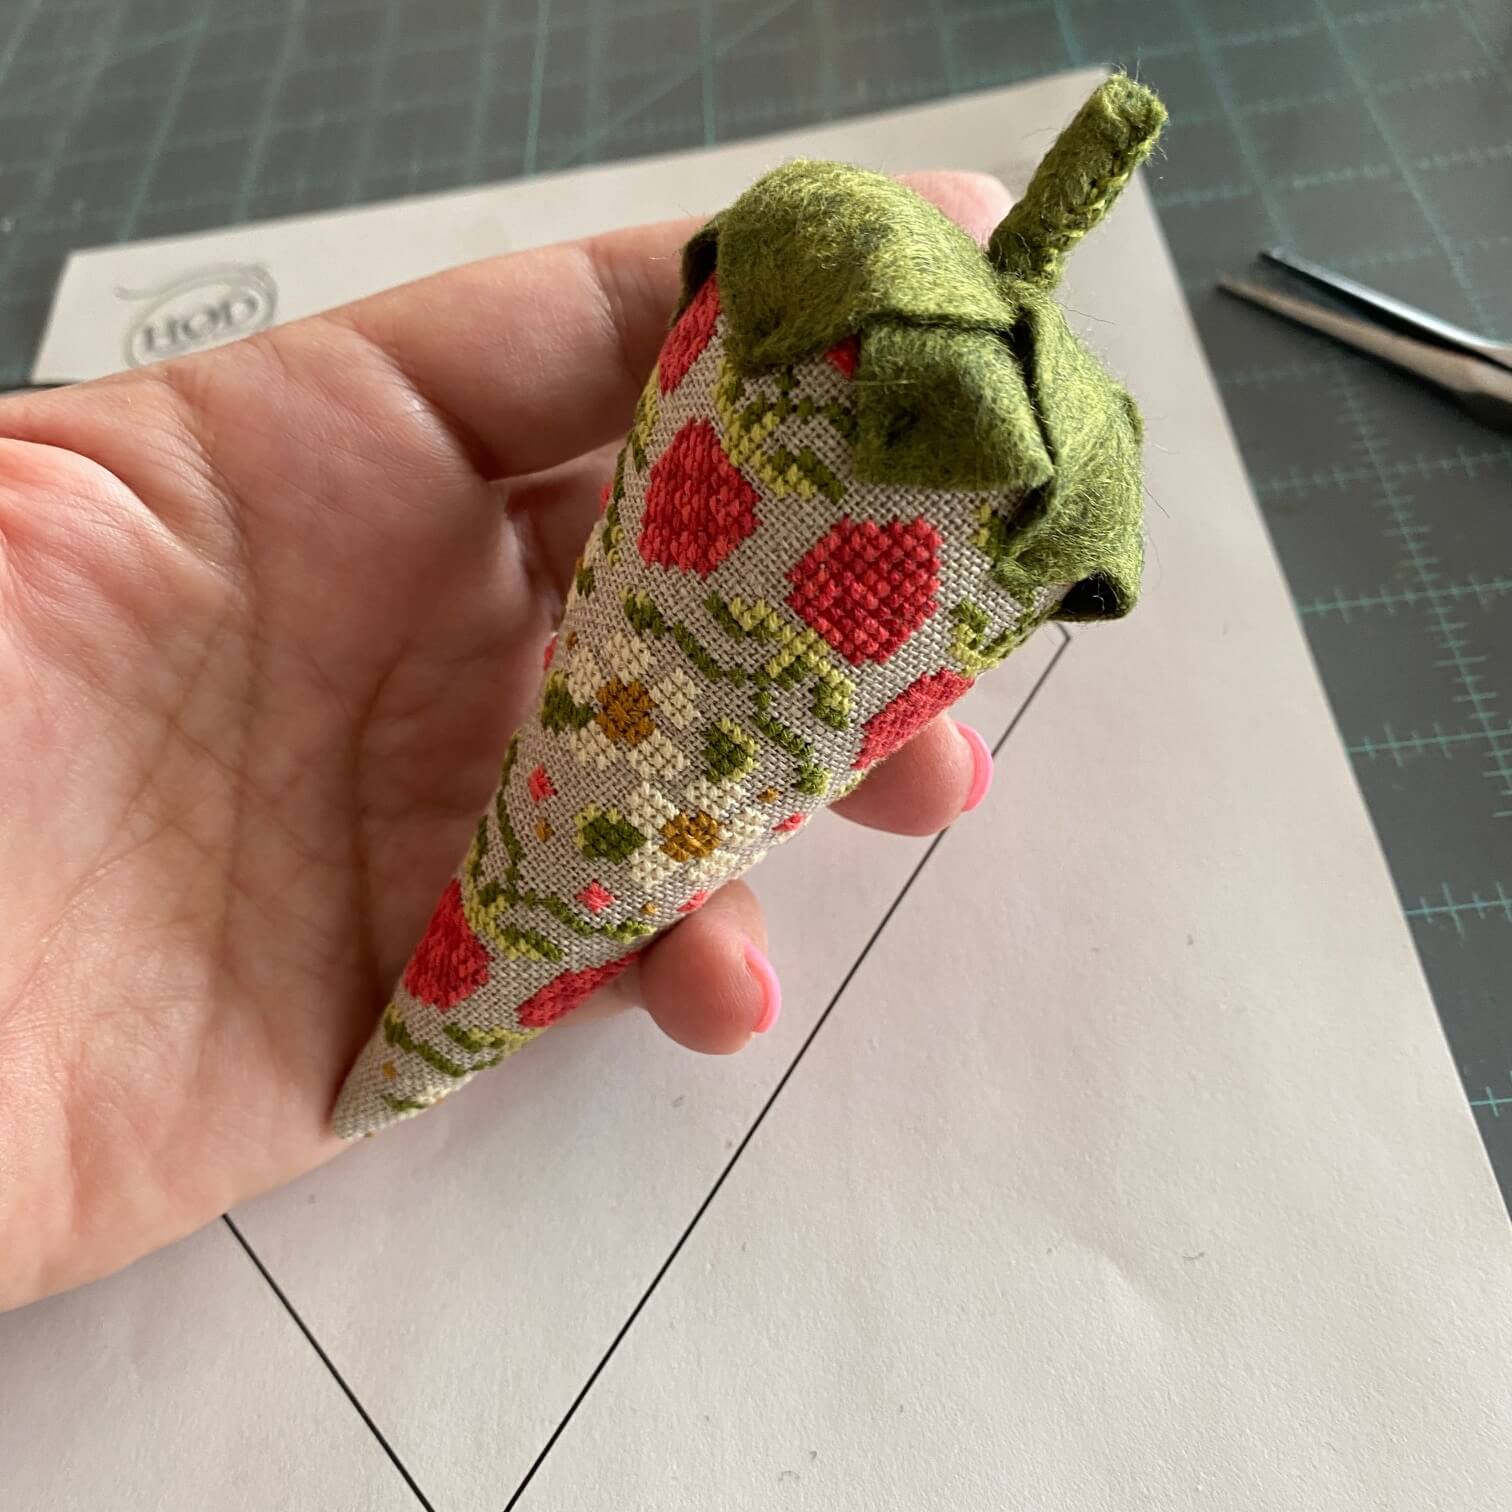
I pulled my thread throughout the whole process to tighten the woolfelt. It help to give some movement to the leaves.
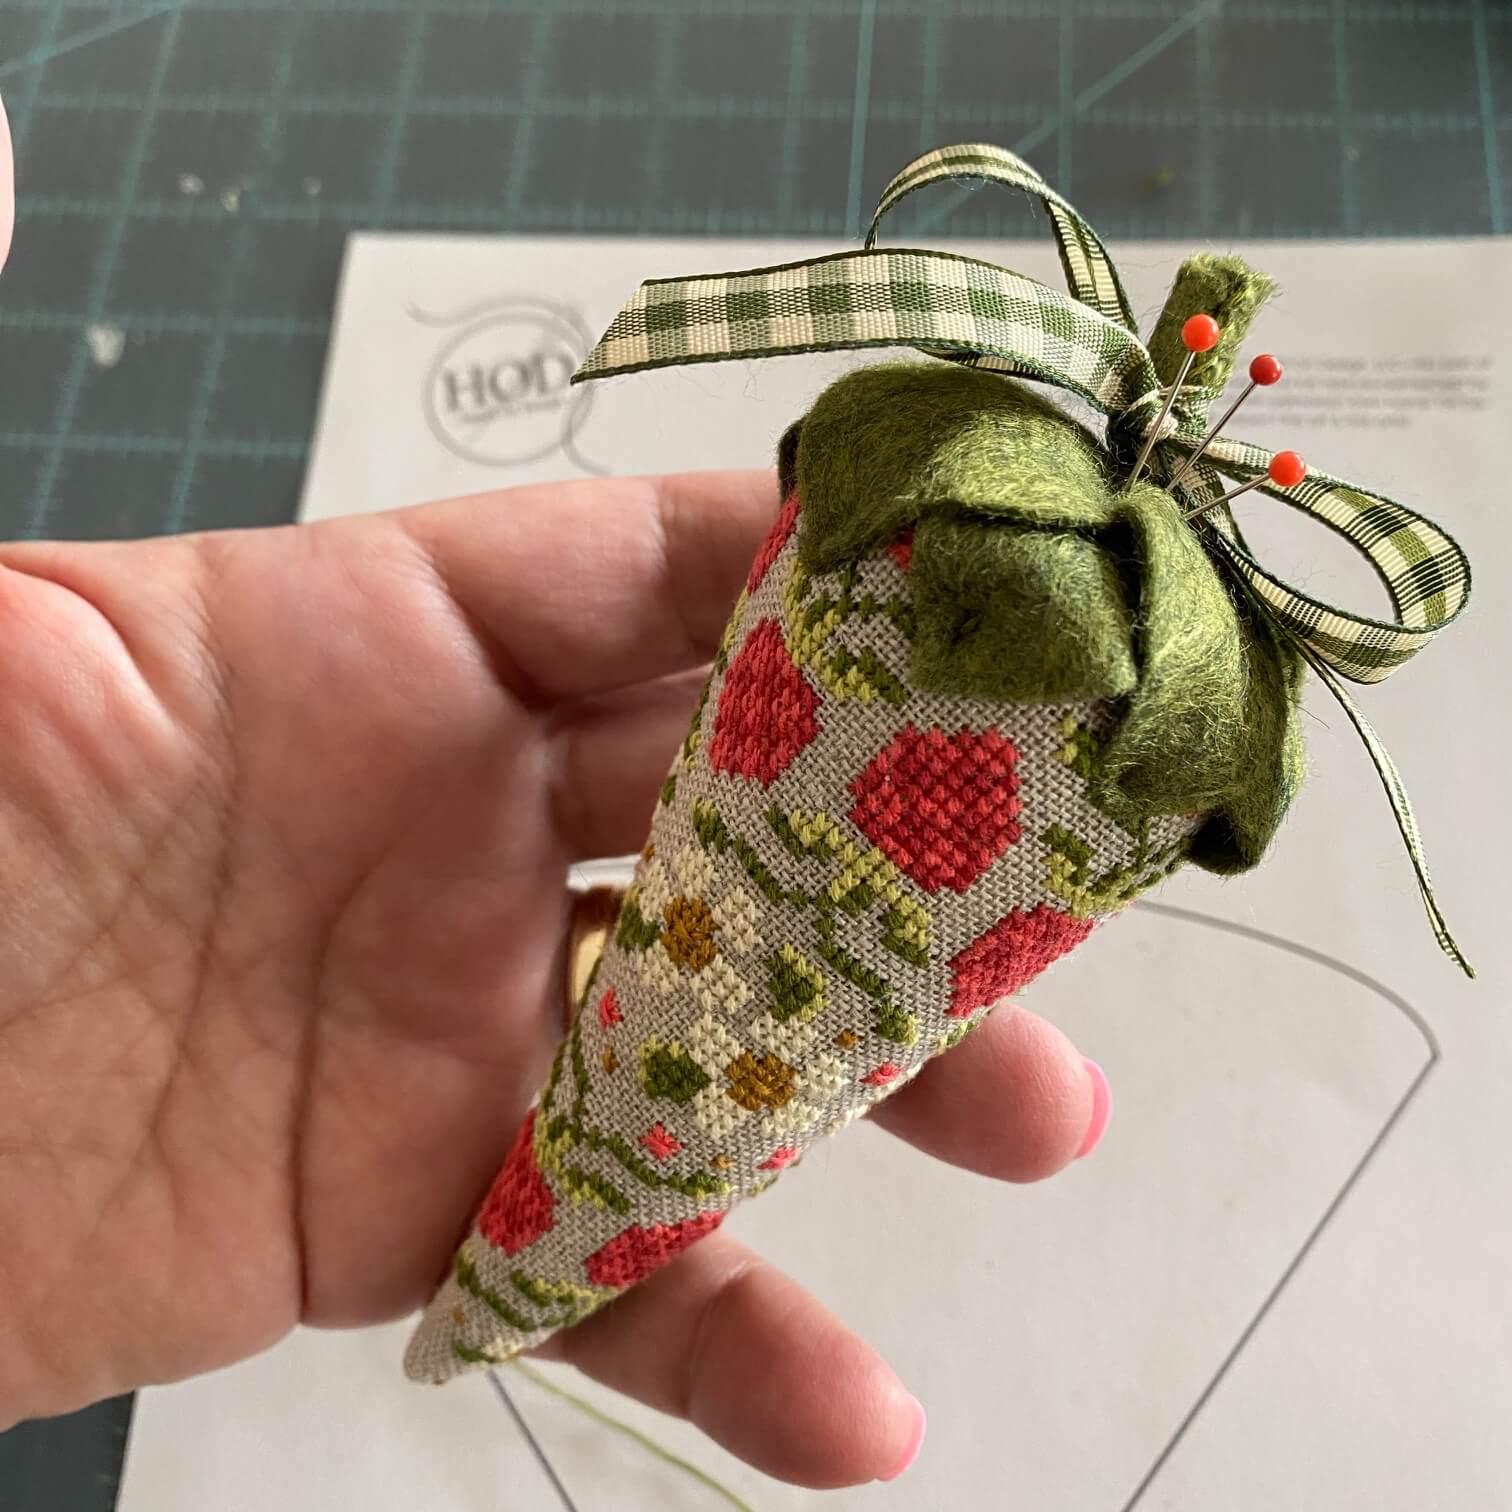
Final steps – add a pretty bow & some pins! Find a cute little bowl or shelf to display your berry.
As always, if you use my tutorial to finish your strawberry, please mention my tutorial & blogpost.
Cathy
remember to #handsondesign when you post so I can see what you’re doing!


Leave a Reply