• My Account
  • Lost Password
  • About
  • Wholesale
  • Store Locator
  • Classes
  • Events
  • OOPSIE

Hands On Design

Needlework and Cross Stitch Designs by Cathy Habermann

  • Shop
  • Tutorials
  • Floss Tube
  • Blog
  • Contact
  • 0 items$0.00

Block Party Tutorial

May 26, 2016 By Cathy Habermann 7 Comments

Welcome to the Block Party … Tutorial that is! I’ve included step by step instructions in each chart, but sometimes we visual learners need picture cues! No problem. Somehow I managed to remember to take photos during the finishing process of HOME!

The full tutorial is shown below but you can also download a PDF here.

Enjoy, Cathy
Block-Party-Tutorial-Pic-1

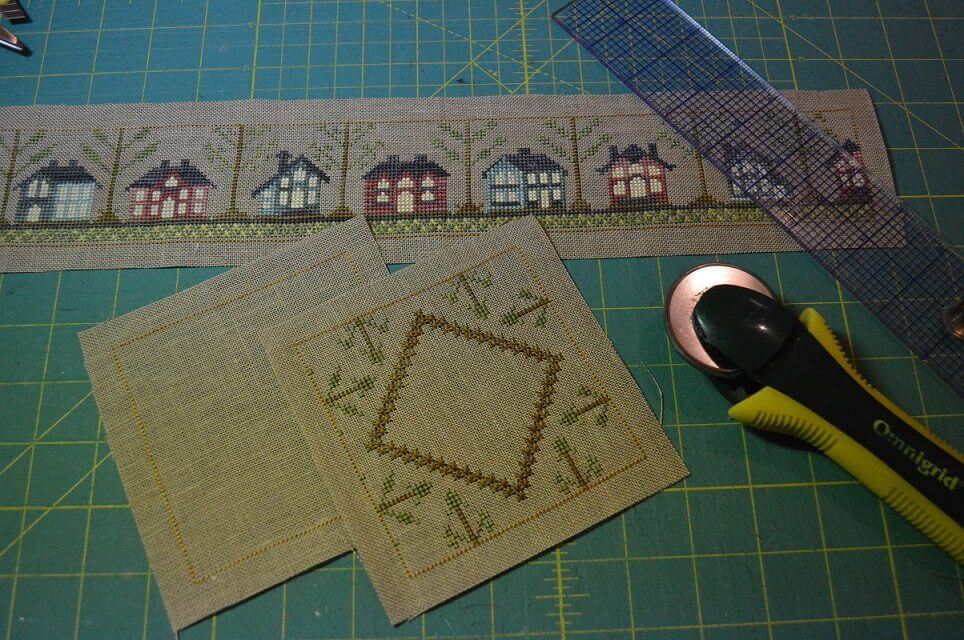
Press & trim completed stitching 5/8” away from the backstitching on all 3 block pieces (top, bottom & side panel). Be sure to check that you stitched the correct number of backstitches (top & bottom are 58×58 and side panel is 232 stitches wide!
Block-Party-Tutorial-Pic-2

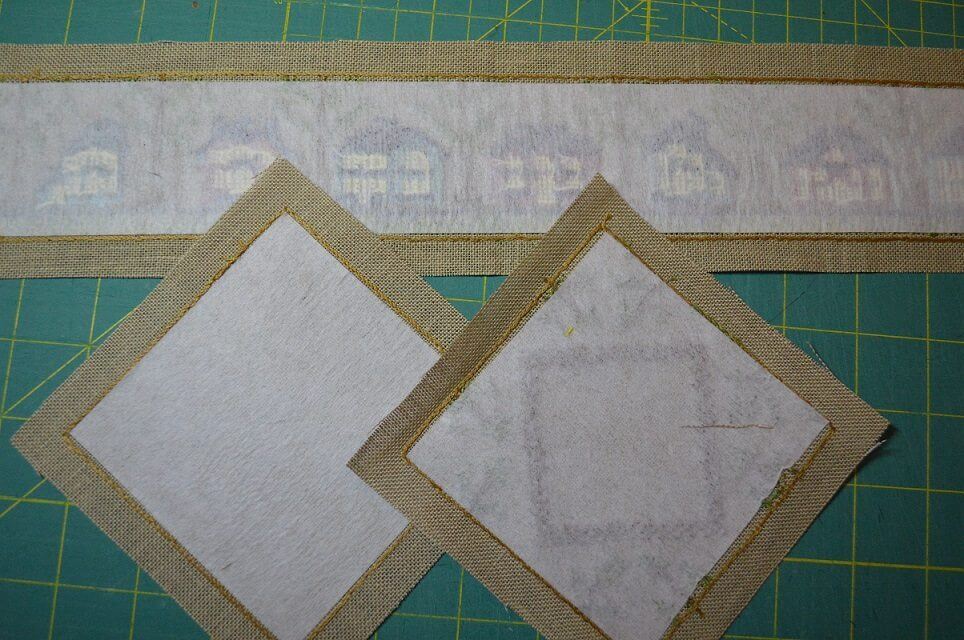
Cut & apply lightweight fusible web to the 3 pieces. It should fit just inside the backstitch line on the back side of your stitching. Follow manufacturer’s instructions.
Block-Party-Tutorial-Pic-3

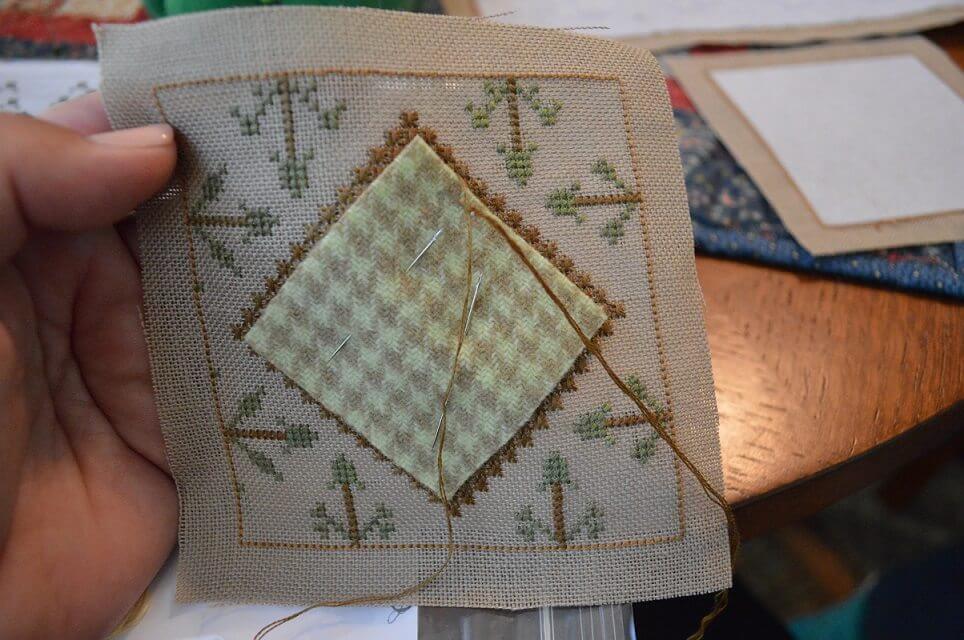
Trim the WDW wool to fit on the Smyrna Cross diamond on the top panel. (approx. 2 1/4”) It will cover some of the Smyrna cross rows (I didn’t want to have any linen showing between the wool & the stitching)
Block-Party-Tutorial-Pic-4

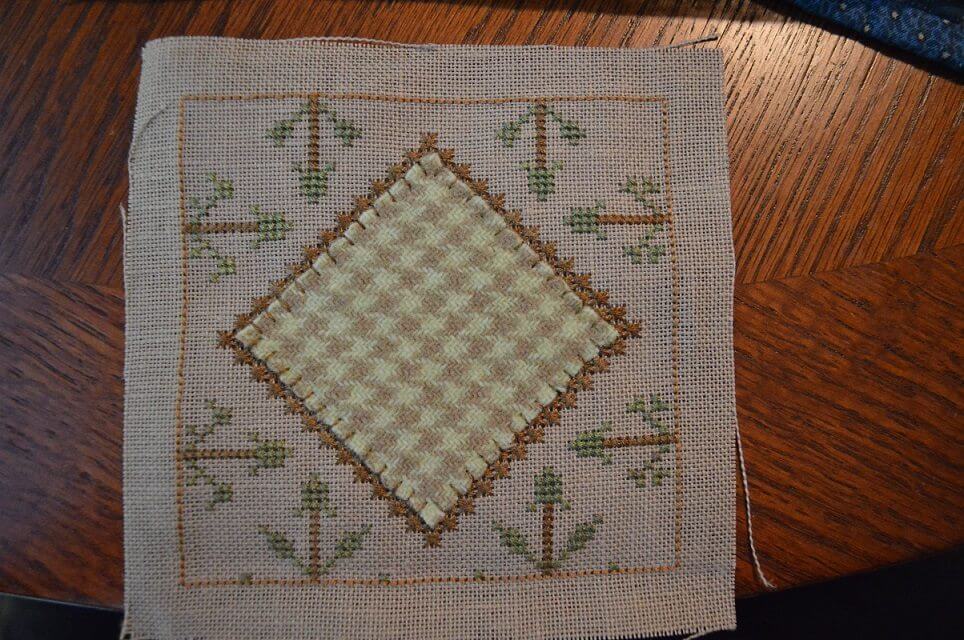
Attach wool with a blanket stitch or applique stitch.
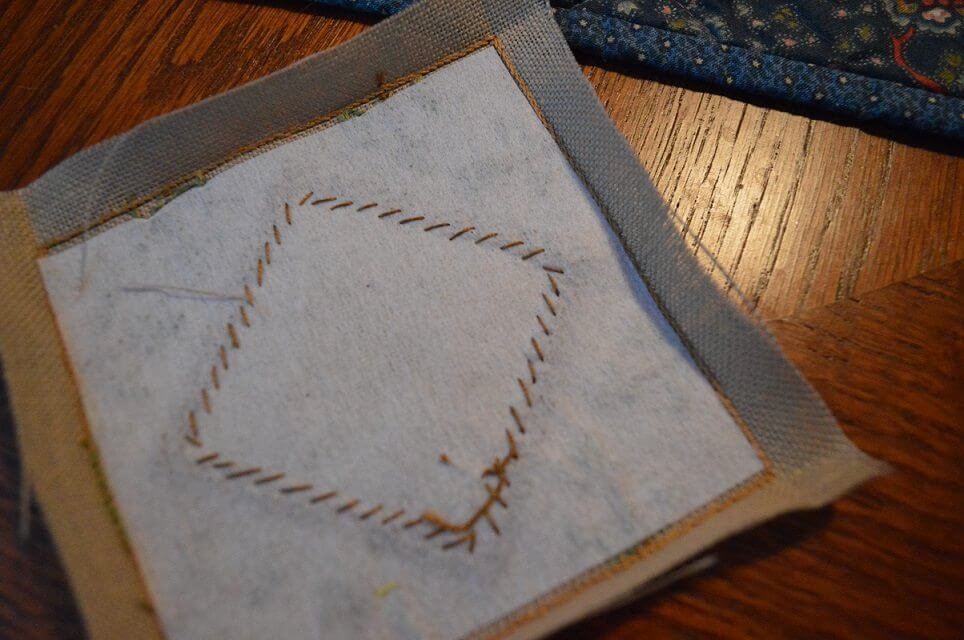
Block-Party-Tutorial-Pic-5

Finger press along backstitch line for all 3 pieces.
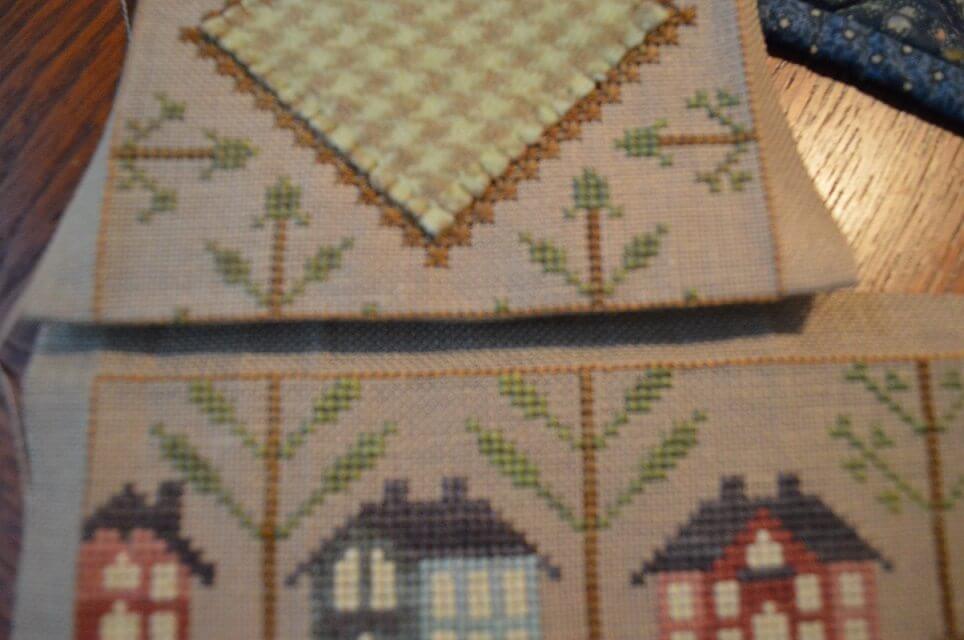
Block-Party-Tutorial-Pic-6

Be sure that you design that flows from the side panel to the top panel matches up
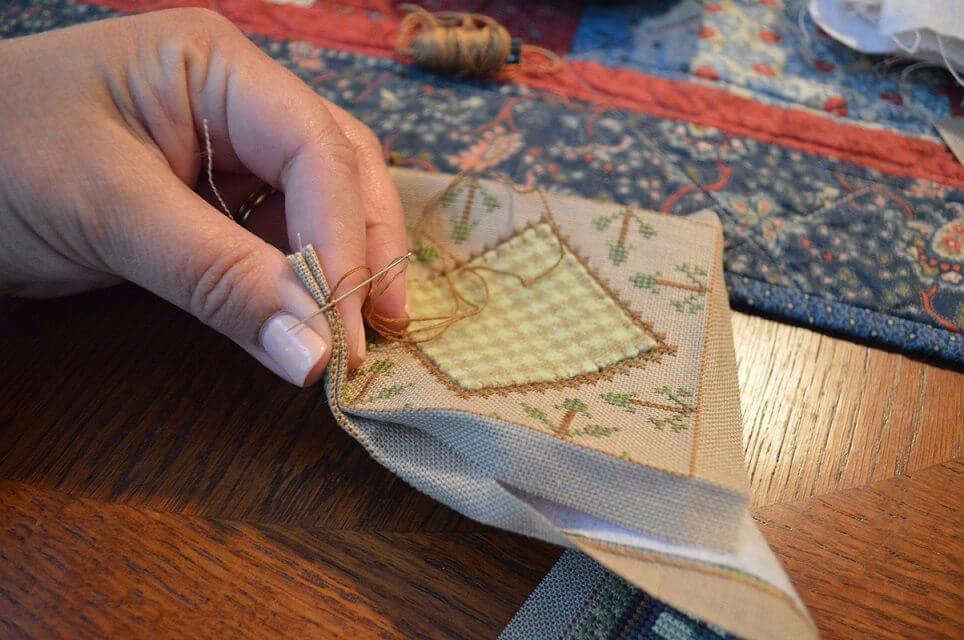
Block-Party-Tutorial-Pic-7

Match up the lower left corner of the block top & the upper left corner of the side panel (marked with an ‘A’ on the chart). Lace the top & side panel through matched backstitches with 2-ply of matching floss. Needle should run under the backstitches & not pierce the linen.
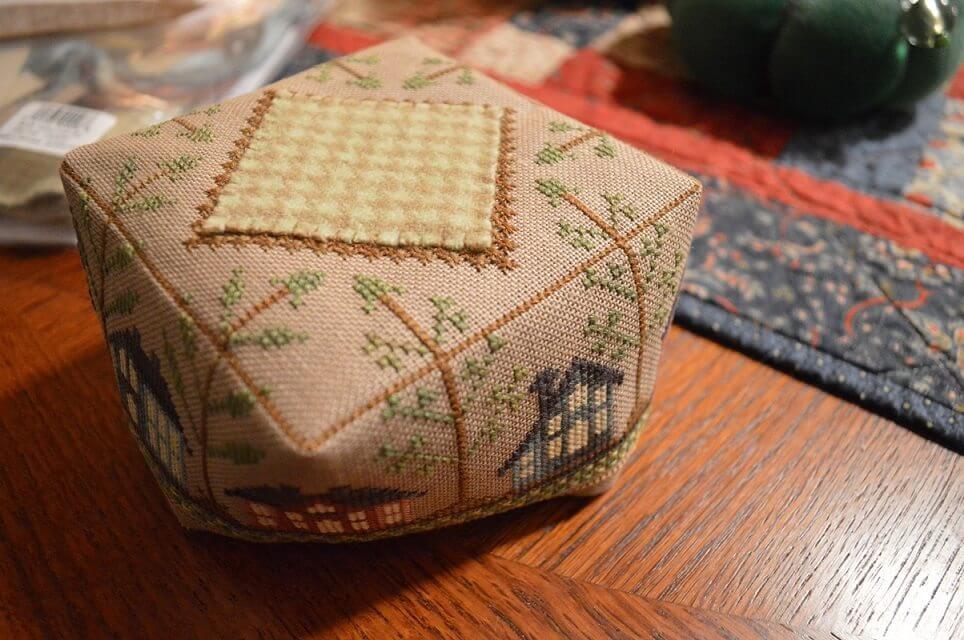
Block-Party-Tutorial-Pic-8

Continue lacing all the way around the top of the square & down the seam in the side panel.
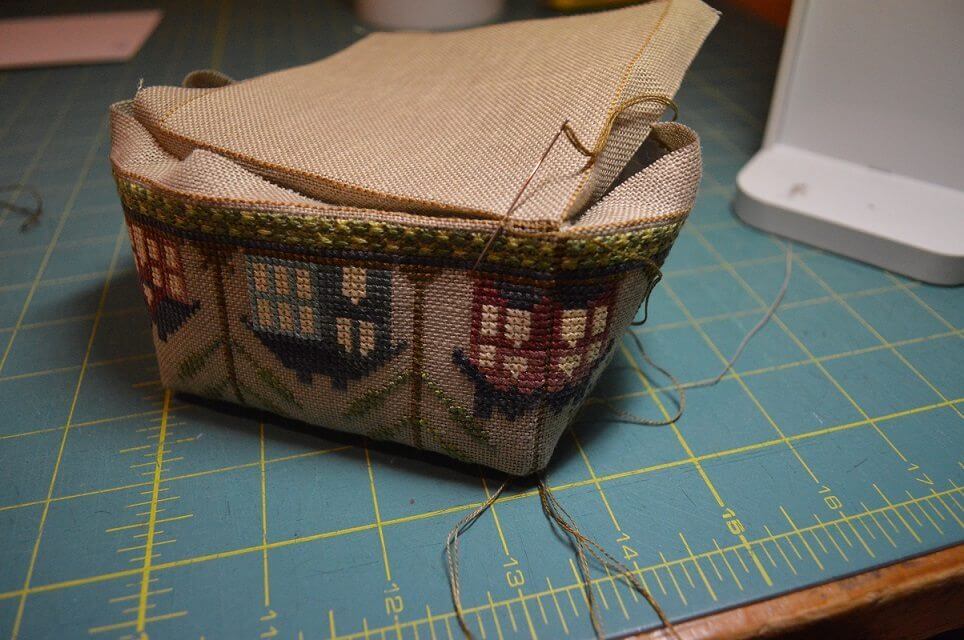
Block-Party-Tutorial-Pic-9

Attach the bottom panel of the block in a similar manner, starting at the corner. I start at the corner with the seam as it is easier to end tie-offs & knots here.
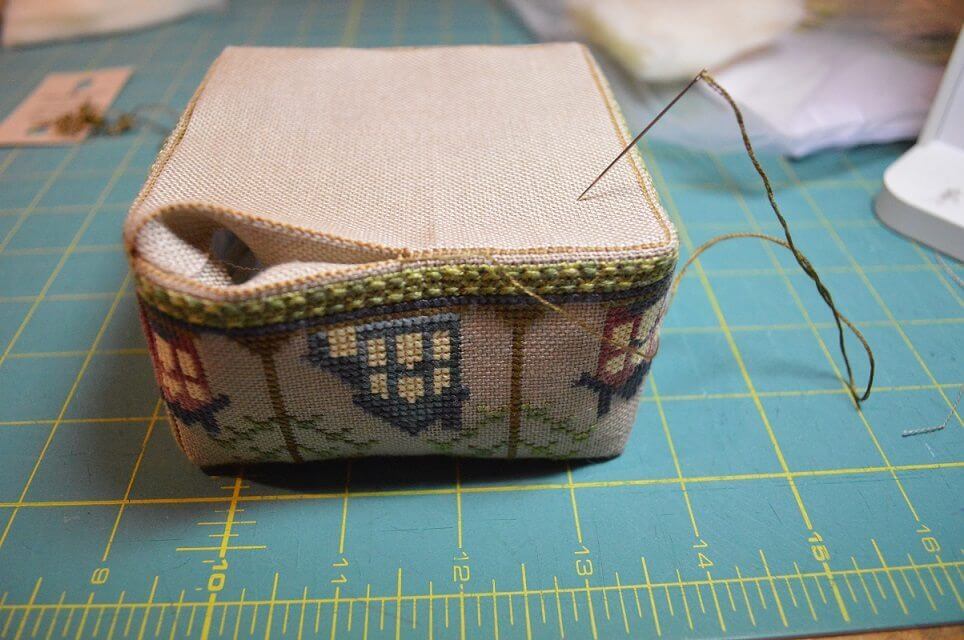
Block-Party-Tutorial-Pic-10

Lace all the way around & before closing up, stuff with wool or fiberfill. Be sure to fill your corners first & shape your block as you go.

I prefer wool roving as it holds it shape well & is good for you needles!


Don’t forget to embellish your Block Party pincushion with it’s very own Just Another Button Company 4-letter word pinset! Be sure to ask at your shop or visit the website: www.justanotherbuttoncompany.com


Block Party Finishing Tutorial©2015 Hands On Design & Cathy Habermann. Permission is granted for Shops & Stitchers to print & distribute for classes and personal use. Reposting is permitted with proper reference to http://www.handsondesign.biz These instructions are complimentary & not for resale. Images are the property of Hands On Design & Cathy Habermann.


Filed Under: Tutorials

Like this Post? Subscribe to My Newsletter!

In Print
Flat Finish Tutorial

Comments

  1. Dorothy Brown says

    August 2, 2019 at 2:40 pm

    I don’t know how mUch wool roving to order. Approximately how many ounces will the block (meow) take?

    Reply
    • Cathy Habermann says

      August 14, 2019 at 1:26 pm

      Dorothy – it depends on how firm you like to stuff your pincushions. I usually order at least a pound at a time to have some extra on hand – I stuff everything with it! Cathy

      Reply
  2. Anita Bloom says

    September 28, 2022 at 9:52 pm

    Where do you buy your wool roving? Do you fluff it like Polyester fiberfill?

    Thank you!
    Anita

    Reply
    • Cathy Habermann says

      October 28, 2022 at 1:19 pm

      I purchased wool roving from Etsy -also Benzie Design for small amounts. Yes, you fluff it just like fiberfill!

      Reply
  3. Kathy Minnaert says

    December 29, 2022 at 10:58 pm

    Thank you so much for sharing this tutorial. I just finished the snow block party. This was my first block and i was nervous but your tutorial made it easy! I just orDered several more of your block party designs and cant wait to finish them, they are so cute!!

    Reply
  4. Debbie fowers says

    January 23, 2023 at 5:53 pm

    how much of the suggested fabric is required to stitch the woof pattern?

    Reply
    • Cathy Habermann says

      January 24, 2023 at 1:30 pm

      I would purchase a fat quarter of the linen or aida. Make sure that if you use something different than what I suggest, that your fabric is ‘square’.

      Reply

Leave a Reply Cancel reply

Your email address will not be published. Required fields are marked *

Shop By Category

Newsletter Subscription

Search

New in the Shop

  • I'M NEW HERE! I'M NEW HERE! $12.00
  • THIS BEE'S GOT KNEES THIS BEE'S GOT KNEES $14.00
  • GOOSE ON THE LOOSE GOOSE ON THE LOOSE $12.00
  • SPRING ROLL SPRING ROLL $12.00

Hands On Design Instagoodness …

hands.on.design

color, design, finish - #stitchsomehappy

The Oh Tomato bellpull tutorial is finally live 🍅 The Oh Tomato bellpull tutorial is finally live 🍅

The tutorial is accessible with the private link inside the chart. 

Designs built on original art 🪡

#handsondesign #ohtomato #originalart #tomaytotomahto #stitchsomehappy
What. A. Day. Thank you to stitchers (from all o What. A. Day. 

Thank you to stitchers (from all over the world) for coming to my finishing class at the Spring Mingle. 

Nothing levels the playing field like watching the designer/teacher struggle with a tiny woolfelt ball 🤣 #youhadtobethere 

Shout out to team @lindystitches for another amazing virtual retreat - the party is NOT over - still so much fun to be had with tomorrow’s classes 

Designs built on original art 🪡

#handsondesign #dodragonsfly #amazingstudents #stitchsomehappy
Pre-stitch kits for 30 Acorns - my in-person class Pre-stitch kits for 30 Acorns - my in-person class at Acorns & Threads are outta’ here!!

They will ship to the shop and then to you!! 

There are just a few seats left in the 2nd session - check out acornsandthreads.com classes 🐿️ 

Designs built on original art 🪡

#handsondesign #acornsandthreads #finishingclass #portland #stitchsomehappy
My first #grwm video - class style!! Can’t wait t My first #grwm video - class style!!

Can’t wait to Mingle with you in class 🪡❤️

Class tickets can still be purchased- head to lindystitches.com to sign up for the Spring Mingle

Designs built on original art🪡

#handsondesign #dodragonsfly #springmingle #stitchsomehappy
Check your email (& spam folder too) - class instr Check your email (& spam folder too) - class instruction email was sent out late this afternoon.

If you didn’t receive it (lost it, deleted it, the dog ate it), please email bill@handsondesign.biz

Please don’t just leave a comment here or send me a DM - quickest way to receive assistance with this is to email Bill!

I can’t wait to see you on Saturday!!! 

Class tickets can still be purchased- head to lindystitches.com to sign up for the Spring Mingle

Designs built on original art🪡

#handsondesign #springmingle2026 #dodragonsfly #finishingclass #stitchsomehappy
Home Sweet Home - Coming Soon! Designs built on o Home Sweet Home - Coming Soon!

Designs built on original art🪡

#handsondesign #homesweethome #comfortstitching #newrelease #stitchsomehappy
Follow on Instagram

Helpful Links

  • My Account
  • Lost Password
  • About
  • Wholesale
  • Store Locator
  • Classes
  • Events
  • OOPSIE

FOLLOW US ON:

Facebook-Logo_For-Website Instagram-Logo_For-Website

Get My Newsletter

And be the first to know about new products, events, tutorials and more!

  • Email
  • Facebook
  • Instagram

Copyright © 2026 · Hands On Design

A Habermann Company · cathy@handsondesign.biz