Hey there! I have had such a great response to my complimentary design ‘Thank You’ & how I finished it, I thought that I would publish a little picture walk of the process! This isn’t a true finishing tutorial because, truth be told, I had a vision for the finish and quite frankly, I figured it out along the way!!
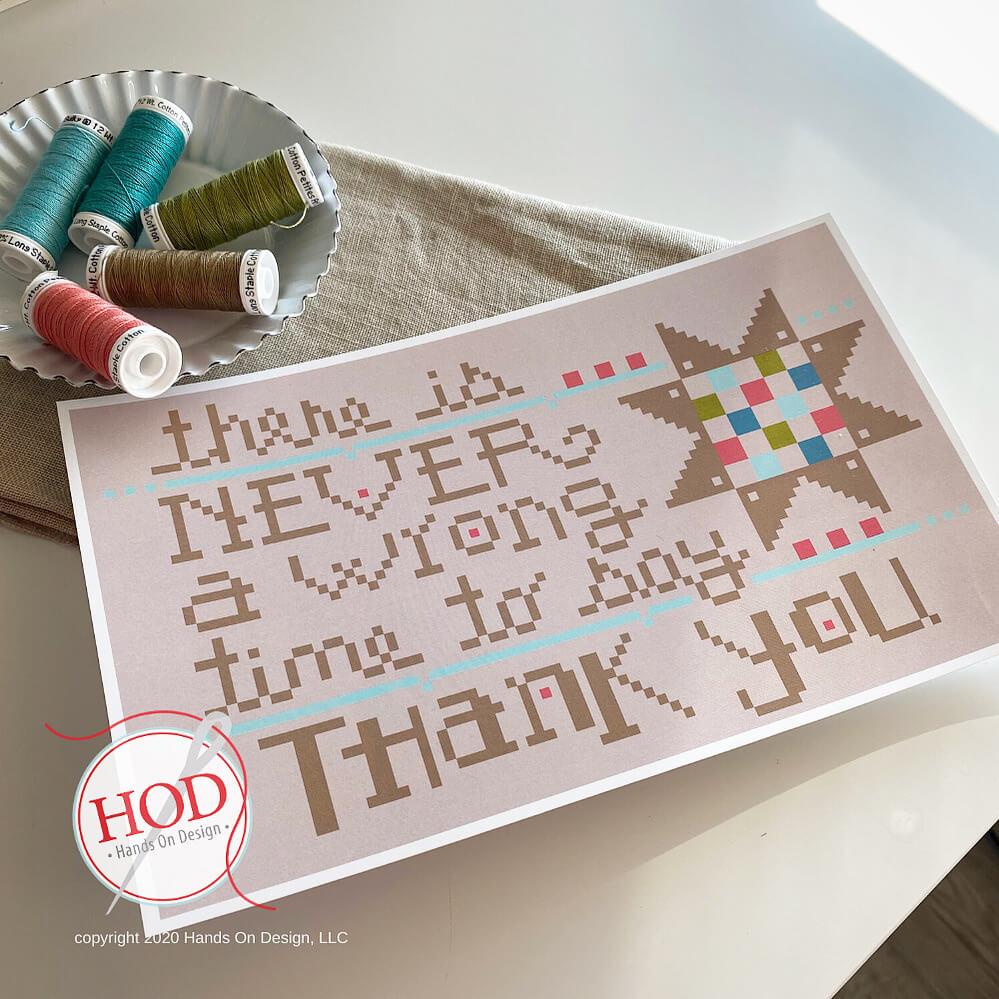
I published the design shortly after coming home from Nashville Needlework Market this past March – little did I know at the time that it would be a very appropriate design for the time! I talk about it here in a short 8 minute FlossTube! (Check out the blogpost just 2 posts before this one to print your copy of the chart!)
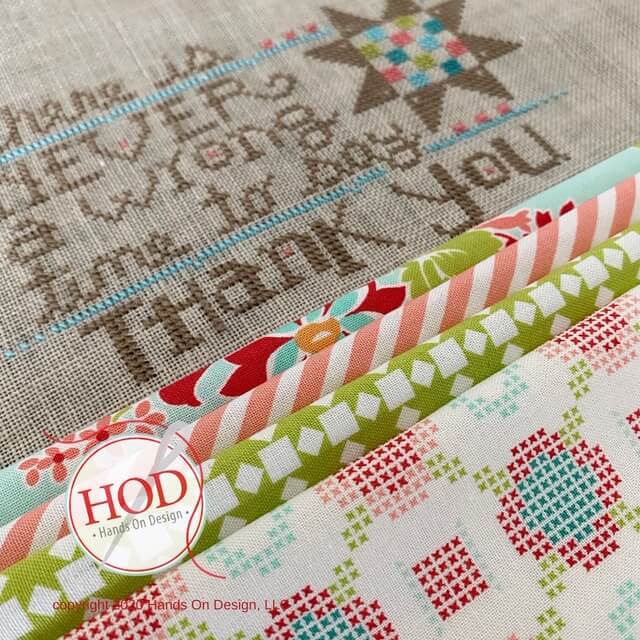
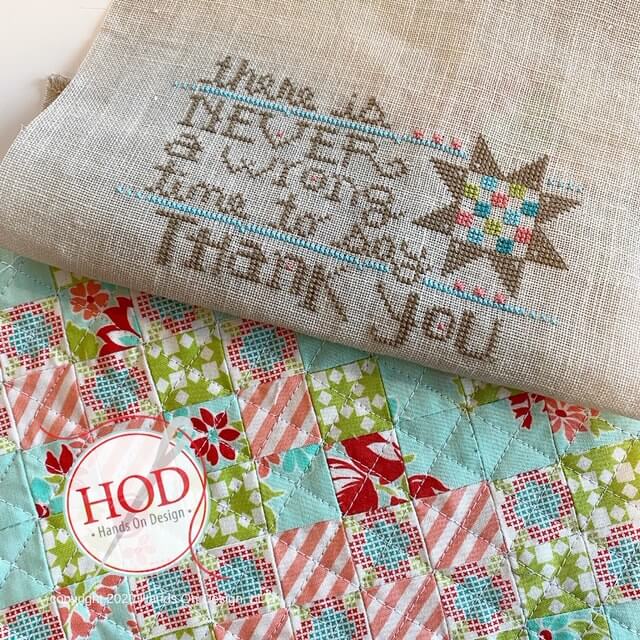
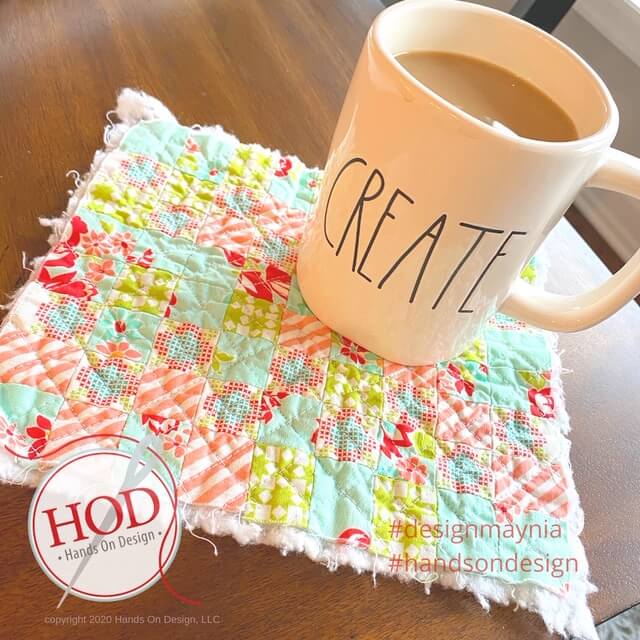
I chose the design colors & then was thrilled to see that I had the perfect fabric in my stash! This was a Layer Cake from the Bonnie & Camille line – Handmade. It came out a few years ago & you probably can tell why I was drawn to it!!
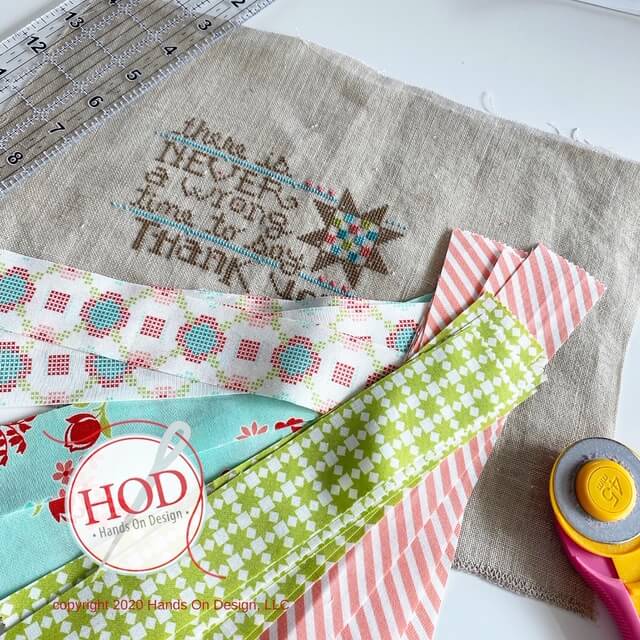
I chose my favorite prints from the layer cake. I wanted to end up with 1″ blocks so I cut my strips 1 1/2″. I fussy cut the fabric with the cross-stitches so that the motif would be centered in the final square.
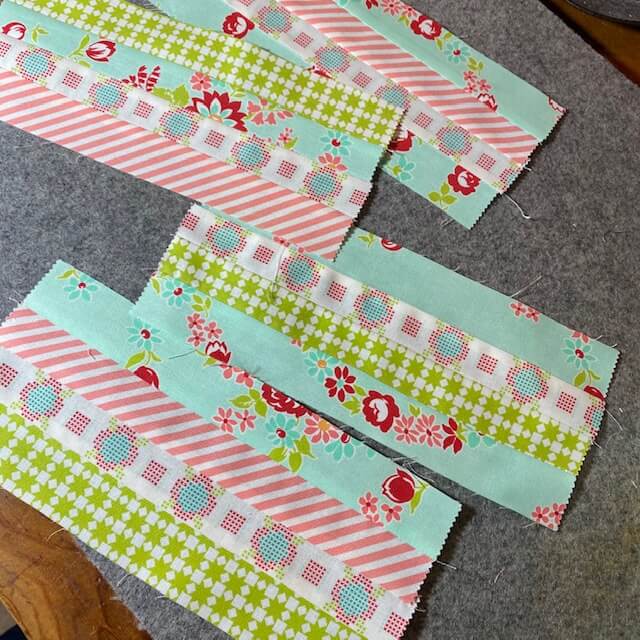
I organized my strips – trying not to be too matchy, matchy or worried about patterns being in any particular order (a very hard thing for me to do at times!!) I’m sure there are lovely videos about strip piecing if you want to know more about this method.
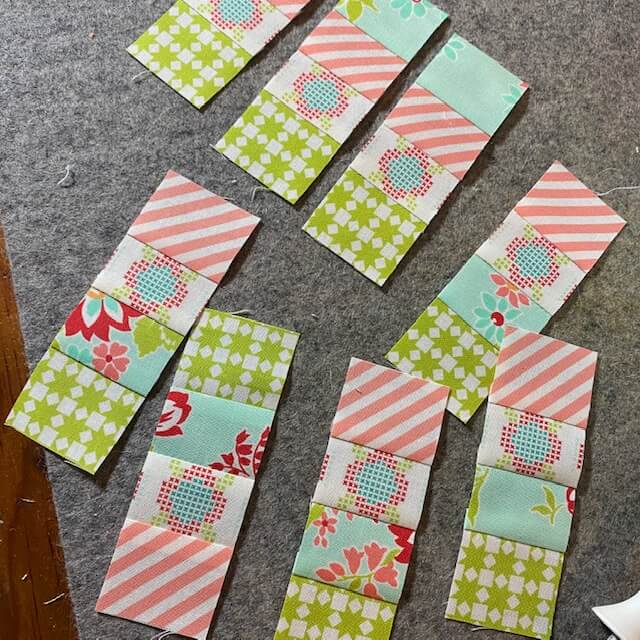 I subcut my strips again in 1 1/2″ widths – and again, I fussy cut the strips so that the cross-stitch motif was in the middle.
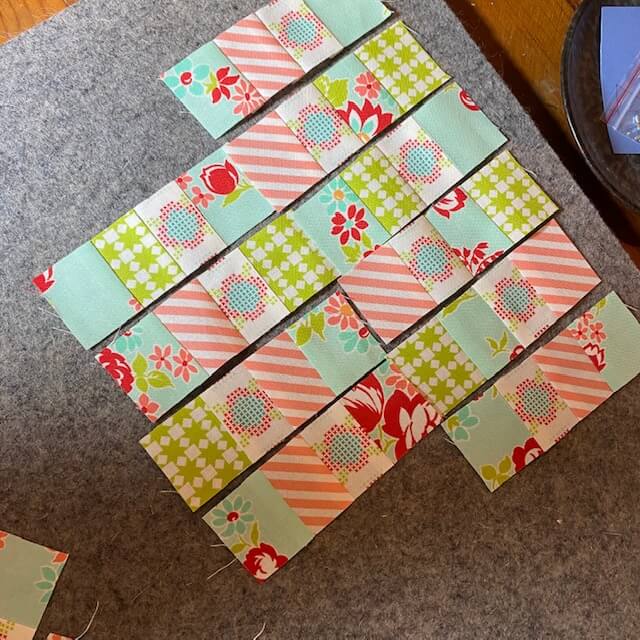
I layed out my sections into a pattern that pleased me…
and sewed them all together.
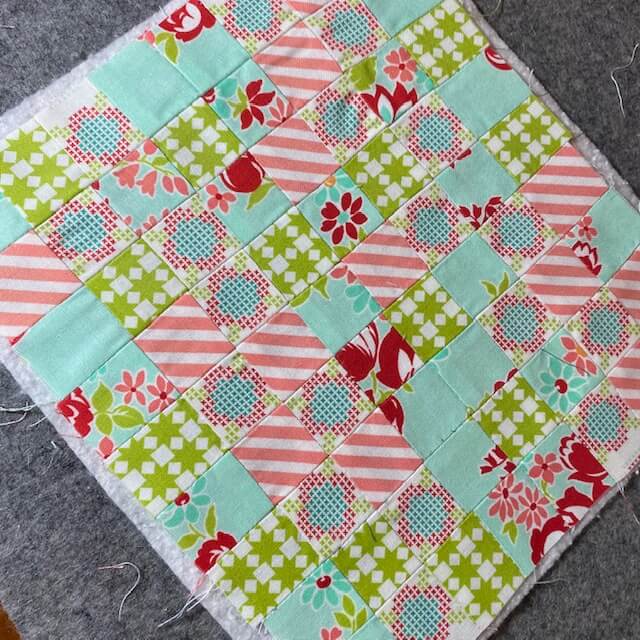
I placed the mini quilt top on batting and machine quilted in a cross-hatch pattern – I just eyeballed everything!
I took the quilted piece & threw it in the wash with some sheets & towels…then the dryer! (to give it that well-loved look!)
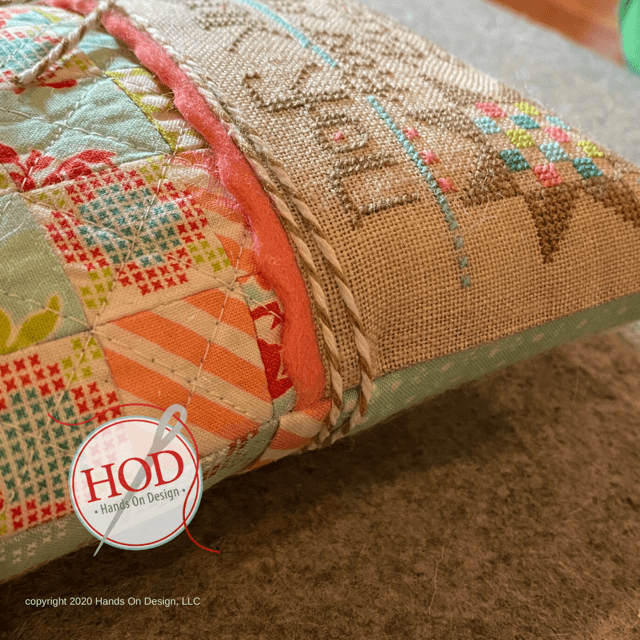
I cut a piece of coordinating woolfelt with a pinked rotary blade…I like attaching edging like this first for several reasons…I love layered design & finishing…simple, tasteful, elegant. It also gives me a seam line to follow when I’m attaching the quilted fabric!! (bonus!)
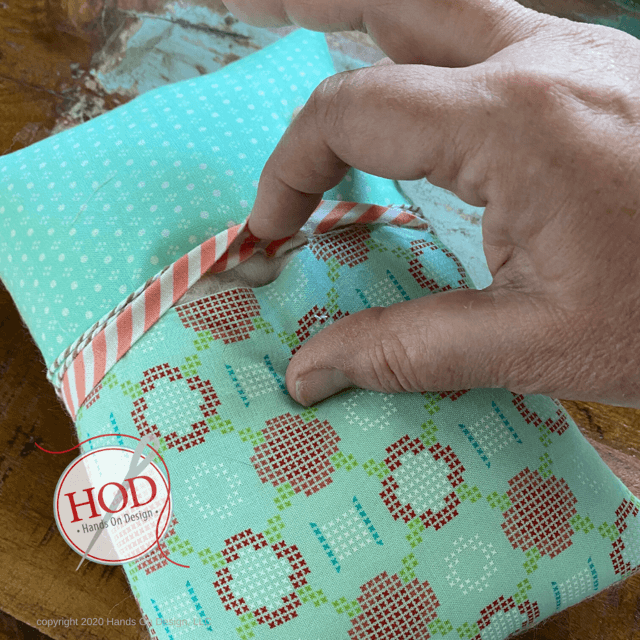
Necessity is the mother of…creativity!! I didn’t have a piece of fabric in the layer cake big enough for the whole back of the pillow…so I used 2 fabrics but first made a faux piped border between the 2 fabrics (it was a leftover strip from the front portion of the quilt). I left an opening for turning & stuffing the back of the pillow!
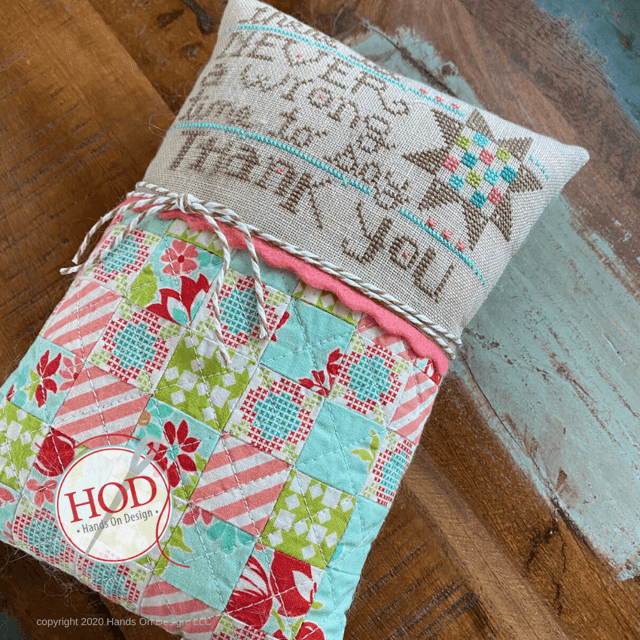
Of course I wrapped a bit of Baker’s Twine around the pillow!
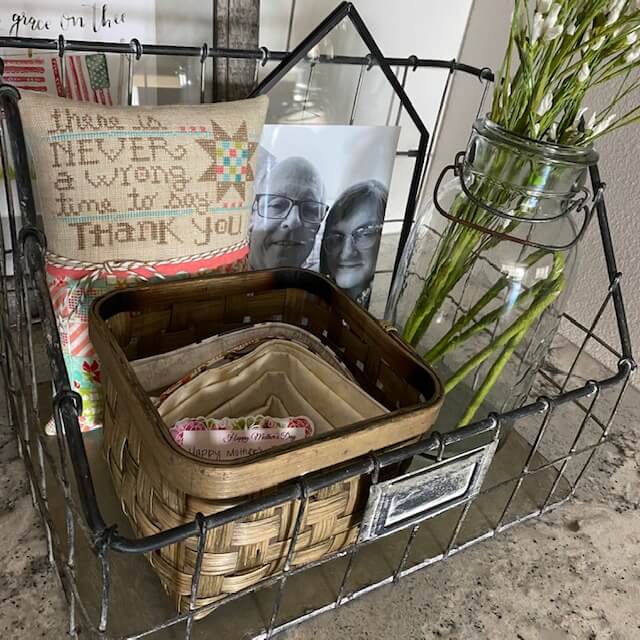 Now…why did I want the pillow to be so tall (probably about 8-9″)? Several reasons…I wanted to show off the quilty part AND I just knew that I was going to display it in this market basket that sits on a counter in my kitchen. I have a picture of me & #mrhod – one of the few I have around the house, with a little basket to hold goodies & essentials & one of my latest Ball jar acquisitions!
It’s a daily reminder to be thankful, greet my love & smile for my blessings.
I hoped that you enjoyed this picture walk with me,
Enjoy the Stitch
Cathy, Hands On Design


This Lovel Thank you so much ? Your work is FabUlous?
I love your pillow! Been trying to figure out how to finish mine.
Cathy: I am stitching on the design this weekend,
So enjoying it- thank you for the tutorial on finishing, gave me some good ideas!
See ya on the flip side ?
Lovely design,
Love the finish .
Thank you .
I really enjoy your youtubes! It has broAden my view for finishing and using your designs in my projects. Thanks a lot. Keep the designs coming! Ida-Jo
thank you for the lovely design. i know i will enjoy stitching it. your designs are so beautifully finished!
Hi Cathy,
Thank you for this lovey Stitch!! I think every home sHould have one. I cant wait to get started on it. Ill be making two. One for me and one for my sons home.
Thank you so much for this sweet and thoughtful stitch!
Thank you cathy for sharing Your cute, meaningful project. Your work is fantastic!
I love this design and the tutorial – thank you! Sidenote – I love your “create” coffee cup, too. Would love to know where to get one! 🙂
This is so generous of you Cathy and it’s just fabulous. Thank you, thank you! Hugs. 🩷