• My Account
  • Lost Password
  • About
  • Wholesale
  • Store Locator
  • Classes
  • Events
  • OOPSIE

Hands On Design

Needlework and Cross Stitch Designs by Cathy Habermann

  • Shop
  • Tutorials
  • Floss Tube
  • Blog
  • Contact
  •  

Finish It Friday – thanks to Cherished Stitches!

July 18, 2014 By Cathy Habermann 2 Comments

Thanks to the wonders of Social Media, I have gotten to know a lot of my fellow designers in the counted thread industry. Yes, we meet up at markets, but sometimes…there’s work to be done at those shows & you just can’t meet everyone! Fortunately, I get to know designers on a whole other level…I do a lot of “finishing” of their designs that customers send to me.

I have put together quite a few of these wonderful little pillows for customers & I went looking for Louise, designer of Cherished Stitches, on Facebook one day. After figuring out who each one of us was & that we have been to the same markets, but just never met, I asked her if it was OK if I featured her finishes on a finish it Friday.

Now, Louise gives great directions…perfect for a beginner. I don’t brag about many things in my life, but putting little pillows together…I’ve got that down. I’m showing you how I put these together – it may vary a bit from your style…I’m just showing you what I do. Take what you can from it & don’t be scared of finishing these little beauties!

Finish-it-Friday_Cherished-Stitches_Blog-Image_1

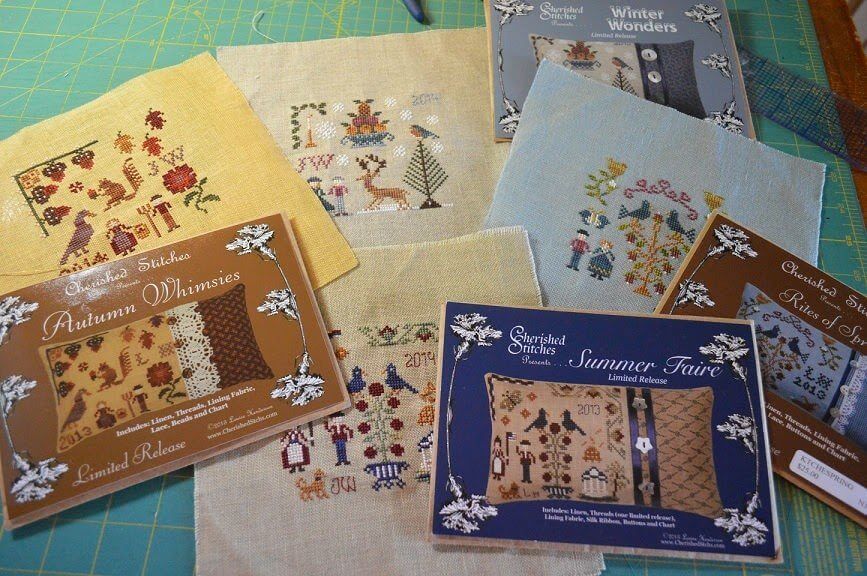
My customer sent me these little beauties, all stitched up, neatly pressed and ready to go.

Finish-it-Friday_Cherished-Stitches_Blog-Image_2

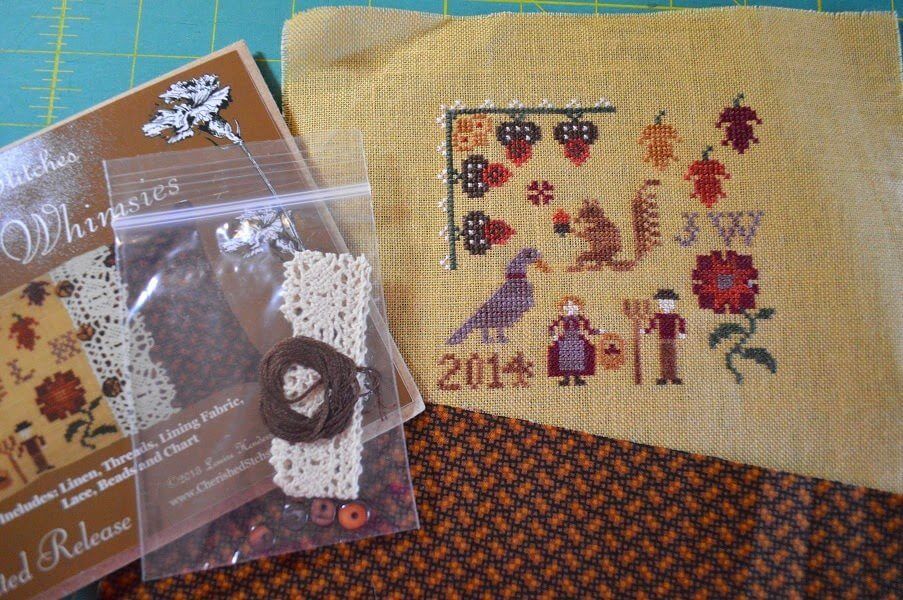
Louise does a great job with her kits – includes everything you need packaged up in these adorable envelopes.

Finish-it-Friday_Cherished-Stitches_Blog-Image_3

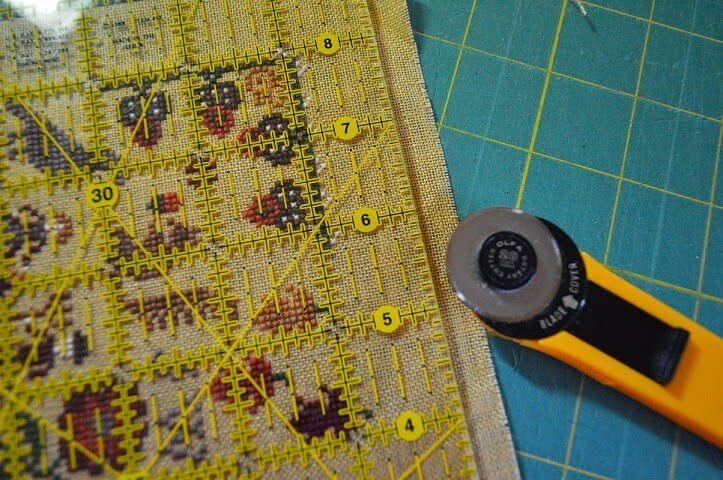
I trim the top, bottom, and left sides to 3/4″ away from stitching.

Finish-it-Friday_Cherished-Stitches_Blog-Image_4

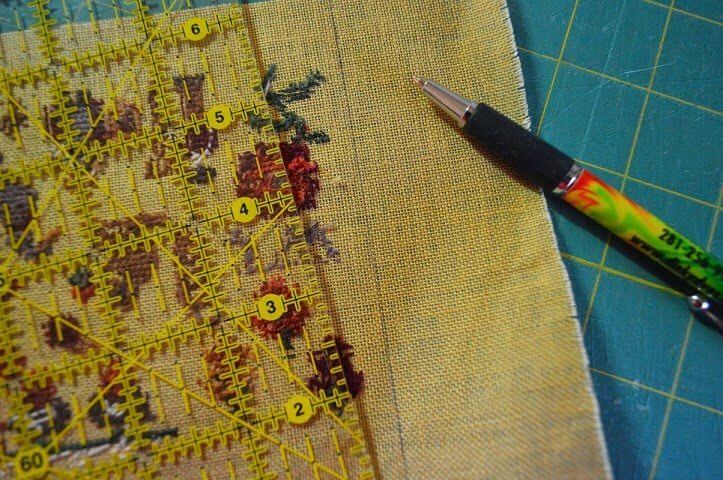
On the remaining side, I draw a sewing guideline on the back of the linen, 1/4″ away from the stitching. Match up the right side of the stitching to the right side of the cotton fabric, and sew along the guideline.

Finish-it-Friday_Cherished-Stitches_Blog-Image_5

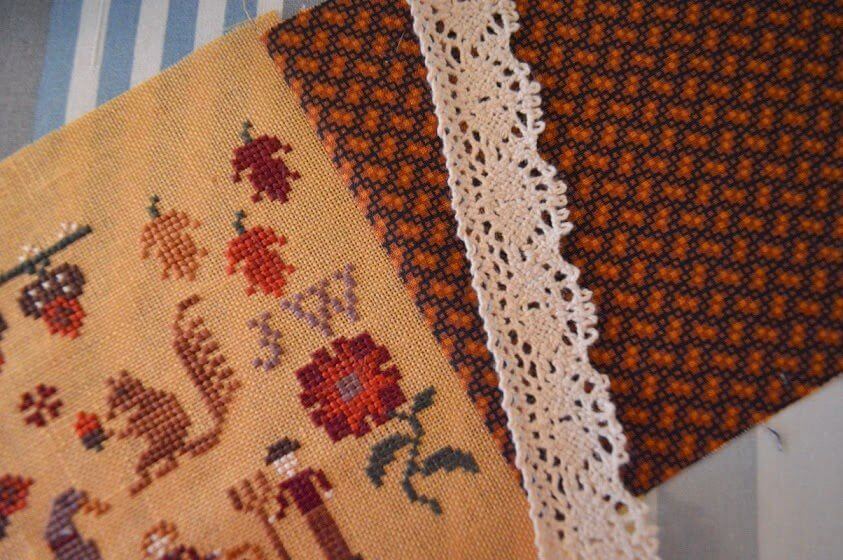
Trim the linen and cotton to 1/4″ away from sewing line & press to the cotton fabric side. Refer to the pictures provided for placement of the lace & buttons required for each design. Here I laid the lace across and sewed right through it with a neutral thread.

Finish-it-Friday_Cherished-Stitches_Blog-Image_6

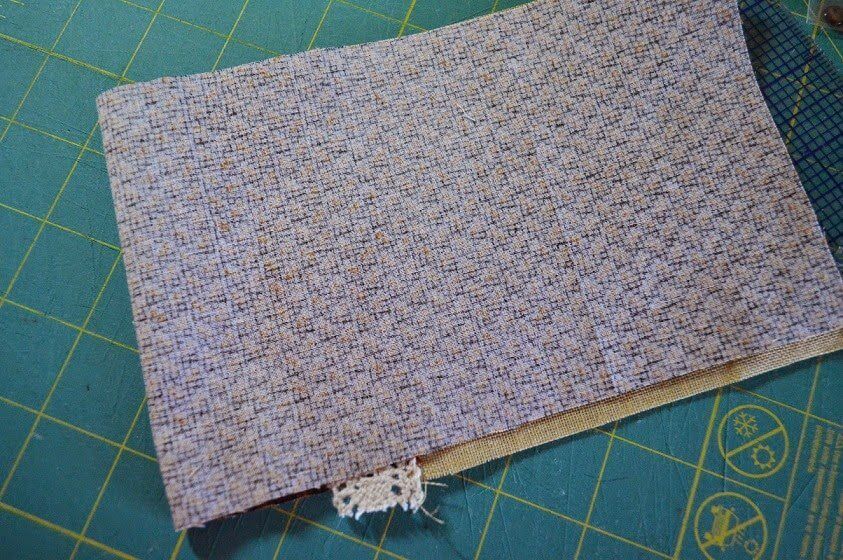
Louise has done such a good job cutting the cotton fabric , that I just fold the fabric over the whole piece to finish the pillow.

Now…I usually line the back of my linen with a thin batiste weight muslin…but for these, I did not, for several reasons. Having the lining helps the pillow to keep it’s shape when stuffing, keeps the corner from being weak when you trim close, and, as I said, when I do larger items or pillows that are going to be firmly stuffed…by all means, use a lining. For these small pillows that will sit in a bowl, and since I know I’m only turning them inside out once, we are good here without the lining. (Sometimes lining also adds too much bulk in small items)

Finish-it-Friday_Cherished-Stitches_Blog-Image_7

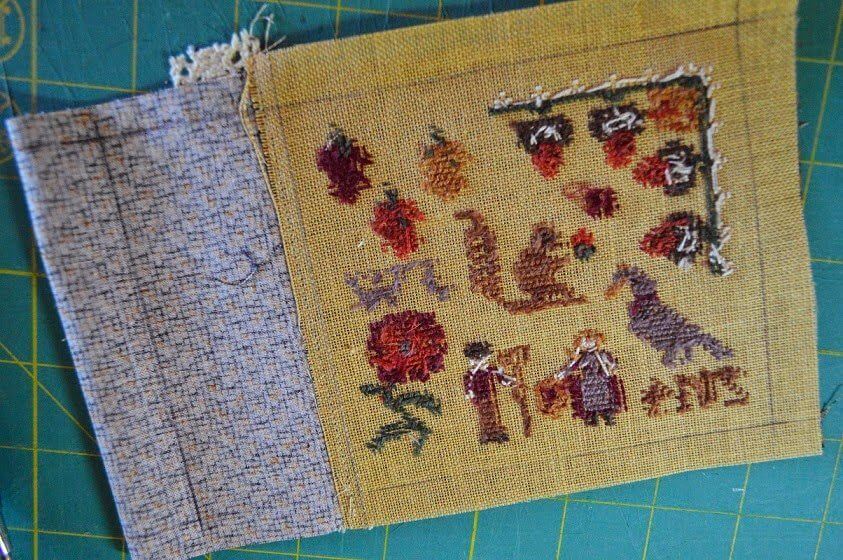
I mark with my pen (I use a fine tip, archival type) 1/4″ away from the image on the back sides of my linen. I wanted the pillow to be 6″ wide, so I measured from the linen side and marked on the cotton side. Sew around all guidelines, but leave an opening for turning in the cotton fabric side.

Finish-it-Friday_Cherished-Stitches_Blog-Image_8

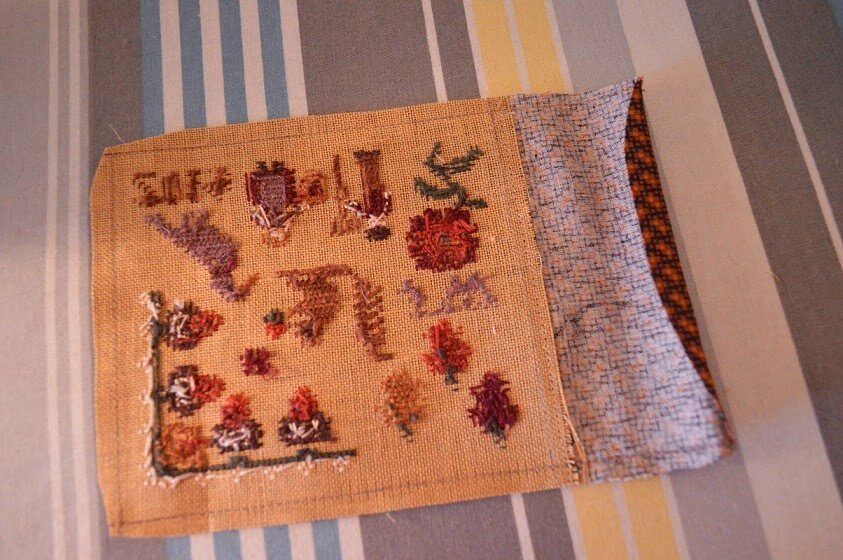
Here, I have sewn along the guidelines, trimmed, and pressed open my opening along the seams (this helps create a guide for the slip stitch later when closing the pillow up)

Finish-it-Friday_Cherished-Stitches_Blog-Image_9

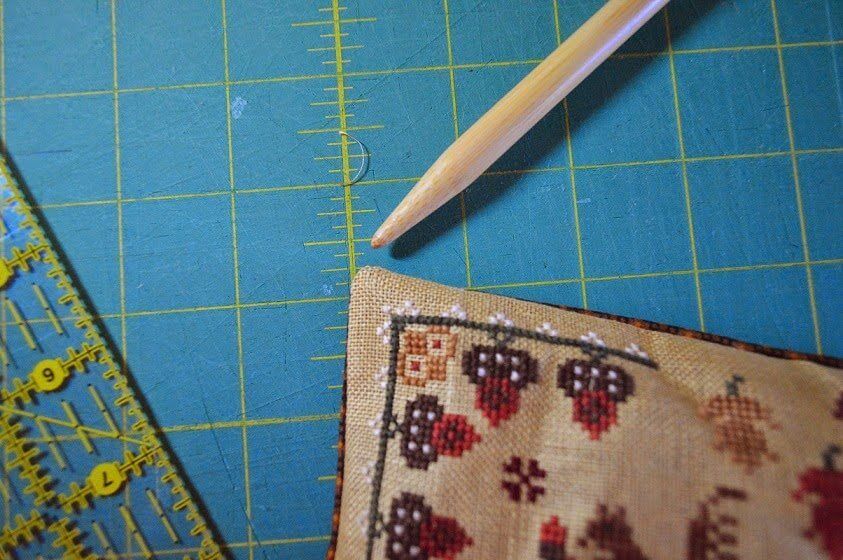
I do push out my corners with a blunt tip knitting needle, but I use a gentle poke/push motion and I always have a finger placed on the outside of the corner – so you don’t have the dreaded poke through!

Finish-it-Friday_Cherished-Stitches_Blog-Image_10

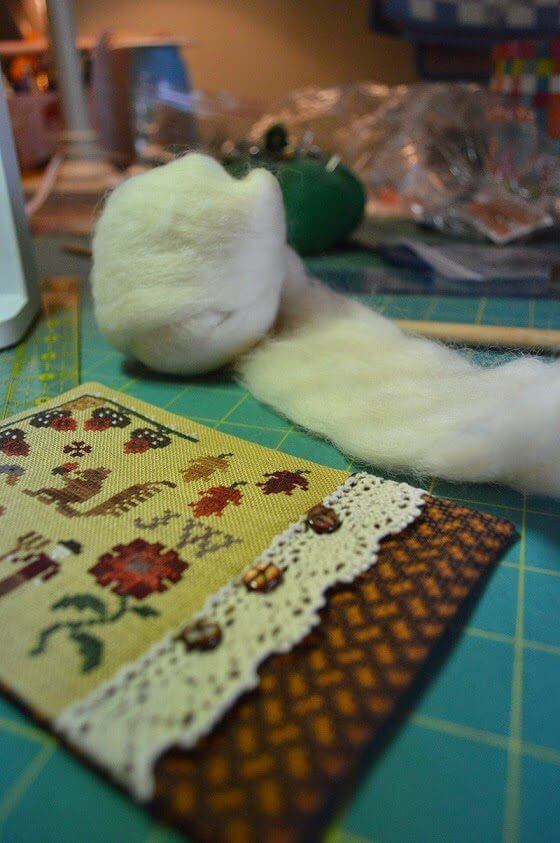
Wool roving for stuffing – another reason I can go with no lining. It is very fluffy, fills corners nicely, and you don’t have to use nearly as much. (which is good since it is also more expensive that fiberfill)

Finish-it-Friday_Cherished-Stitches_Blog-Image_11

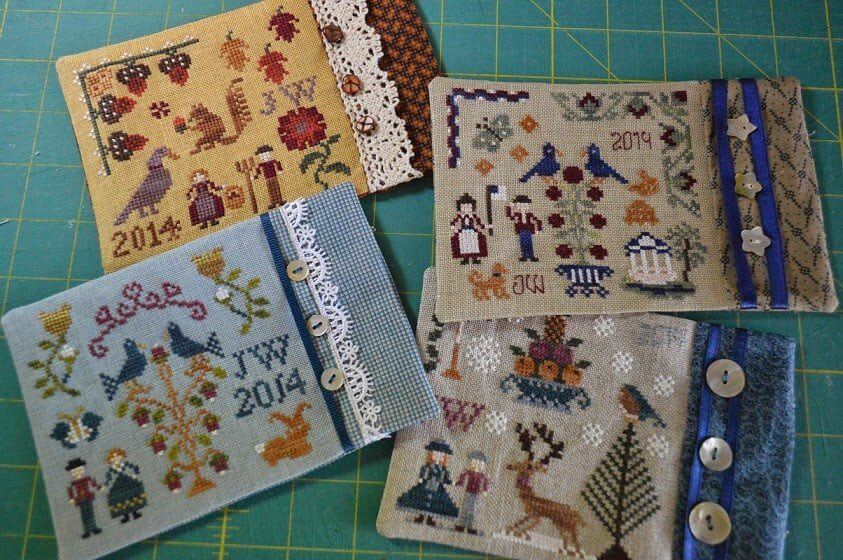
Here are all 4 pillows ready for stuffing!

Louise has designed quite a few of these lovely little kits & I thank her for letting me show them off (and showing my own take on finishing them!) Visit her website at www.cherishedstchs.com and she is also on facebook.

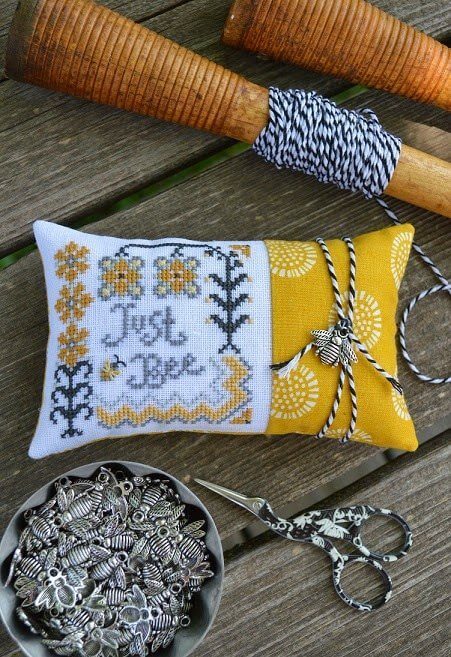
If you follow my designs, you know I’m into the pillow finishes as well. I released Just Bee – a chartpack that includes cotton fabric, baker’s twine & bee charm. This is a Limited Release, so contact you shop. Shops may order these from me and can see the details on my website.

Finish-it-Friday_Cherished-Stitches_Blog-Image_12

A few housekeeping notes: soon, I will be posting links to the previous Finish it Friday posts in the column so you can look back at them easily. I will also be posting the DMC substitutes for the Year of Celebrations early next week. Finishing deadlines for Holiday finishing is still Oct 1 – that means it must be here by then. I enjoy finishing, but currently have a very full overflowing log book. Finishing takes time & I have lots of Fall markets.

Have a great weekend & enjoy the stitch,

Cathy

Filed Under: Uncategorized

Like this Post? Subscribe to My Newsletter!

It’s Been a Great Week!
A Year of Celebrations

Comments

  1. Diane Summers says

    July 18, 2014 at 11:36 am

    Great tips on finishing simple needlework projects. I often have people ask so I'll pass your blog onto them.

    Reply
  2. cucki says

    July 18, 2014 at 11:49 am

    Wow so beautiful xxx

    Reply

Leave a Reply Cancel reply

Your email address will not be published. Required fields are marked *

Shop By Category

Newsletter Subscription

Search

New in the Shop

  • MAD FOR PLAID
  • SNOW ON THE GROUND
  • THE WINTER BASKET
  • PENGUIN.PLAY $7.00

Hands On Design Instagoodness …

Come take a walk with me…a picture walk through Come take a walk with me…a picture walk through the finishing process of ‘love you too’. The tour starts on today's blog post on my website. 

This year’s Anniversary Token chart can be found on the blog posted a few days ago. 

#handsondesign #loveyoutoo #anniversary #anniversarygift #tokenoflove #valentinestitching #valentine #simplestitches #finishingtouch #moderncrossstitch #needlework #flosstube #beoriginal #maker #stitchsomehappy
‘love you too’ - this year’s Anniversary Tok ‘love you too’ - this year’s Anniversary Token 

You will find this chart in the newsletter that was sent out this morning. (ps…check the current blogpost on the website)

Thank you for your anniversary well wishes and we extend the same to you 🪡❤️

#handsondesign #loveyoutoo #anniversary #anniversarygift #tokenoflove #crossstitchsmalls #crossstitchfromtheheart #mrhod #moderncrossstitch #modernmaker #complimentarydesign #happyanniversary #stitchsomehappy
Just a little Wednesday Wave from a Walrus 😉 S Just a little Wednesday Wave from a Walrus 😉

Say that 10x fast

#handsondesign #wednesday #wave #polarplunge #sneakpeek #classiccolorworks #fabricsbystephanie #flosstube #moderncrossstitch #needlework #stitchywednesdays #stitchsomehappy
A new FlossTube is up for your viewing! #77 (somed A new FlossTube is up for your viewing! #77 (someday we’ll hit 100)

We are back in the kitchen getting ready to make nachos! (They were delish). 

Join us for some laughs (go ahead and laugh at us…we do all the time 😁) - no edits, no frills and umm, umm, umm…New Release details!

https://youtu.be/1RXKCJzjzRw

#handsondesign #flosstube #flosstubersofinstagram #mrhod #newreleases #crossstitch #needlework #pincushion #fabricsbystephanie #dmc #cosmofloss #woolfelt #chantelles141 #simplestitchesfabricshop #finishingtutorial #141designcompany 
#141madforplaidsal #moderncrossstitch #finishitfun #tripleplaypillows #madforplaid #plaidallyear #stitchsomehappy
Each one tells a story. 11 years ago I found mys Each one tells a story. 

11 years ago I found myself in need of an anniversary gift. A gift that I shared with stitchers. 

I see our journey through these annual designs - like pages of a journal- ‘yes, that was the year we…’

Previous years can be found scattered through my blog on the website. 

Next week I will update and gather all of the links together in one post. 

We are approaching our 35th anniversary and soon I will share this year’s token ❤️

#handsondesign #anniversary #anniversarygift #complimentarydesign #stitchavalentine #mrhod #journeyofstitches #february #crossstitch #flosstube #stitchesoflove #stitchsomehappy
It’s almost our Anniversary ❤️ Have you sti It’s almost our Anniversary ❤️

Have you stitched any of the previous year’s tokens that I design for Mr. HOD & gift to you? 

More details soon 

#handsondesign #anniversary #complimentarydesign #mrhod #anniversarygift #februarywedding #xstitch #stitch #flosstube #maker #designer #finisher #beoriginal #betrue #betruetoyourself #stitchsomehappy
Join Me on Instagram

Helpful Links

  • My Account
  • Lost Password
  • About
  • Wholesale
  • Store Locator
  • Classes
  • Events
  • OOPSIE

FOLLOW US ON:

Facebook-Logo_For-Website Instagram-Logo_For-Website

Get My Newsletter

And be the first to know about new products, events, tutorials and more!

  • Email
  • Facebook
  • Instagram

Copyright © 2023 · Hands On Design

A Habermann Company · cathy@handsondesign.biz