• My Account
  • Lost Password
  • About
  • Wholesale
  • Store Locator
  • Classes
  • Events
  • OOPSIE

Hands On Design

Needlework and Cross Stitch Designs by Cathy Habermann

  • Shop
  • Tutorials
  • Floss Tube
  • Blog
  • Contact
  • 0 items$0.00

Whimsy Pennant Banner Tutorial

June 18, 2016 By Cathy Habermann Leave a Comment

Whimsy-Pennant-Banner-Pic-1

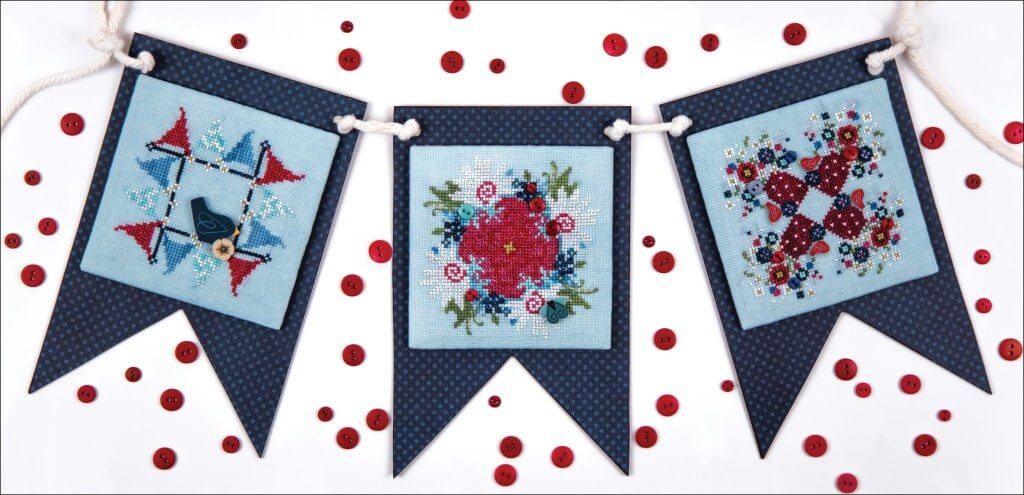
Today we’re bringing you the third cross stitch finishing tutorial for square.ology. We hope you’re having fun following these finishing tutorials. We’re having lots of fun sharing our ideas with you. Follow this tutorial to make a pennant banner from our Whimsy Cross Stitch Charts. The full tutorial is shown below but you can also download a PDF here.

Materials:

[whimsy] design stitched on 30 count linen

Matboard (4 3/8” square)

Batting (4 3/8” square)

Lacing thread (hand quilting thread or pearl cotton #8)

Stitchery tape (double-sided, acid free)

Scrapbook paper

Paper Accents – Kraft Chipboard Pennants (5” x 8”, available in craft stores)

White twisted cord—1/4” diameter

Scotch tape

JABC [square.parts]

Supplies:

Sharp sewing needles

Rotary cutter

Quilter’s ruler

Cutting mat

Scissors

Box cutter

X-acto Knife

Hole punch

Iron & pressing surface

Brown Sharpie

[square.ology] flat-finish tutorial

Prepare the Flat-Finished Square:

  • Using the [square.ology] Flat-Finish Tutorial, flat finish any of the 4” whimsy designs.
  • Sew any embellishments to the flat-finished piece using a small needle and matching thread.

Prepare the Paper Pennant:

  • Cut small pieces of stitchery tape and apply around the edges of a chipboard pennant. Remove the backing paper from the tape.

Whimsy-Pennant-Banner-Tutorial-Pic-2

  • Lay the pennant (tape-side-down) on the wrong side of your scrapbook paper. Press the pennant against the paper to make the tape stick.
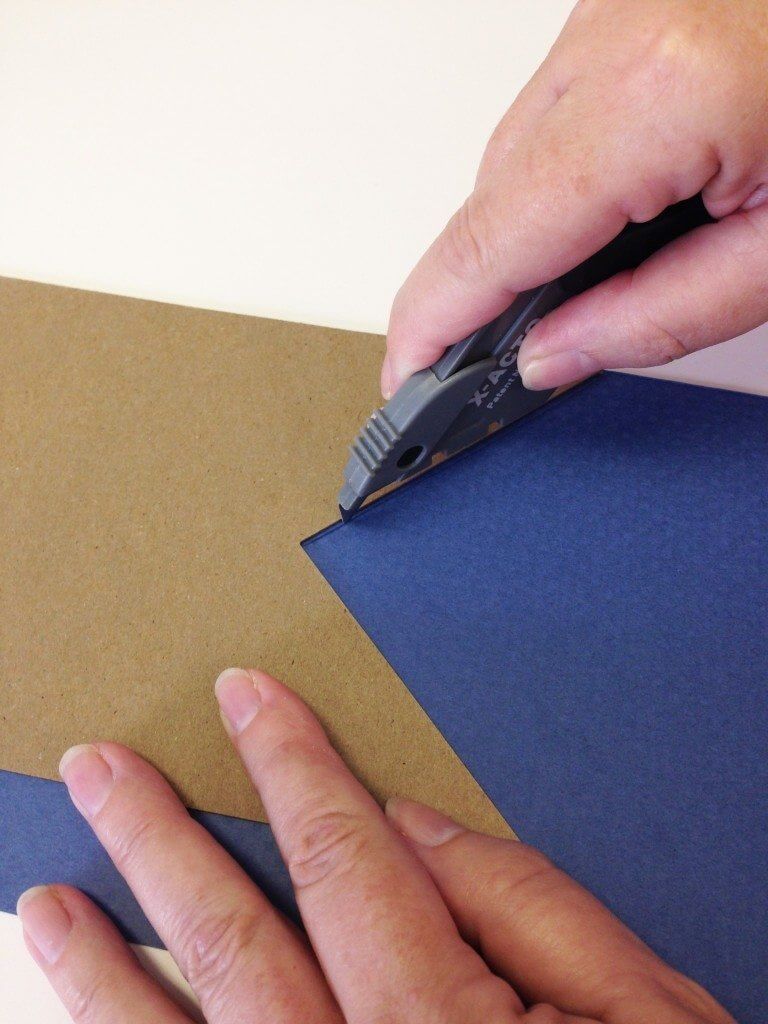
  • Using an X-acto knife and cutting mat, trim the paper even with the edges of the chipboard pennant.

Whimsy-Pennant-Banner-Tutorial-Pic-3

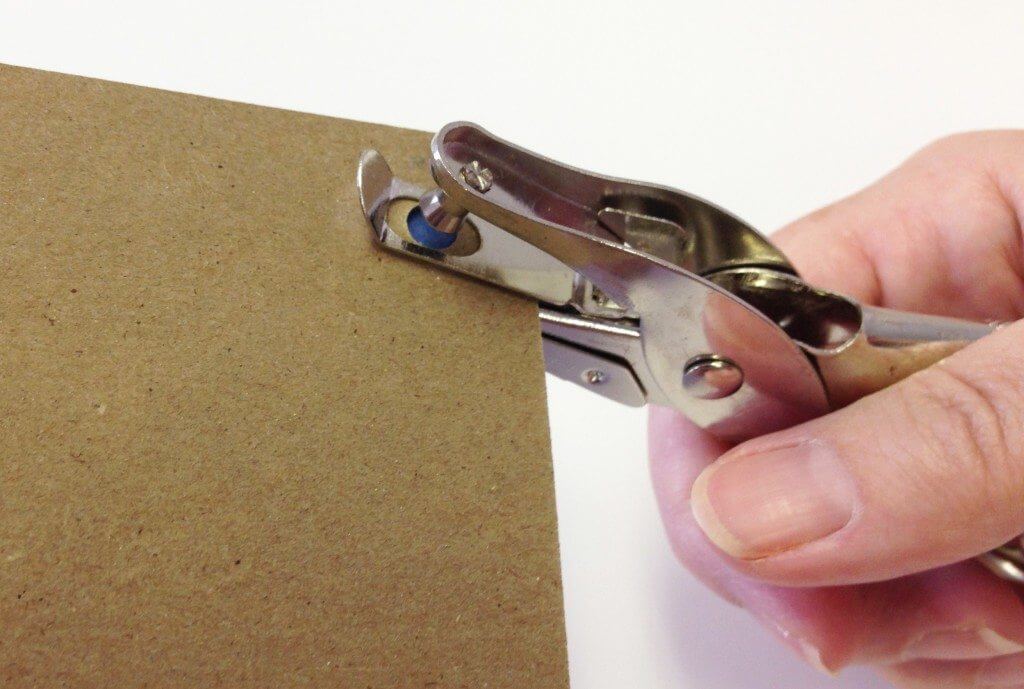
  • Line up the hole punch with the holes in the chipboard and punch holes in the paper to match.

Whimsy-Pennant-Banner-Tutorial-Pic-4

  • Using a brown (or dark blue) Sharpie, color any visible edges of the chipboard.
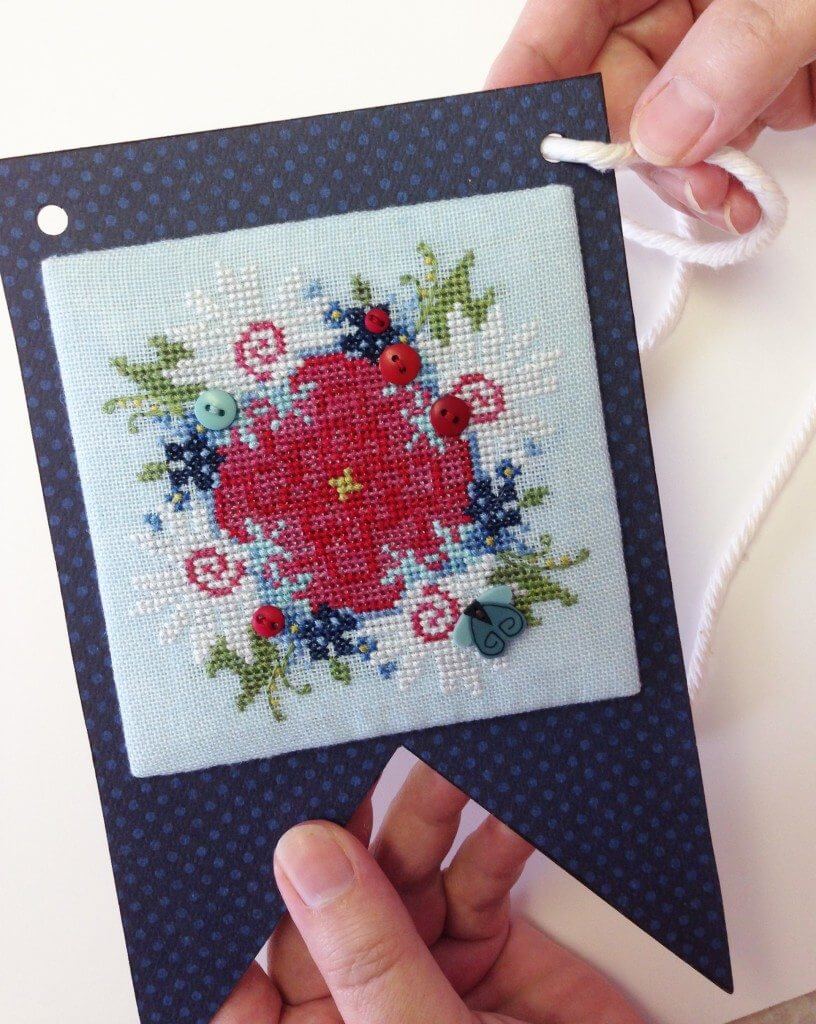
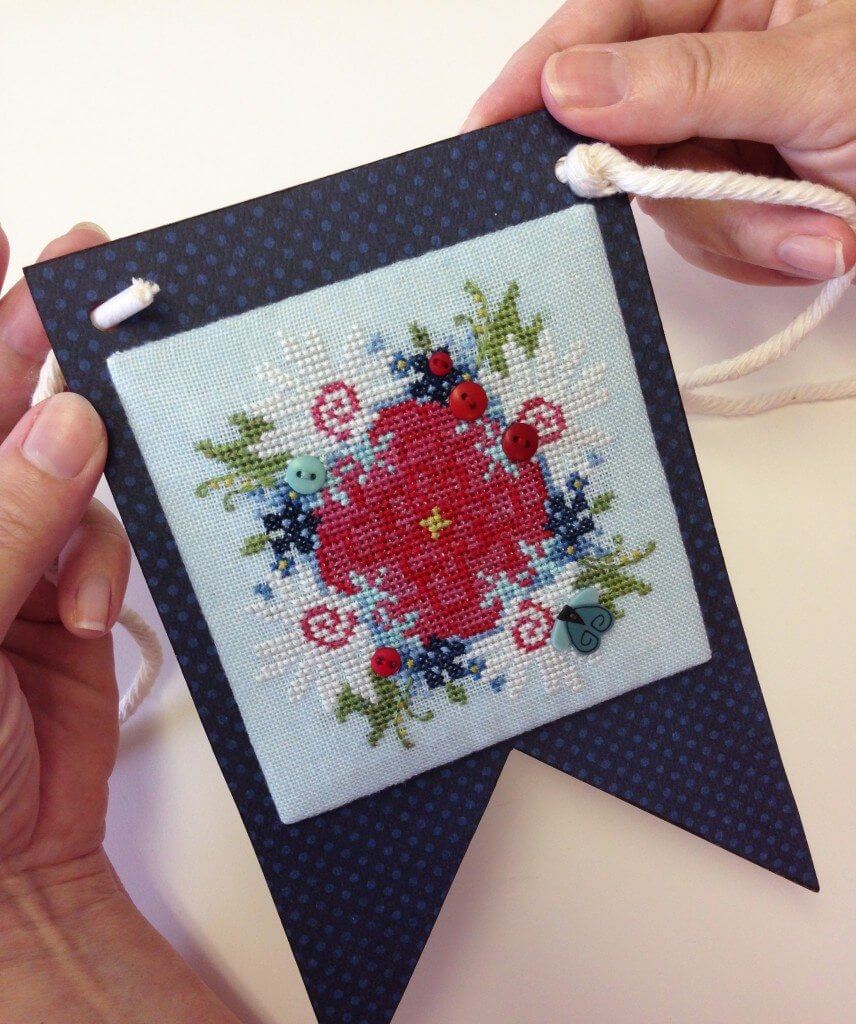
Finish the Pennant:

  • Place the flat-finished stitching face-down. Put strips of stitchery tape along the edges and remove the backing paper.

Whimsy-Pennant-Banner-Tutorial-Pic-5

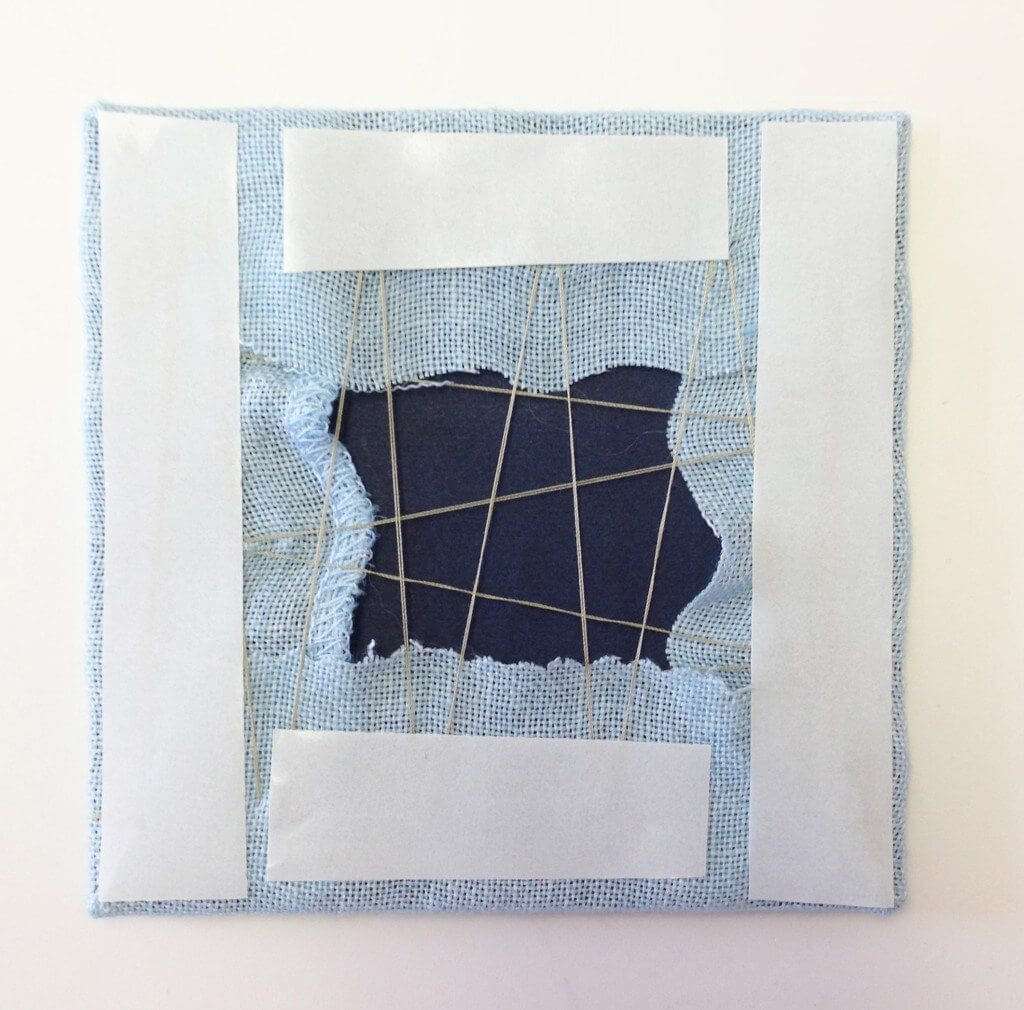
  • Arrange the flat-finished square on the paper side of the pennant according to the picture and press down to apply the tape to the paper.

Whimsy-Pennant-Banner-Tutorial-Pic-6

Finish the Garland:

  • Make more pennants with the other [whimsy] stitched pieces and extra ones by covering some pennants with just paper.
  • Tie a knot 12” from the end of your cord (adjust the 12” if you want a longer “tail” at the end of your banner).

Whimsy-Pennant-Banner-Tutorial-Pic-7

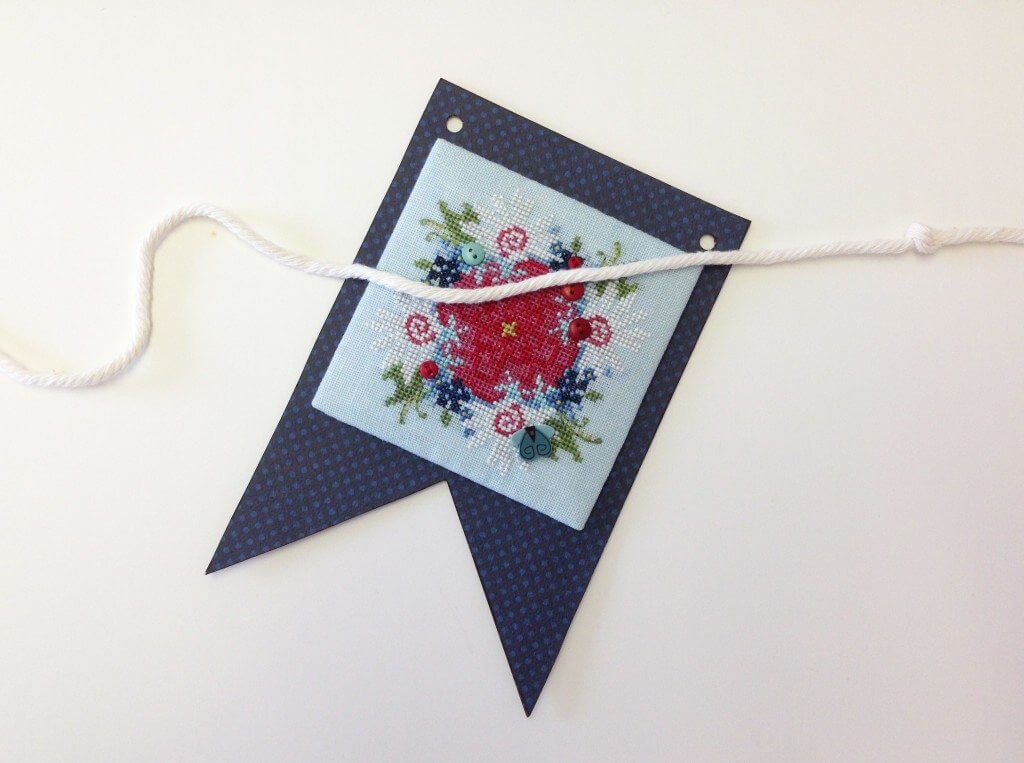
  • Lay the cord with the knot on the right and the unknotted end on the left. You will string from left to right. Wrap a piece of Scotch tape around the left end of the cord to make threading easier.
  • String the cord through the right hole of the first pennant, from the front to the back. Slide the pennant to the right until the hole meets the knot you made.

Whimsy-Pennant-Banner-Tutorial-Pic-8

  • Now thread the cord through the left hole, from the back to the front. Tie a knot right in front of the hole.

Whimsy-Pennant-Banner-Tutorial-Pic-9

  • Choose how much space you want to leave between this and the next pennant and then tie a knot at that point.
  • Repeat steps 4 & 5 until all of your pennants are threaded onto the cord.

Enjoy your [whimsy] pennant banner!


Whimsy-Pennant-Banner-Pic-1

©2015, Hands On Design, Just Another Button Company™    No permission is granted to reproduce these instructions or images for commercial purposes, although shops may distribute the instruction sheet as part of a class or tutorial featuring [square.ology] or other products by Hands On Design or Just Another Button Company.  Permission for other uses must be granted individually and in writing.  The instructions and images may not be published or shared electronically by shops or individuals. Instructions and images are property of Hands On Design and Just Another Button Company.

Filed Under: Tutorials

Like this Post? Subscribe to My Newsletter!

Ahoy Frame Finishing Tutorial
Bloom Bit Fob Finishing Tutorial

Leave a Reply Cancel reply

Your email address will not be published. Required fields are marked *

Shop By Category

Newsletter Subscription

Search

New in the Shop

  • THAT'S A WRAP - PATRIOTIC COLLECTION THAT'S A WRAP - PATRIOTIC COLLECTION $12.00
  • THREAD, WHITE & BLUE THREAD, WHITE & BLUE $14.00
  • TOES IN THE SAND TOES IN THE SAND $8.00

Hands On Design Instagoodness …

New project stitching, golf tournament fundraiser, New project stitching, golf tournament fundraiser, time to garden, surprise birthday party for a friend (such a surprise that I didn’t take a picture), sunset on the deck. 

I’m ready for the week ahead 🤞🏻 

#handsondesign #lastweekend #summertime #stitchsomehappy
No stitchy posts this weekend- I get to be Mom all No stitchy posts this weekend- I get to be Mom all weekend. Billy just got home from an amazing trip out west where he got to white water raft, ride a gondola, hike in a national park (where they saw all kinds of wildlife), swim, go to a real rodeo, go on an alpine rail, make new friends and so much more. 

I missed him so much (even though he doesn’t live with us every day…yep, the mom in me knew he was far away 😊) - we are so thankful to the Let’s Go West team for planning & documenting this trip. He’s staying on with us a few more days …I was even excited to do his laundry!?!?🤷🏻‍♀️🤦🏻‍♀️

#handsondesign #chickinthenest #stitchsomehappy
Are you in the mood for more BAP - Big Awesome Pro Are you in the mood for more BAP - Big Awesome Produce??

The follow up to 'There's a Hare in my Garden' will debut in September & I can't wait for you to see it!!

#handsondesign #bigawesomeproduce #fabricsbystephanie #pearlcotton #stitchsomehappy
The Finishing Touch Course-in-a-box is open for pr The Finishing Touch Course-in-a-box is open for pre-order only through July 31st! They will not be available after that date.

Pre-order means, if you place an order, you will receive yours (orders are fulfilled in the order they are received starting Aug 1st)

Head to chantelles141.com to read what all is included in your shipment & get your fabric & floss list while you are there 

#handsondesign #thefinishingtouch #courseinabox #homesweethome #stitchsomehappy
It's World Emoji Day!! 🌼🤷🏼‍♀️🍅🪡😉❤️ 

Did you know that when I released Well Hello There - we called those adorable buttons that grace each stitch every month 'button-moji's'?? 

Button-moji packs are still available from my dear friends @justanotherbuttoncompany - I don't know that button-moji ever caught on as a word but they sure look cute

#handsondesign #wellhellothere #EmojiFun #justanotherbuttoncompany #stitchsomehappy
A little 'down-time' between HOD models, I started A little 'down-time' between HOD models, I started Harvest Lilies from my good friend Tracy @inkcircles.xs - I switched up the linen for 32ct Rosewood @fabrics.by.steph & called for threads with Sulky 12wt. I do have a yellow pulled for the negative space that looks kinda quilty. I'm thinking about leaving it like it is...what do you think?

#handsondesign #harvestlillies #eveningstitching #stitchsomehappy
Join Me on Instagram

Helpful Links

  • My Account
  • Lost Password
  • About
  • Wholesale
  • Store Locator
  • Classes
  • Events
  • OOPSIE

FOLLOW US ON:

Facebook-Logo_For-Website Instagram-Logo_For-Website

Get My Newsletter

And be the first to know about new products, events, tutorials and more!

  • Email
  • Facebook
  • Instagram

Copyright © 2025 · Hands On Design

A Habermann Company · cathy@handsondesign.biz