• My Account
  • Lost Password
  • About
  • Wholesale
  • Store Locator
  • Classes
  • Events
  • OOPSIE

Hands On Design

Needlework and Cross Stitch Designs by Cathy Habermann

  • Shop
  • Tutorials
  • Floss Tube
  • Blog
  • Contact
  • 0 items$0.00

MURDER IN THE GARDEN – FINISHING PICTURE WALK TUTORIAL

September 19, 2025 By Cathy Habermann Leave a Comment

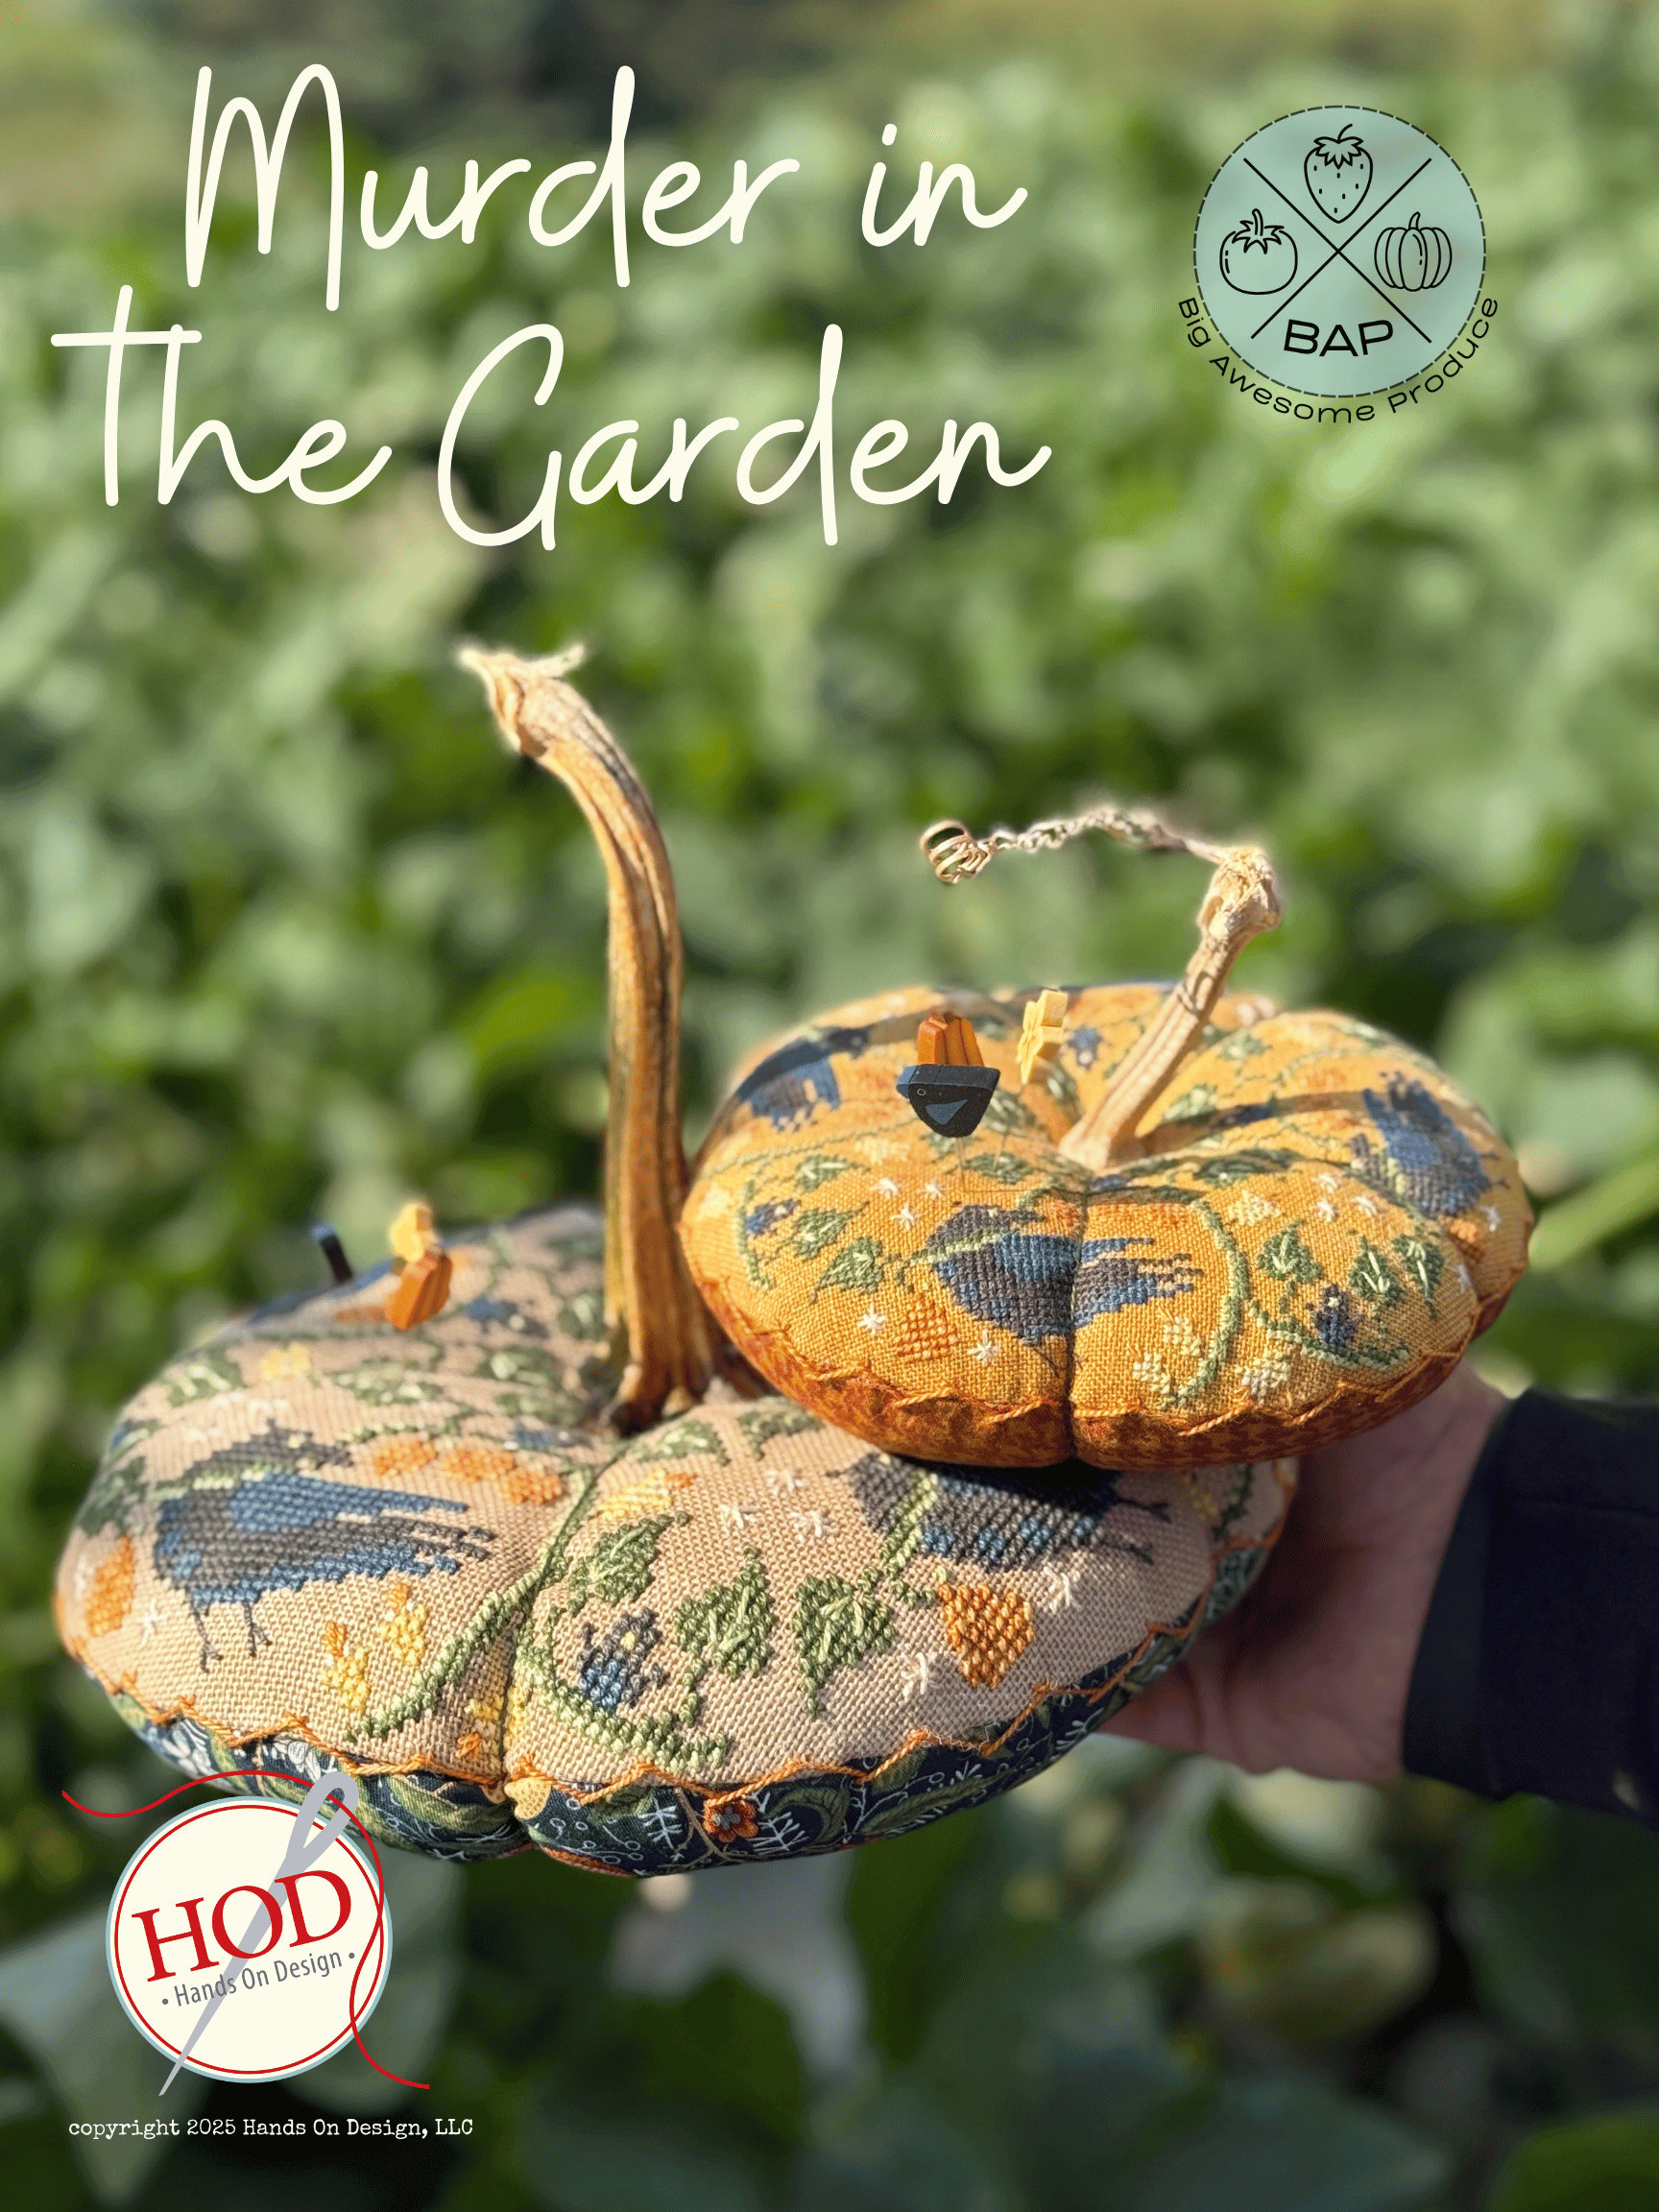
Murder in the Garden – a finishing picture walk tutorial.

I am so happy that you all like this quirky, oversized series of produce! The finishes are not difficult when broken down into steps. A sewing machine will be required although hand-sewing will do the job as well. I will talk as if you are one with your machine!

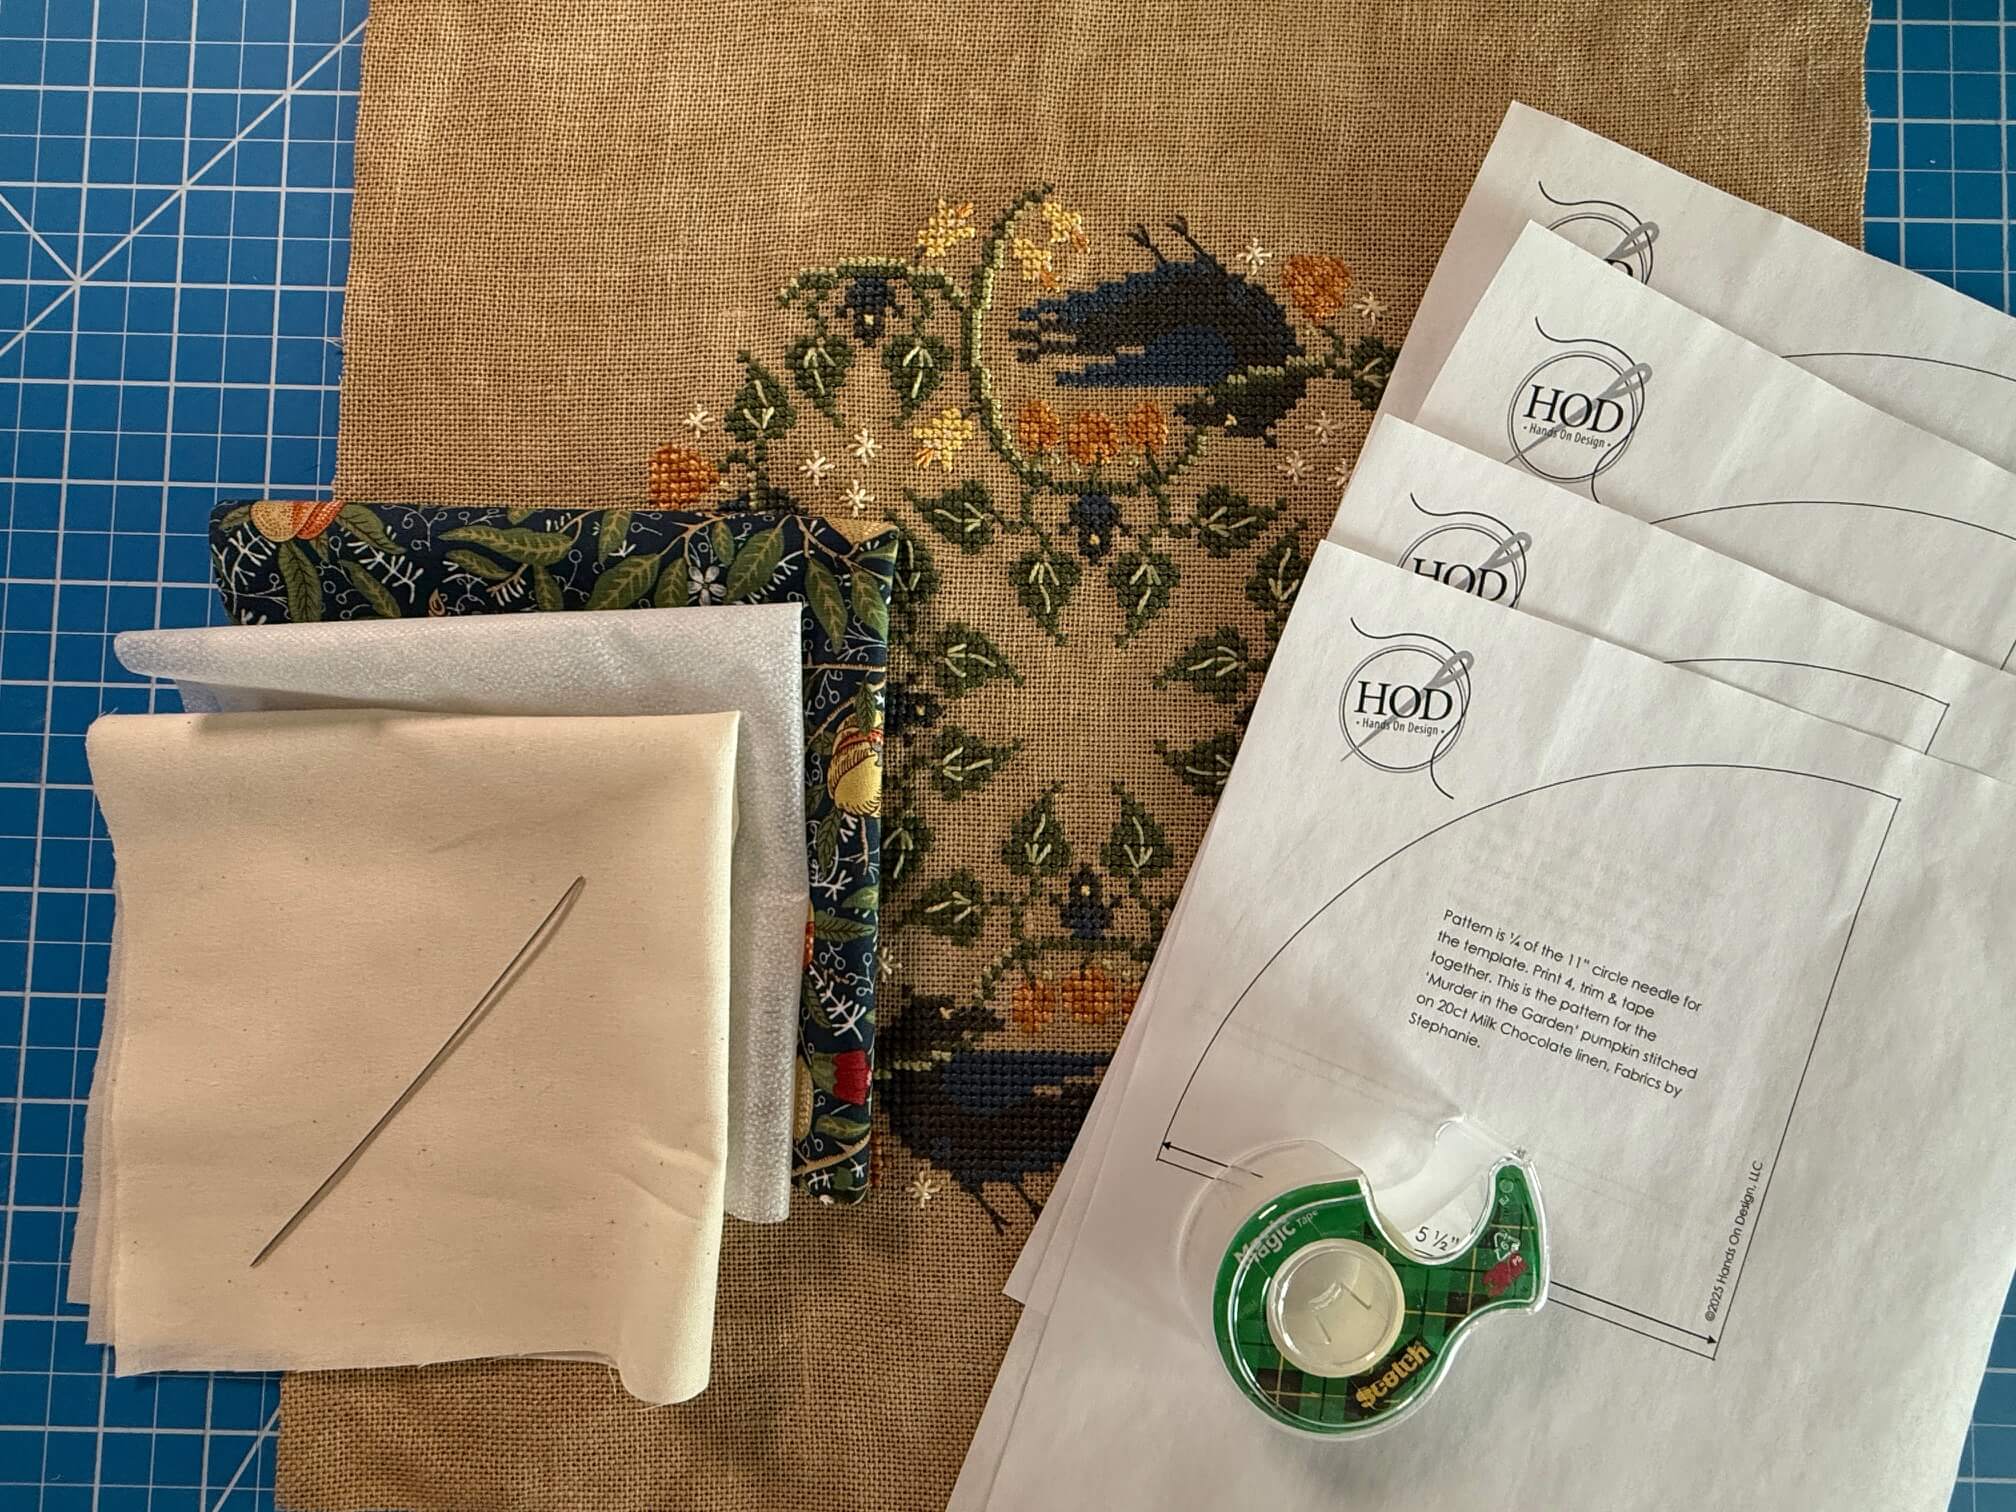
Gather items for your finish: coordinating quilting cotton, featherweight fusible interfacing (906F Pellon), cotton muslin, doll making needle, & 4 copies of the template (see link below to download & print). These will get you started – read on for other items I used.

Print template here.


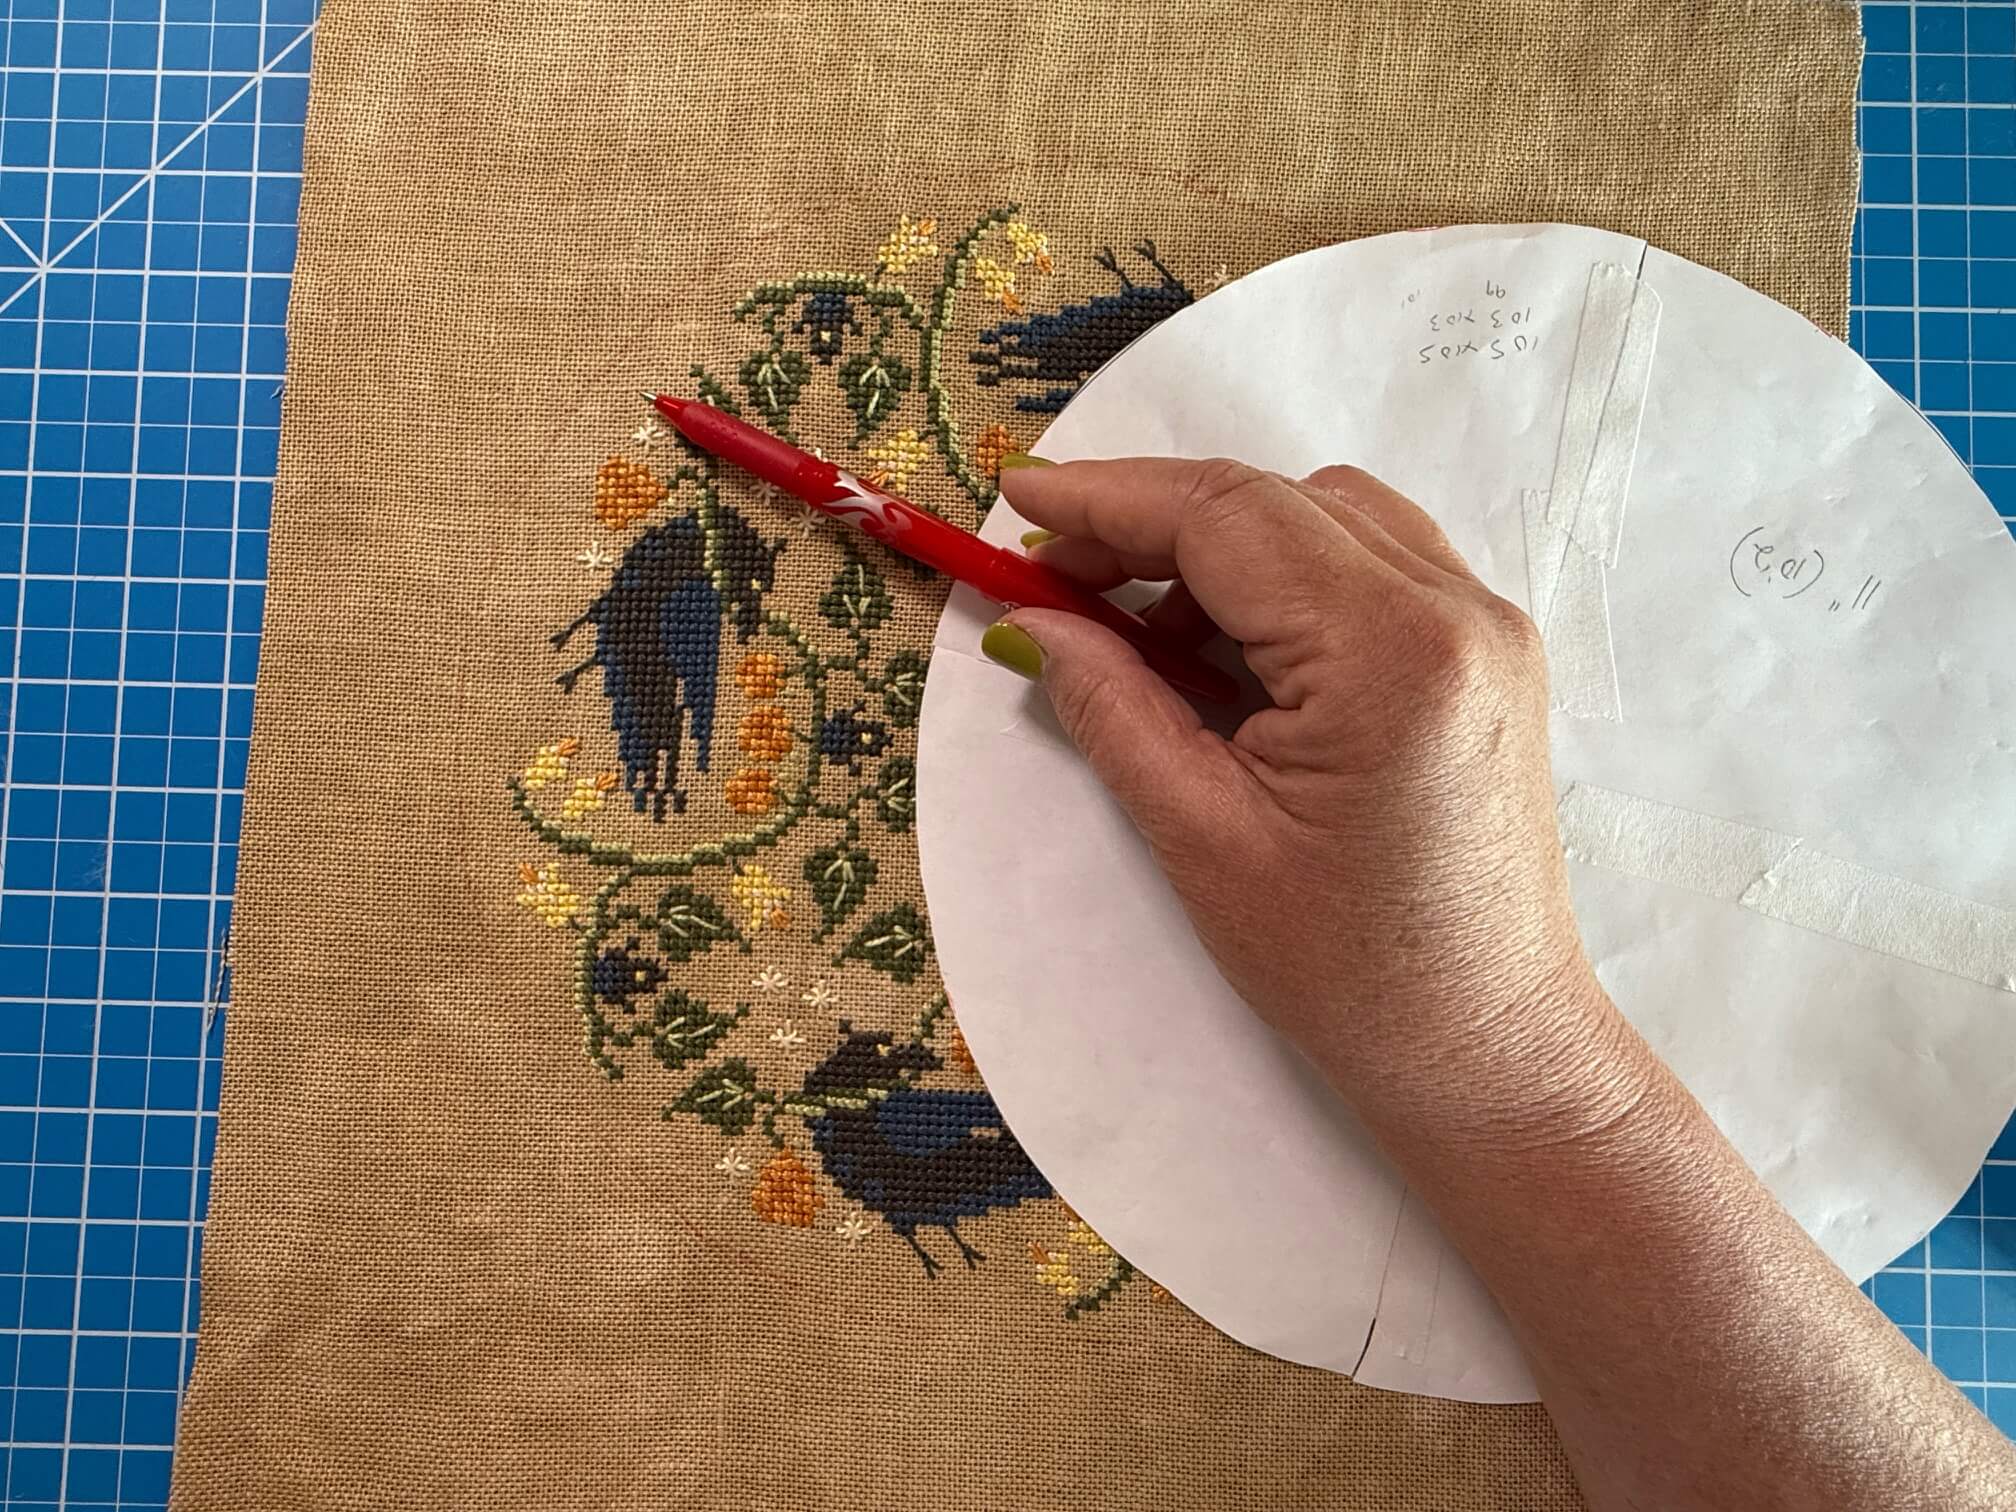
Tape the 4 pieces of the circle together & center over the stitching (hold it up to a window). Using a Frixion marker, trace around the circle onto the front side of your stitching.


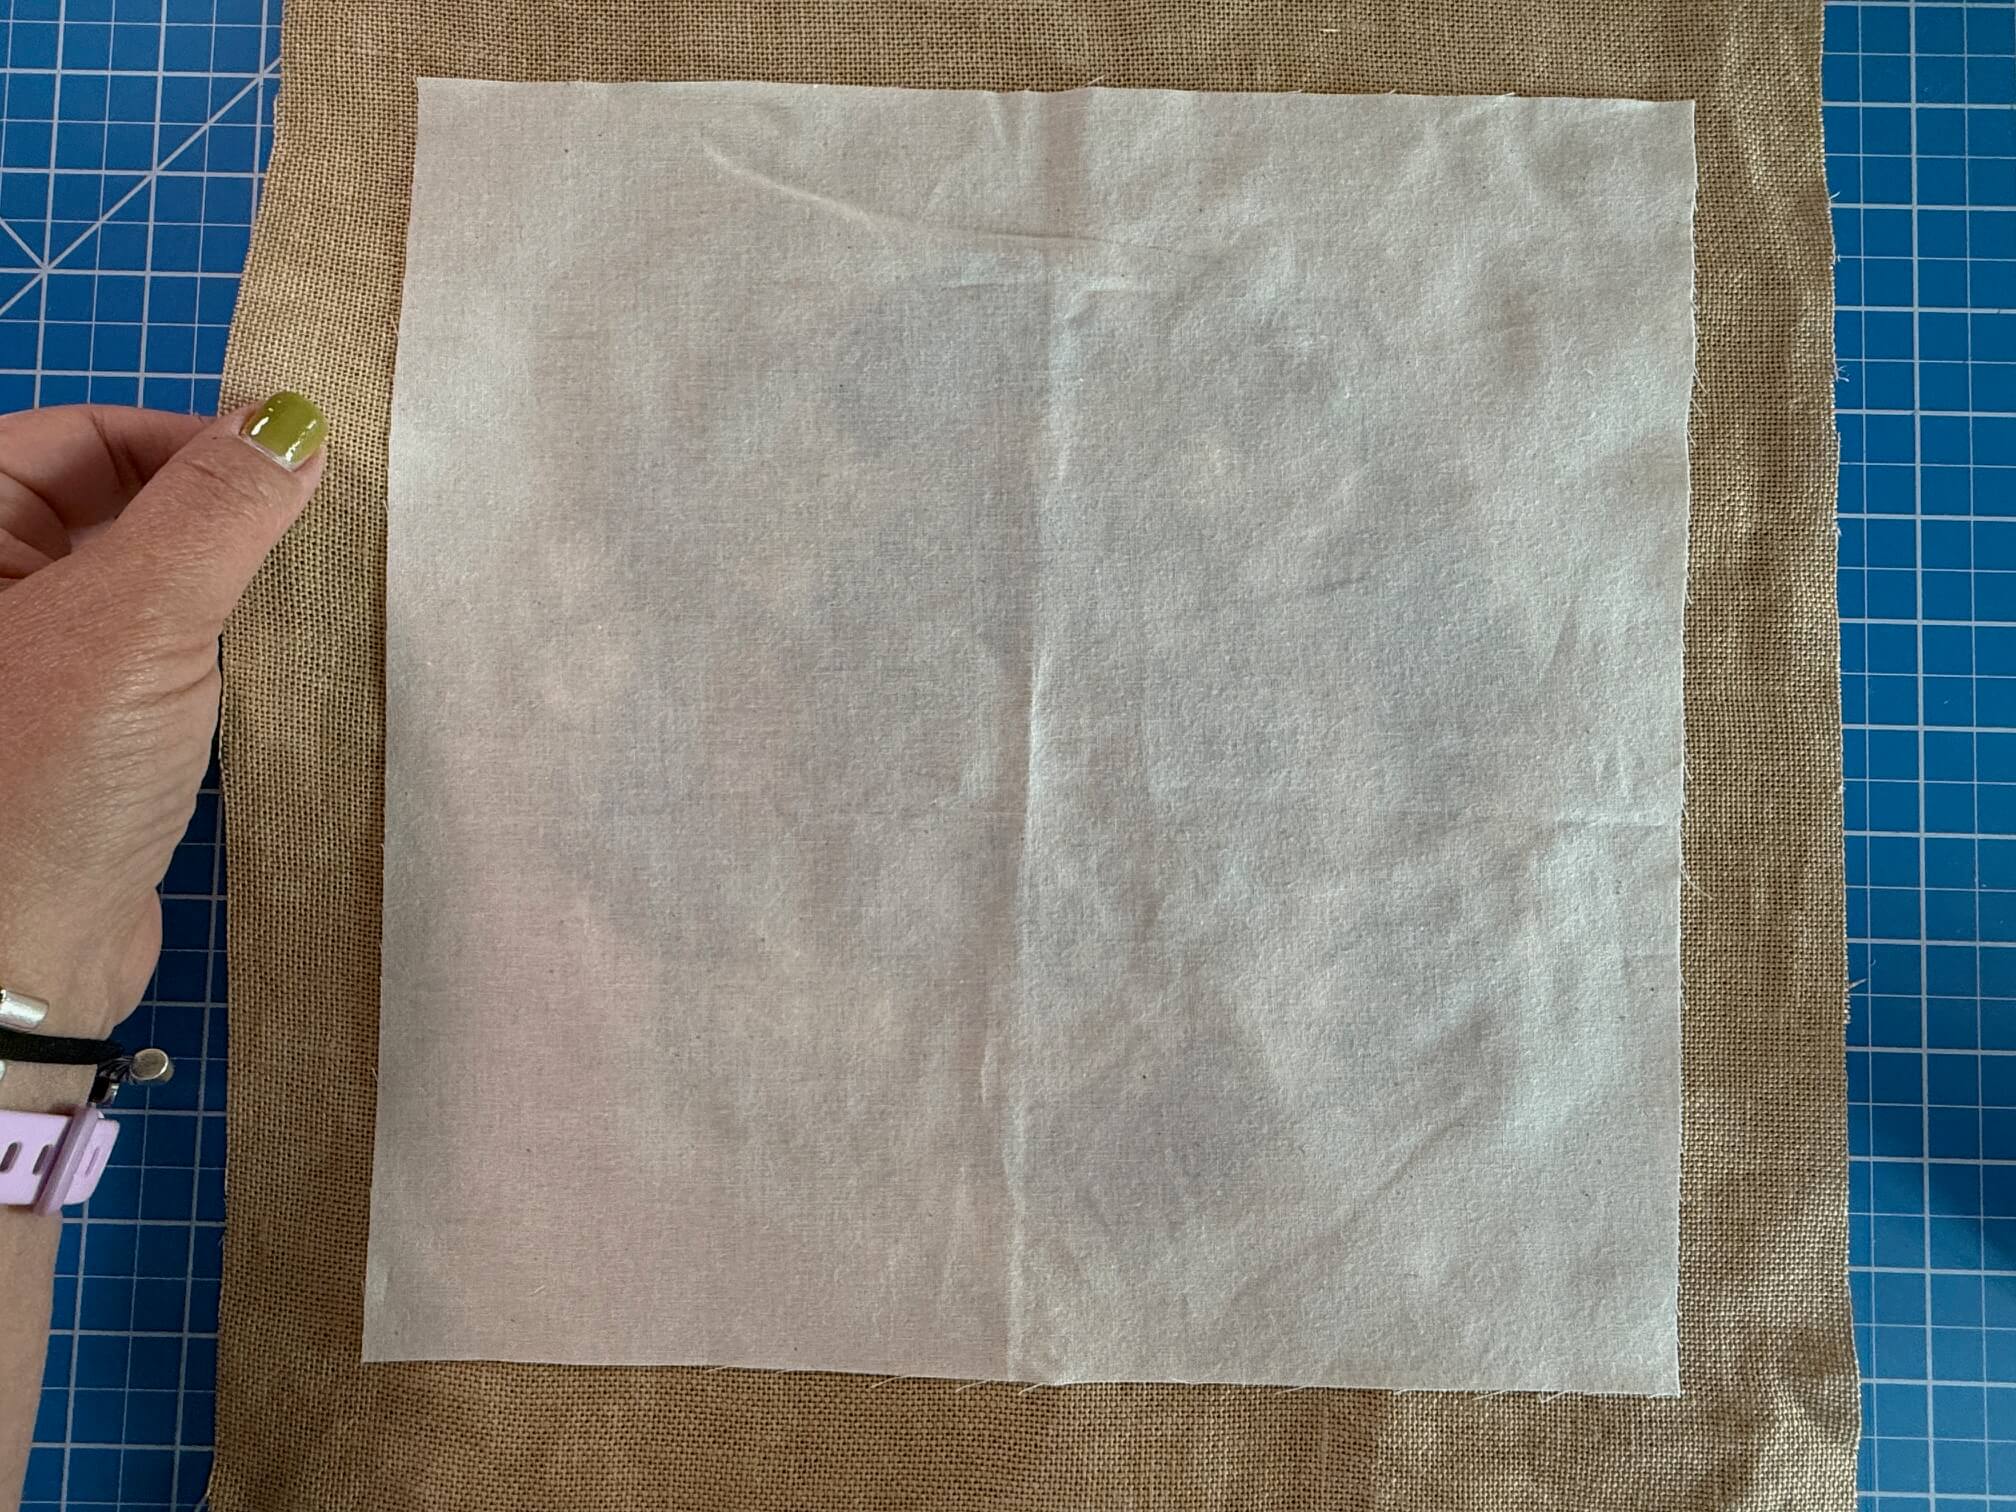
Place the muslin on the back side of your stitching & pin into place. (muslin should cover the line that you traced in the previous step)


Machine sew on the front of the linen. Sew ON the line that you marked in the previous step. Sew ALL the way around the circle. Trim the linen & muslin 1″ away from the sewing line. Iron the fusible interfacing on the back side of the quilting cotton.


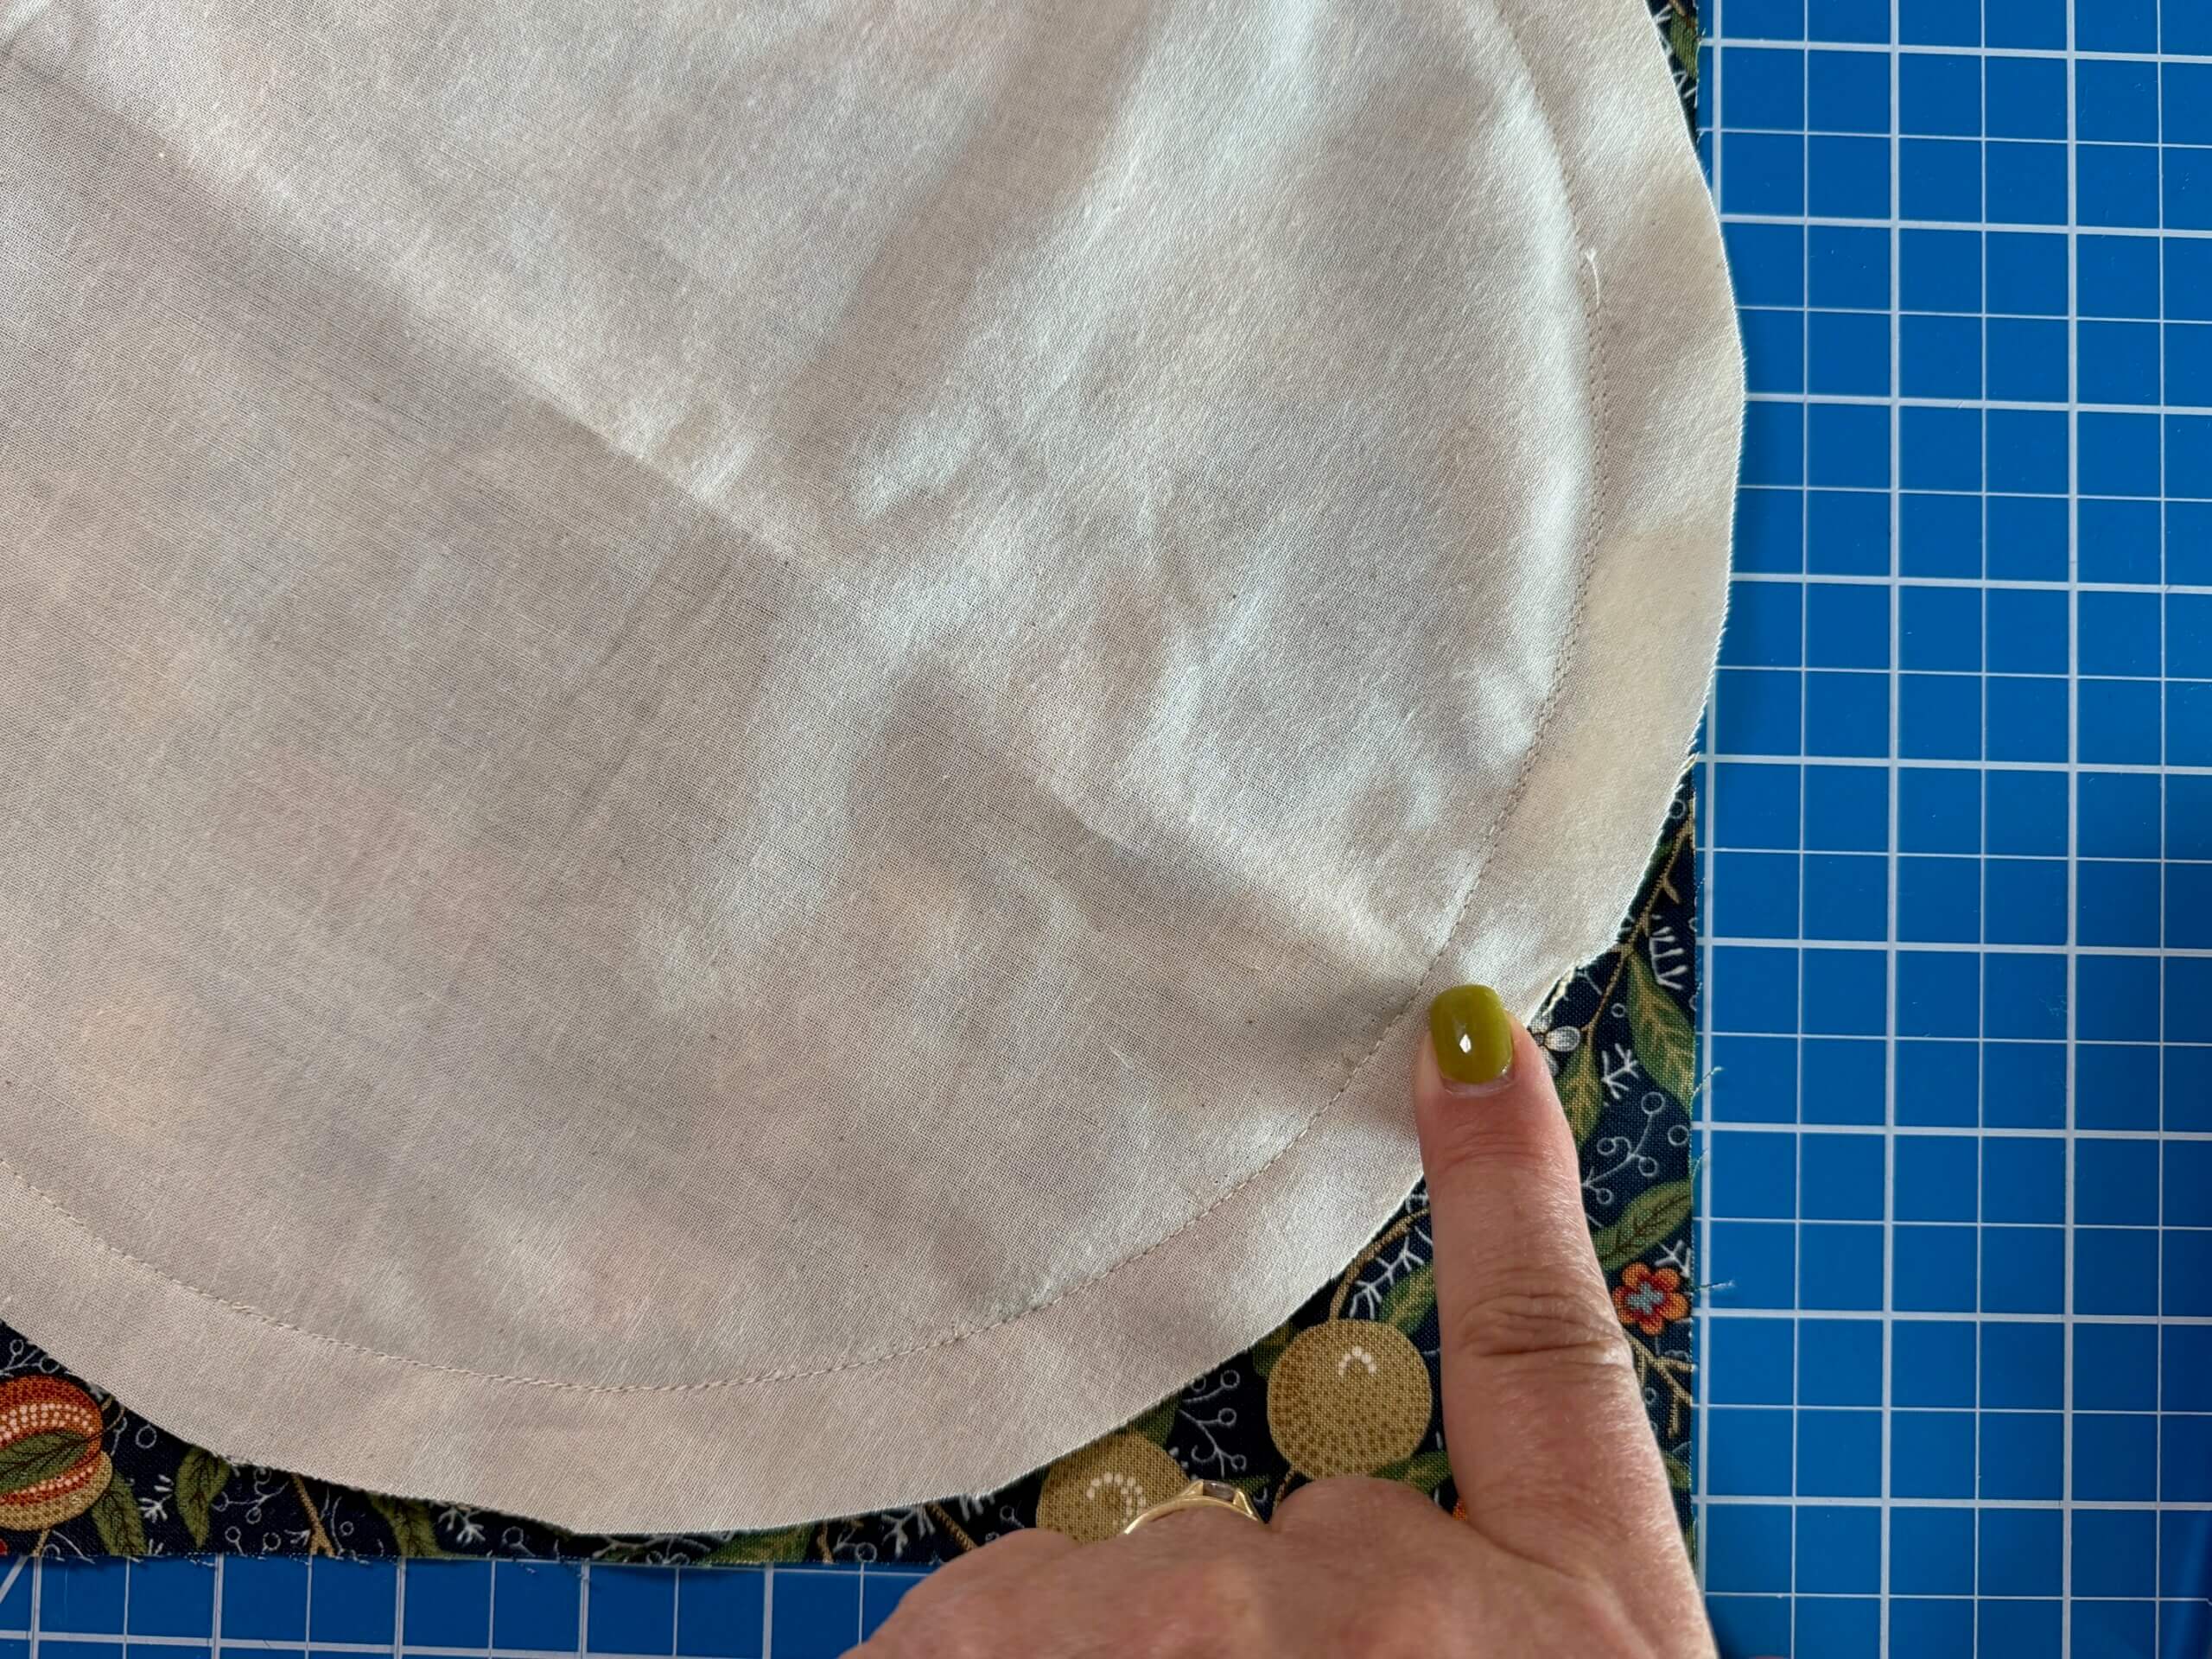
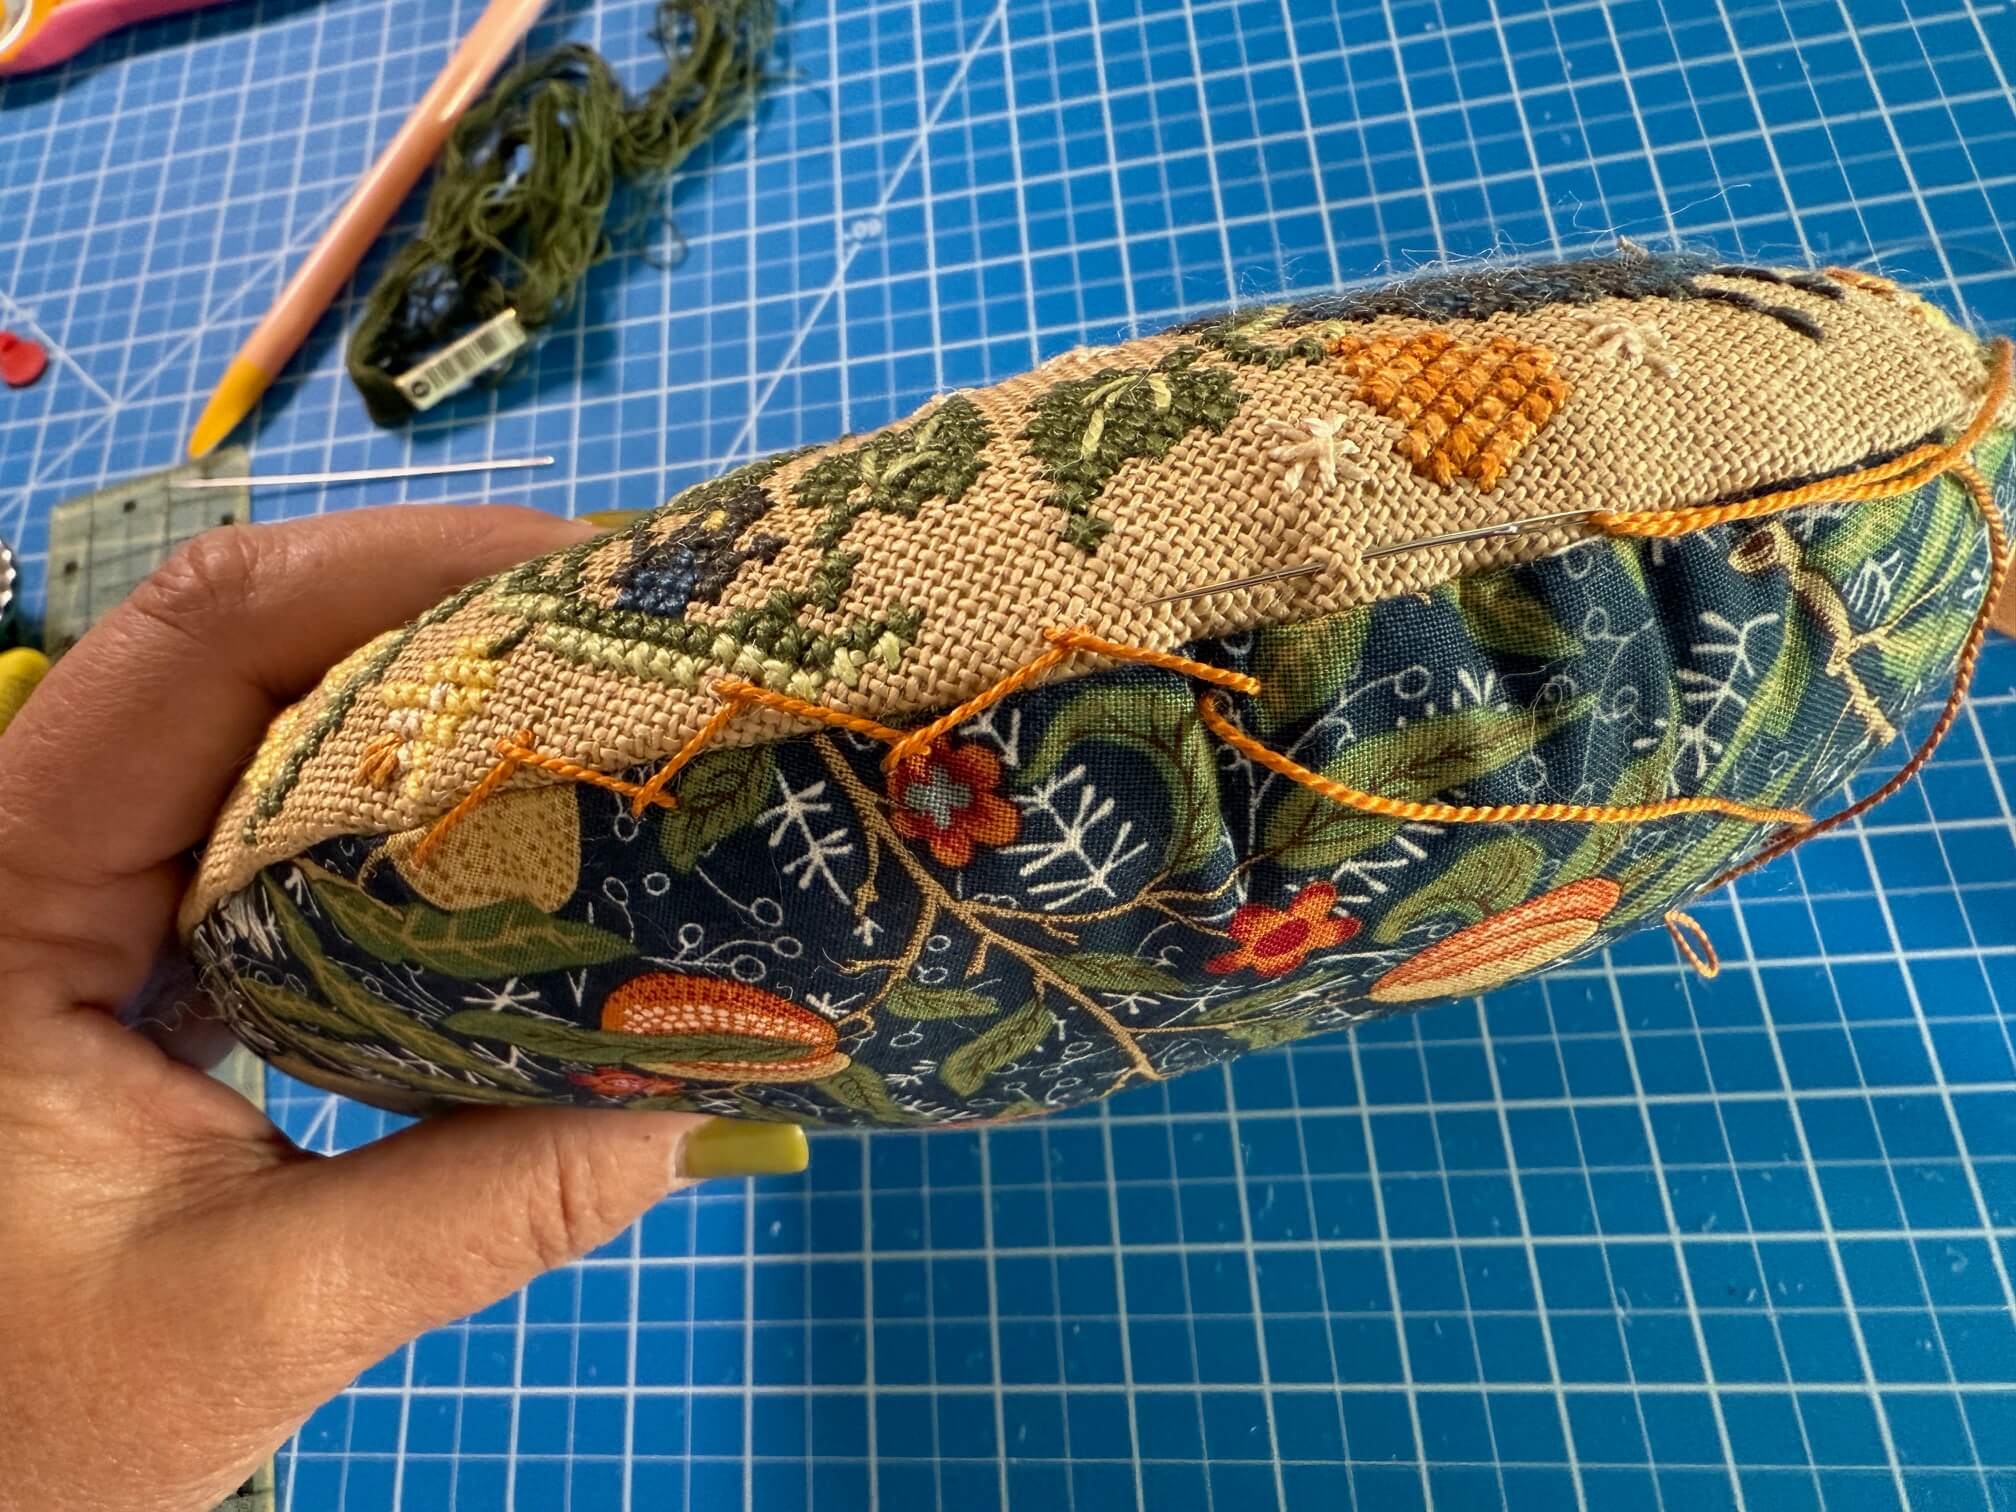
Place the right sides of the stitching & quilting cotton together, pin together & once again sew all the way around the circle. Sew the seam right on top of or ever so slightly inside the previous seam.


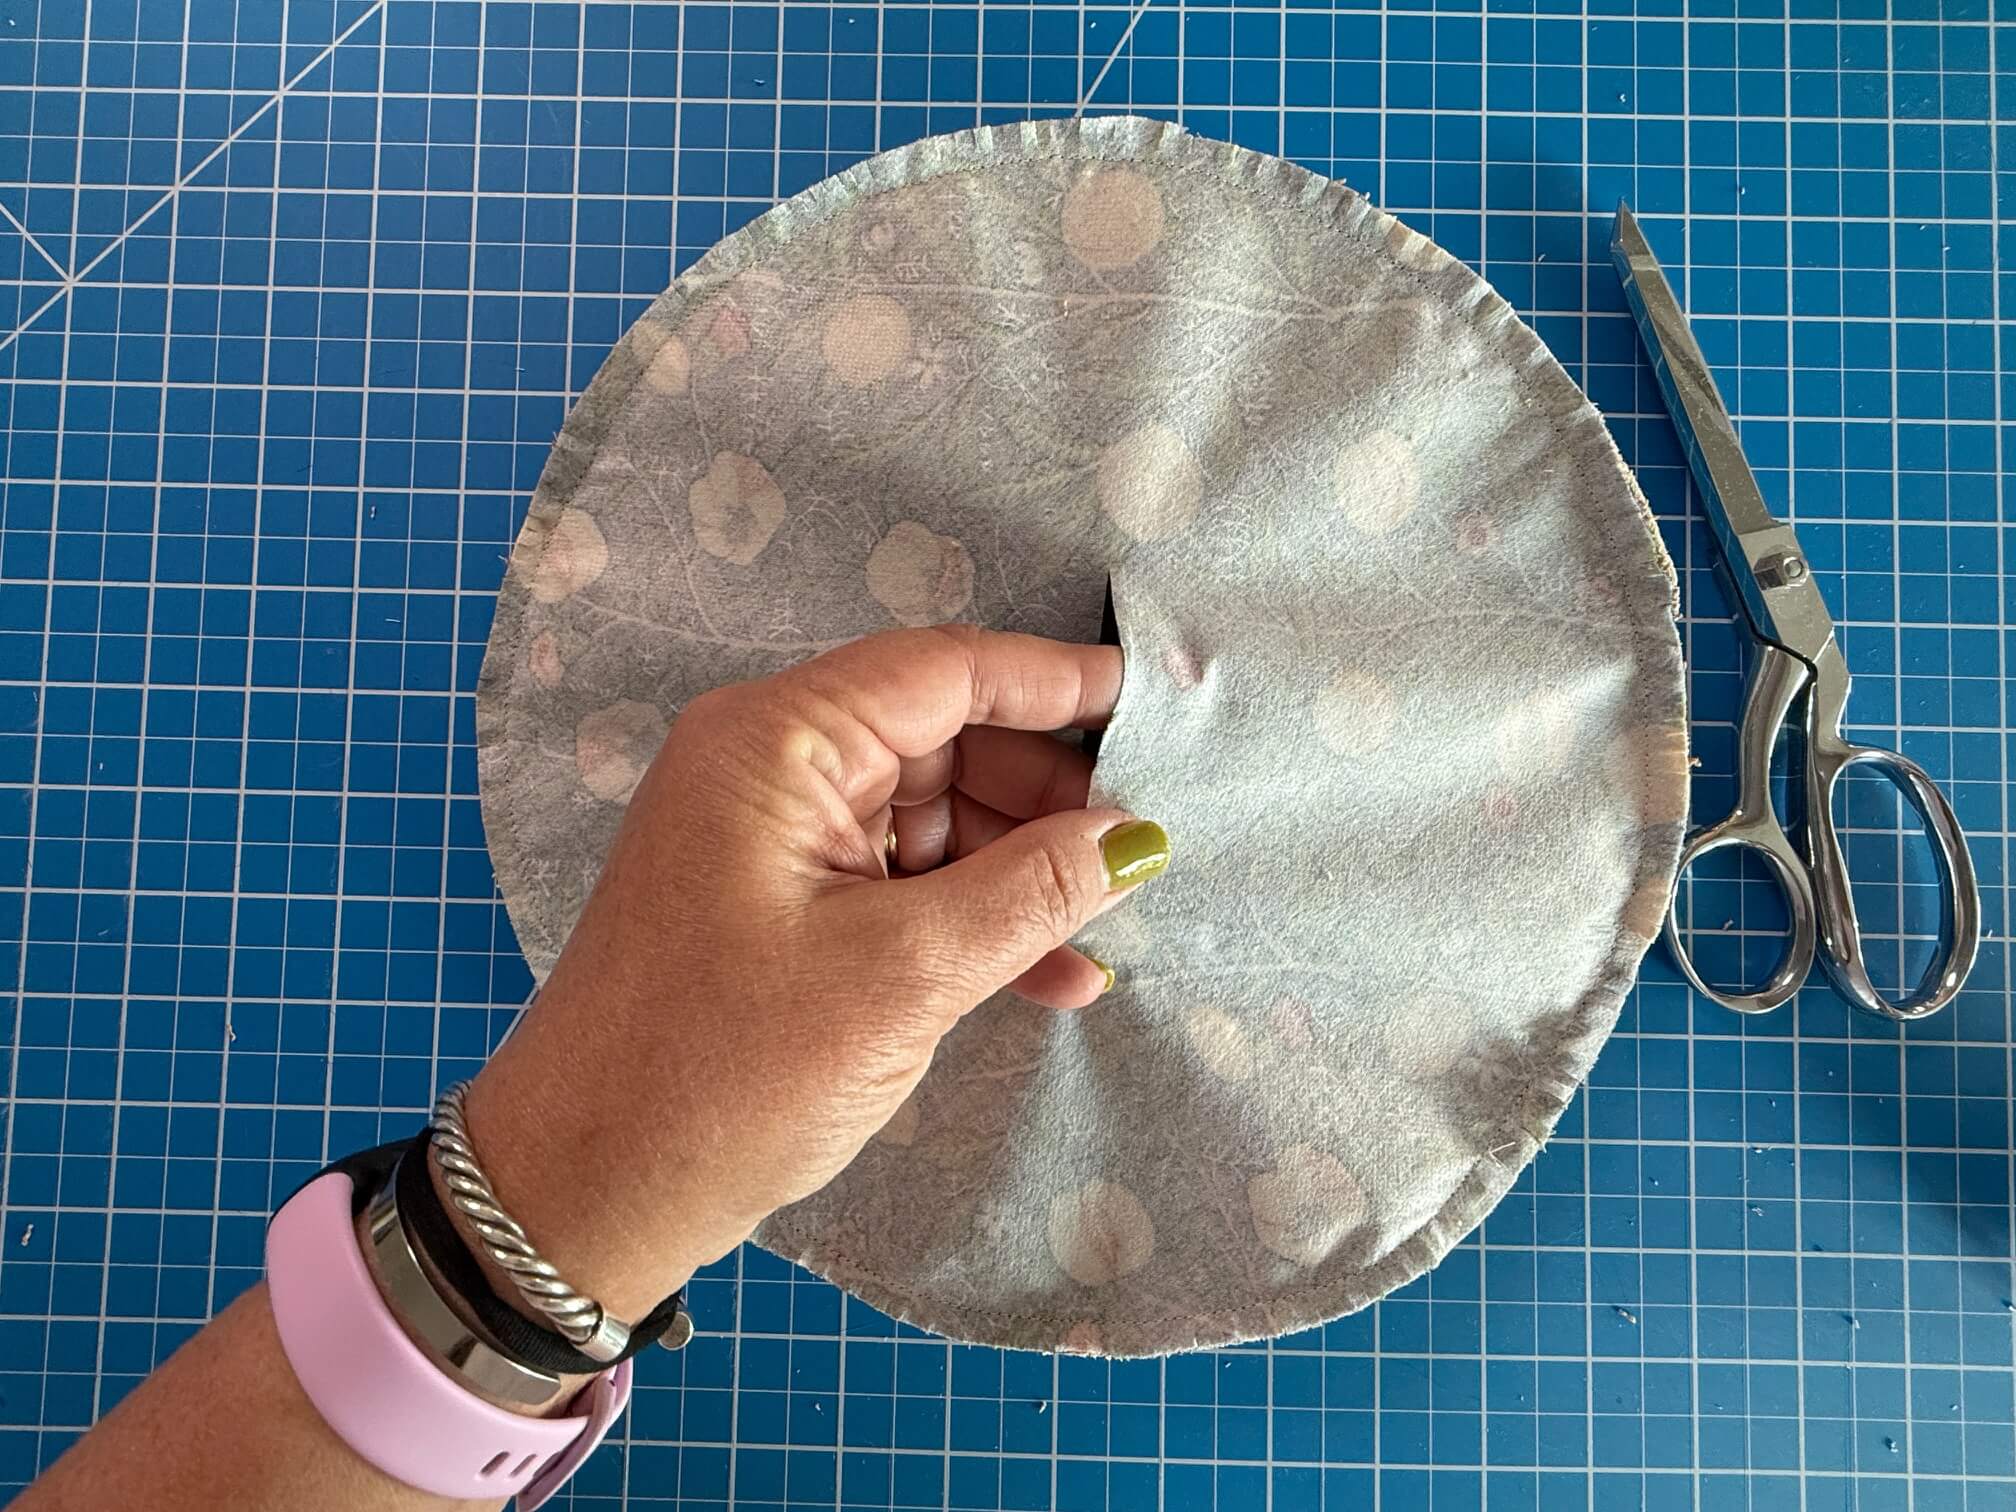
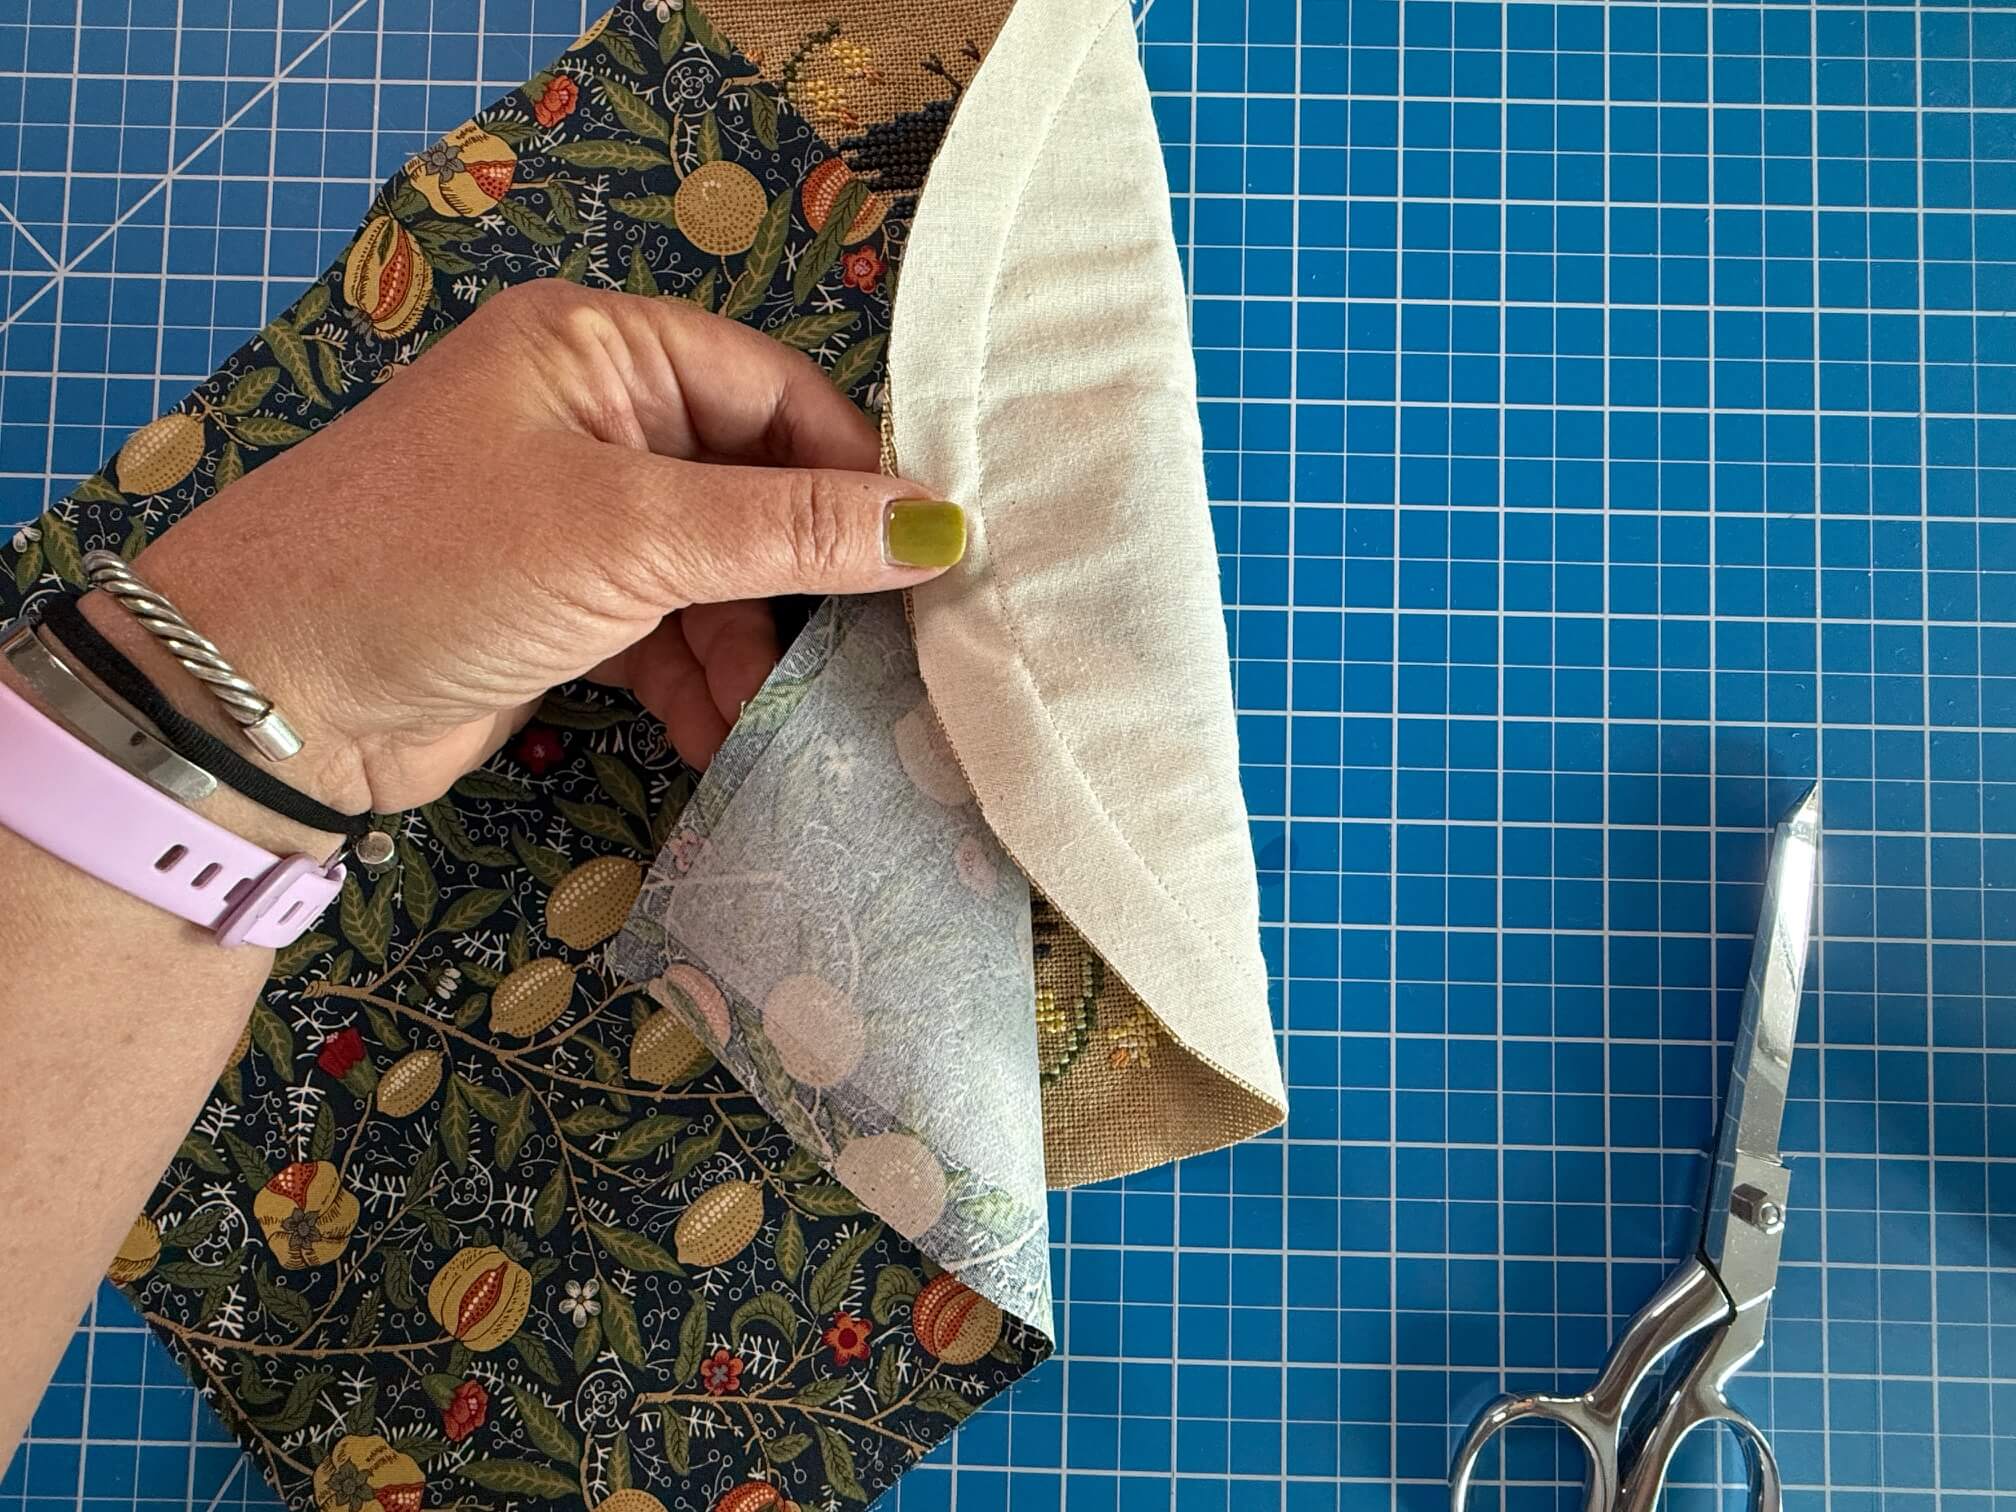
 Trim all the layers of fabric 1/2″ from the sewing line & clip through the selvage all around the circle. Cut through the BACK of the quilting cotton to turn the pumpkin.


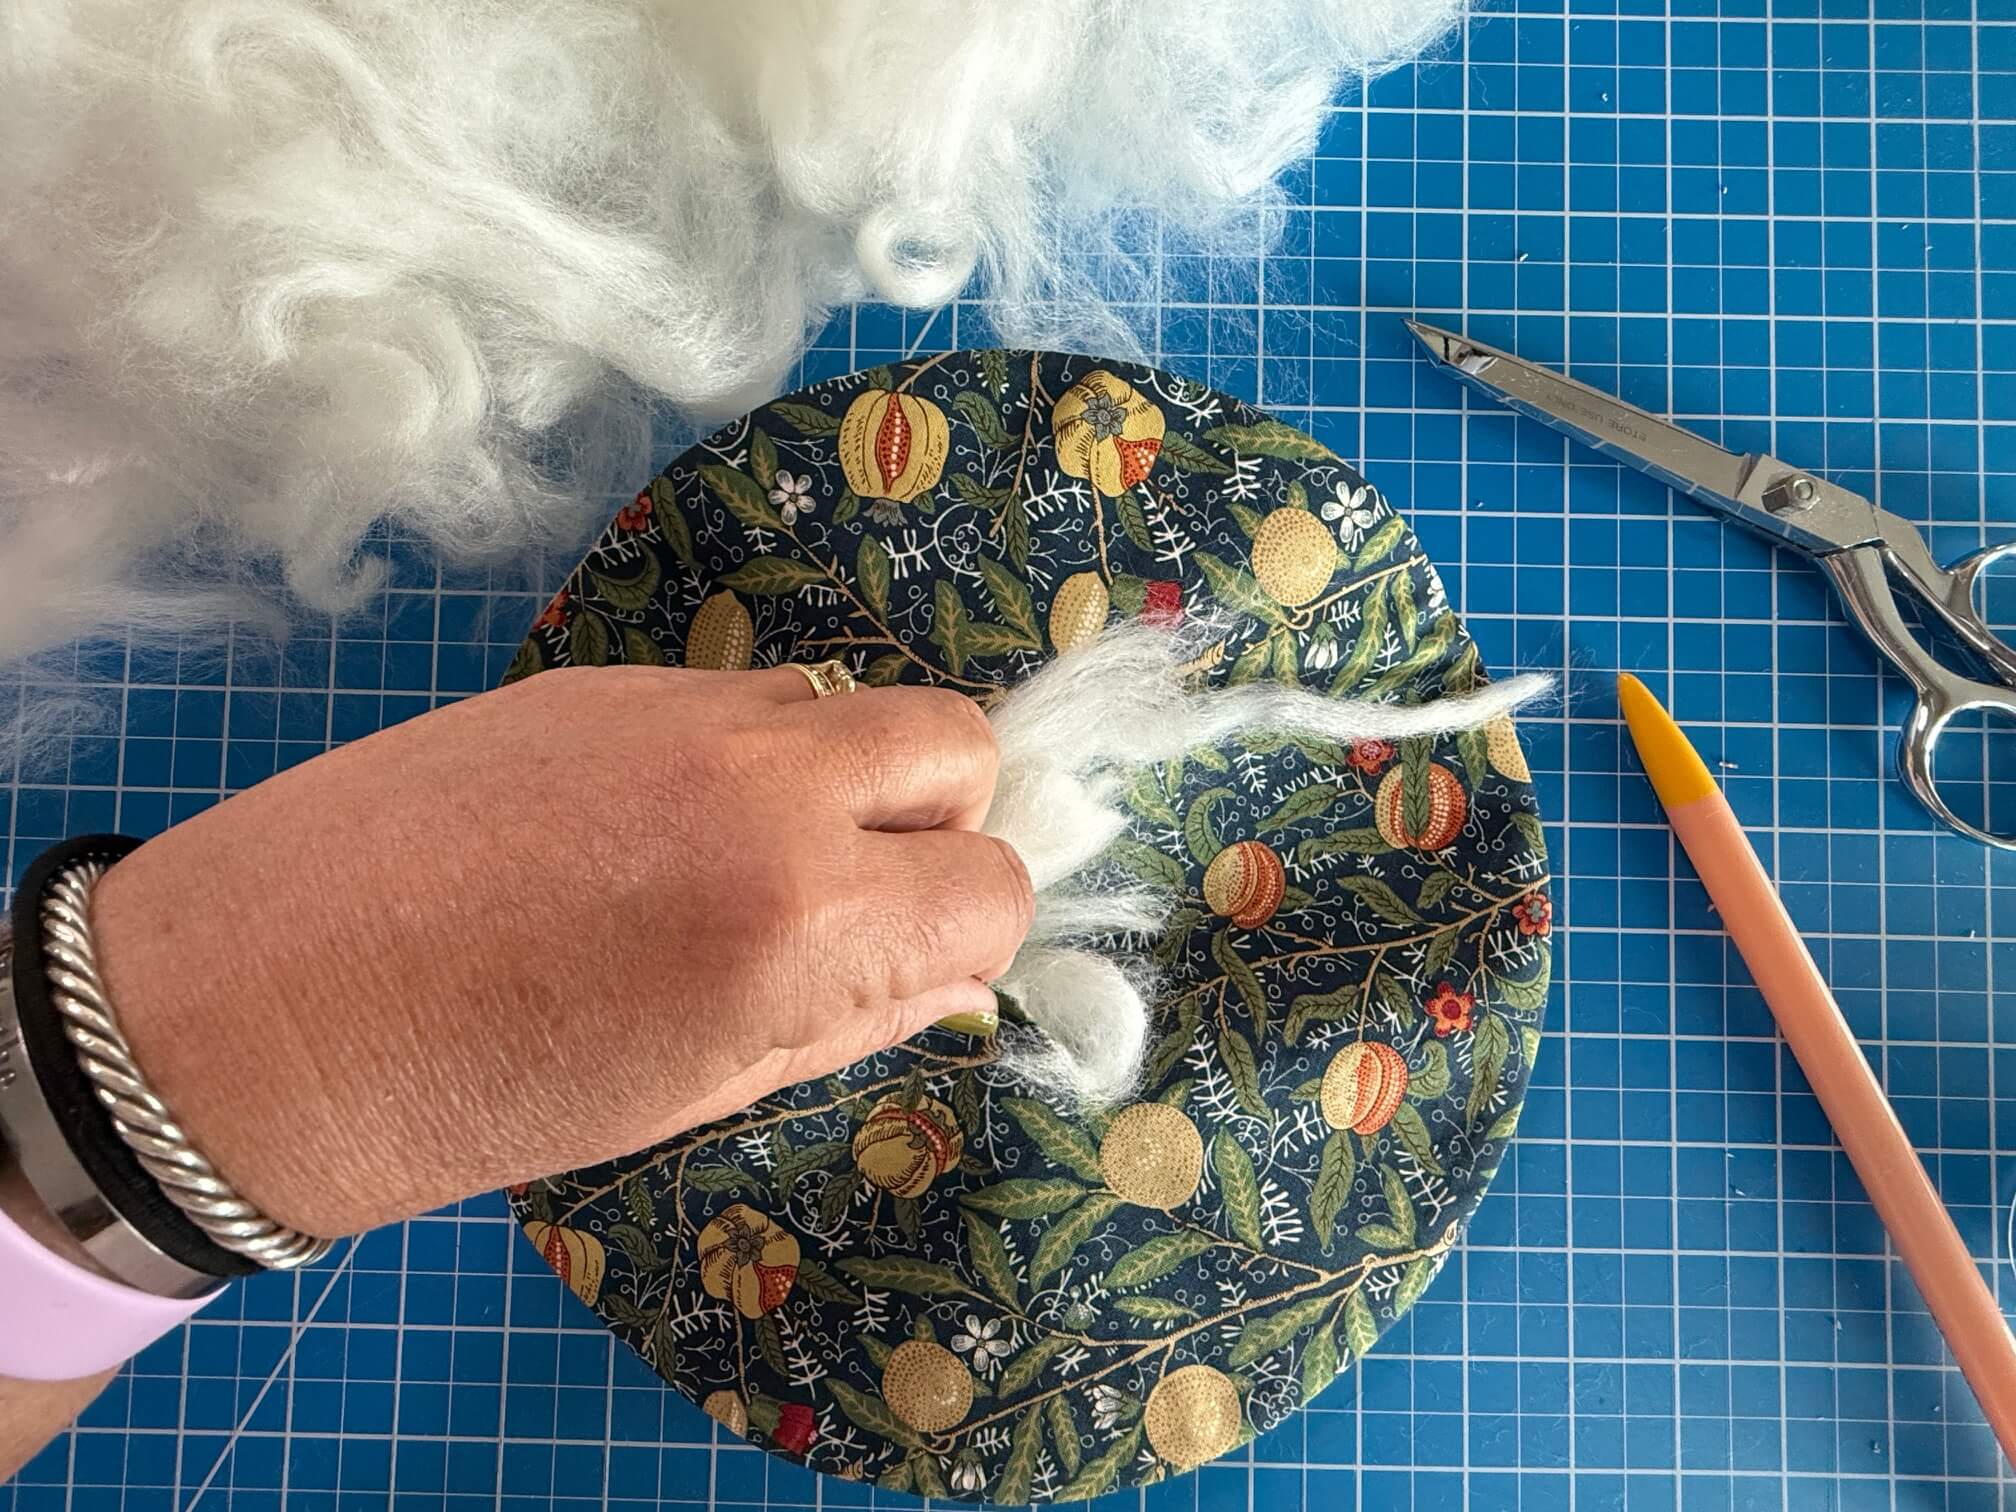
Turn pumpkin right side out, press & stuff with your favorite fill (I use wool roving which you can get from Benzie Design or many Etsy shops)


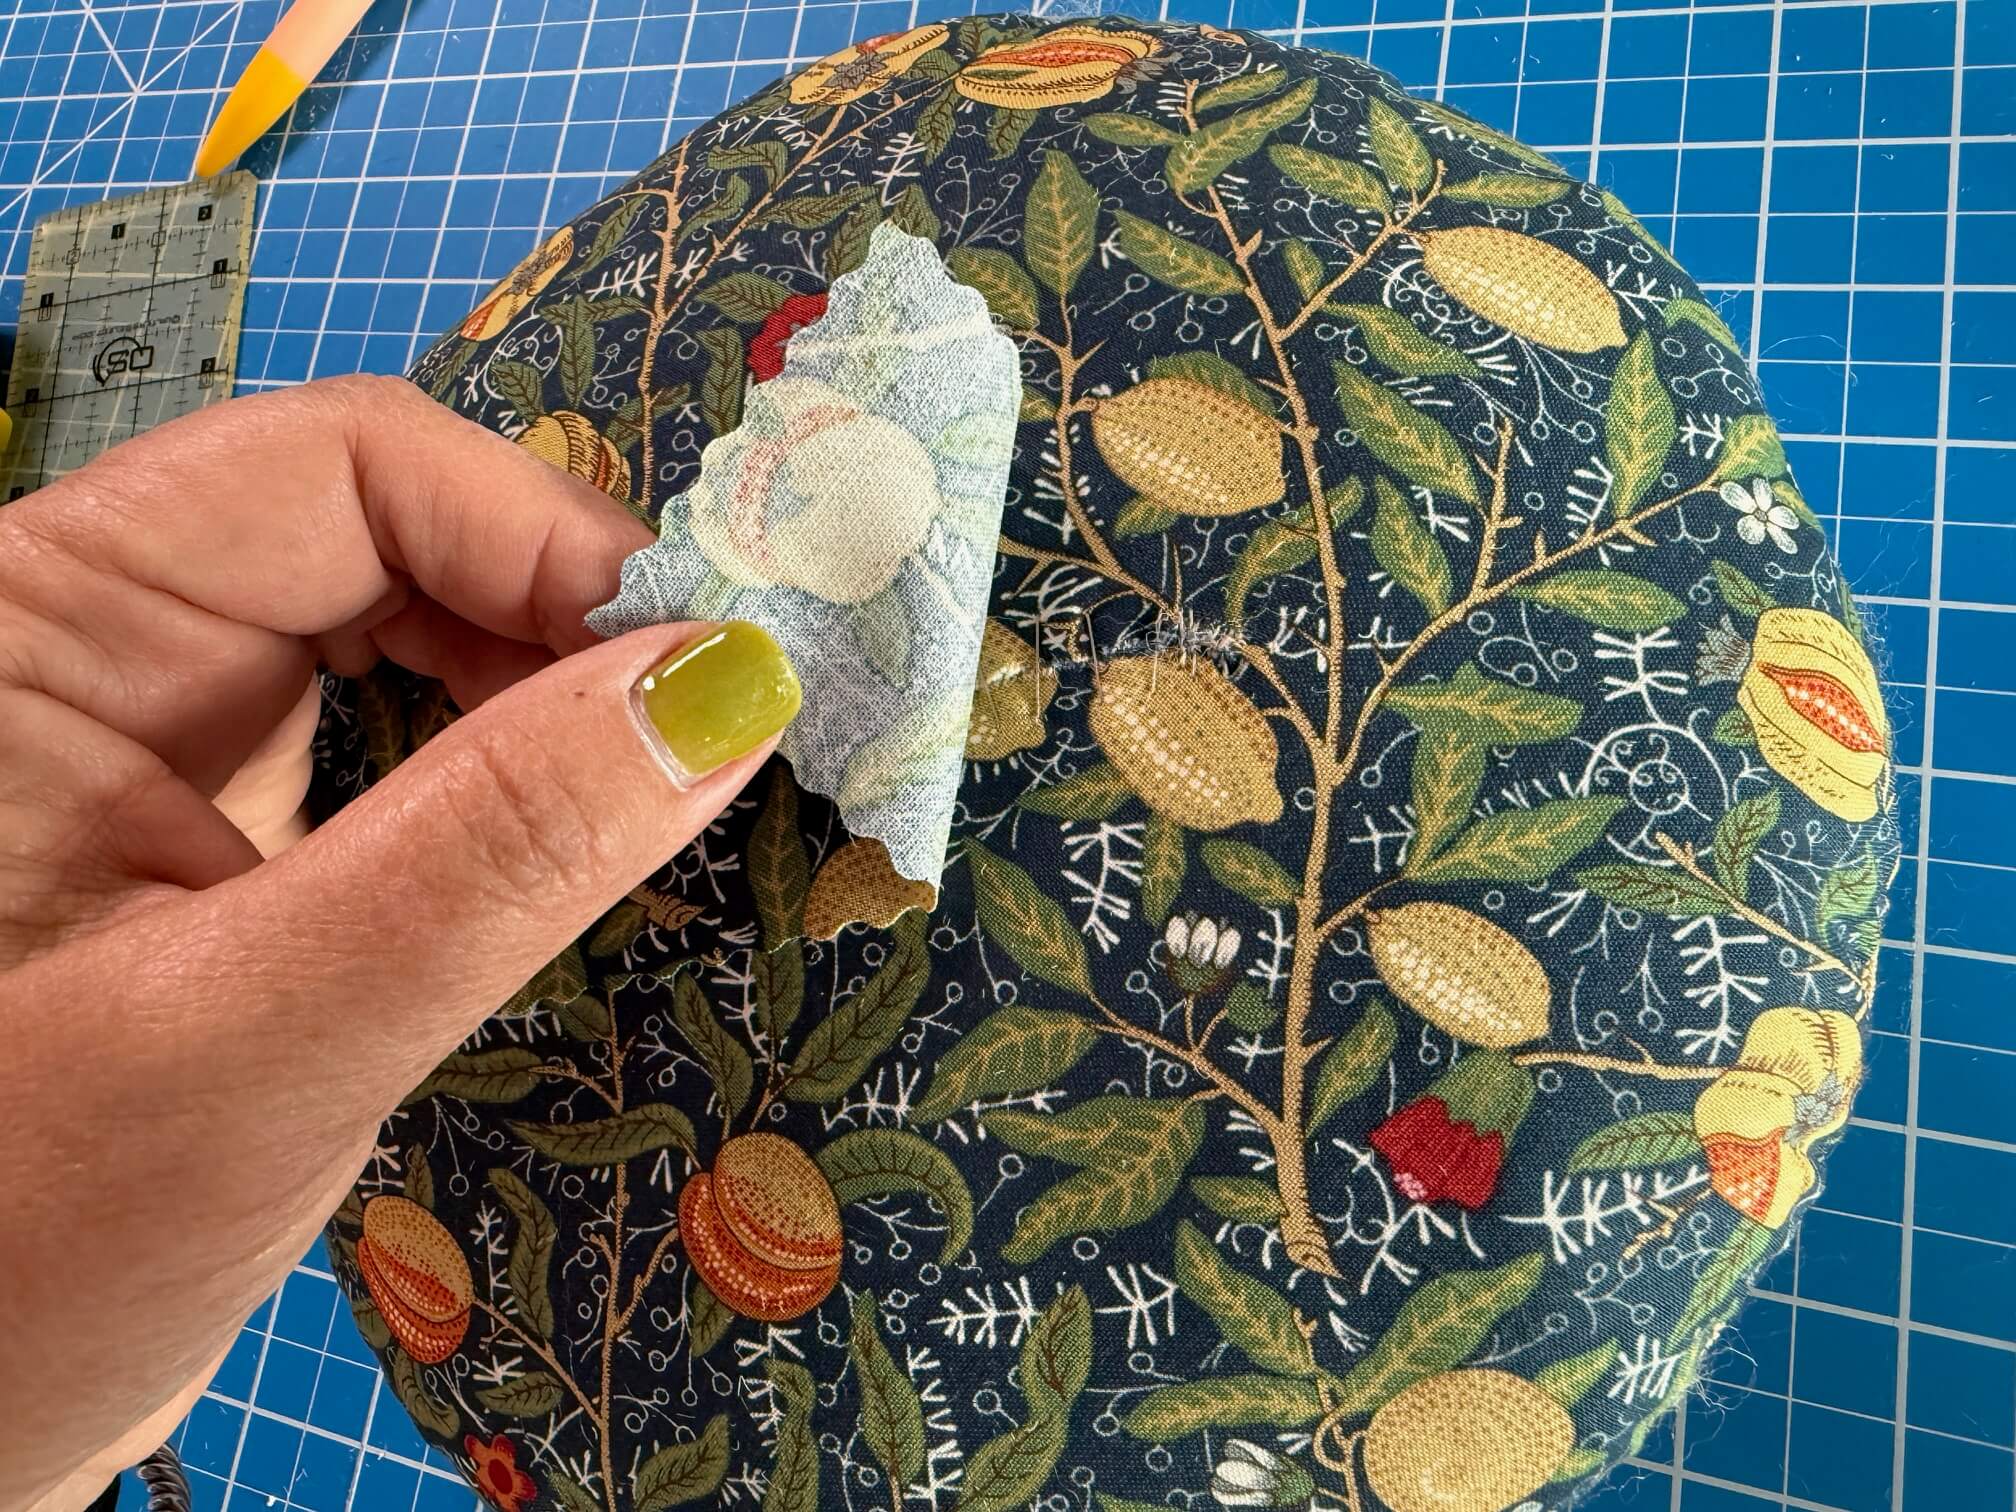
Ladder stitch the opening closed. I like to cover the ladder stitching with a matching piece of cotton that has been treated with double sided fusible interfacing.

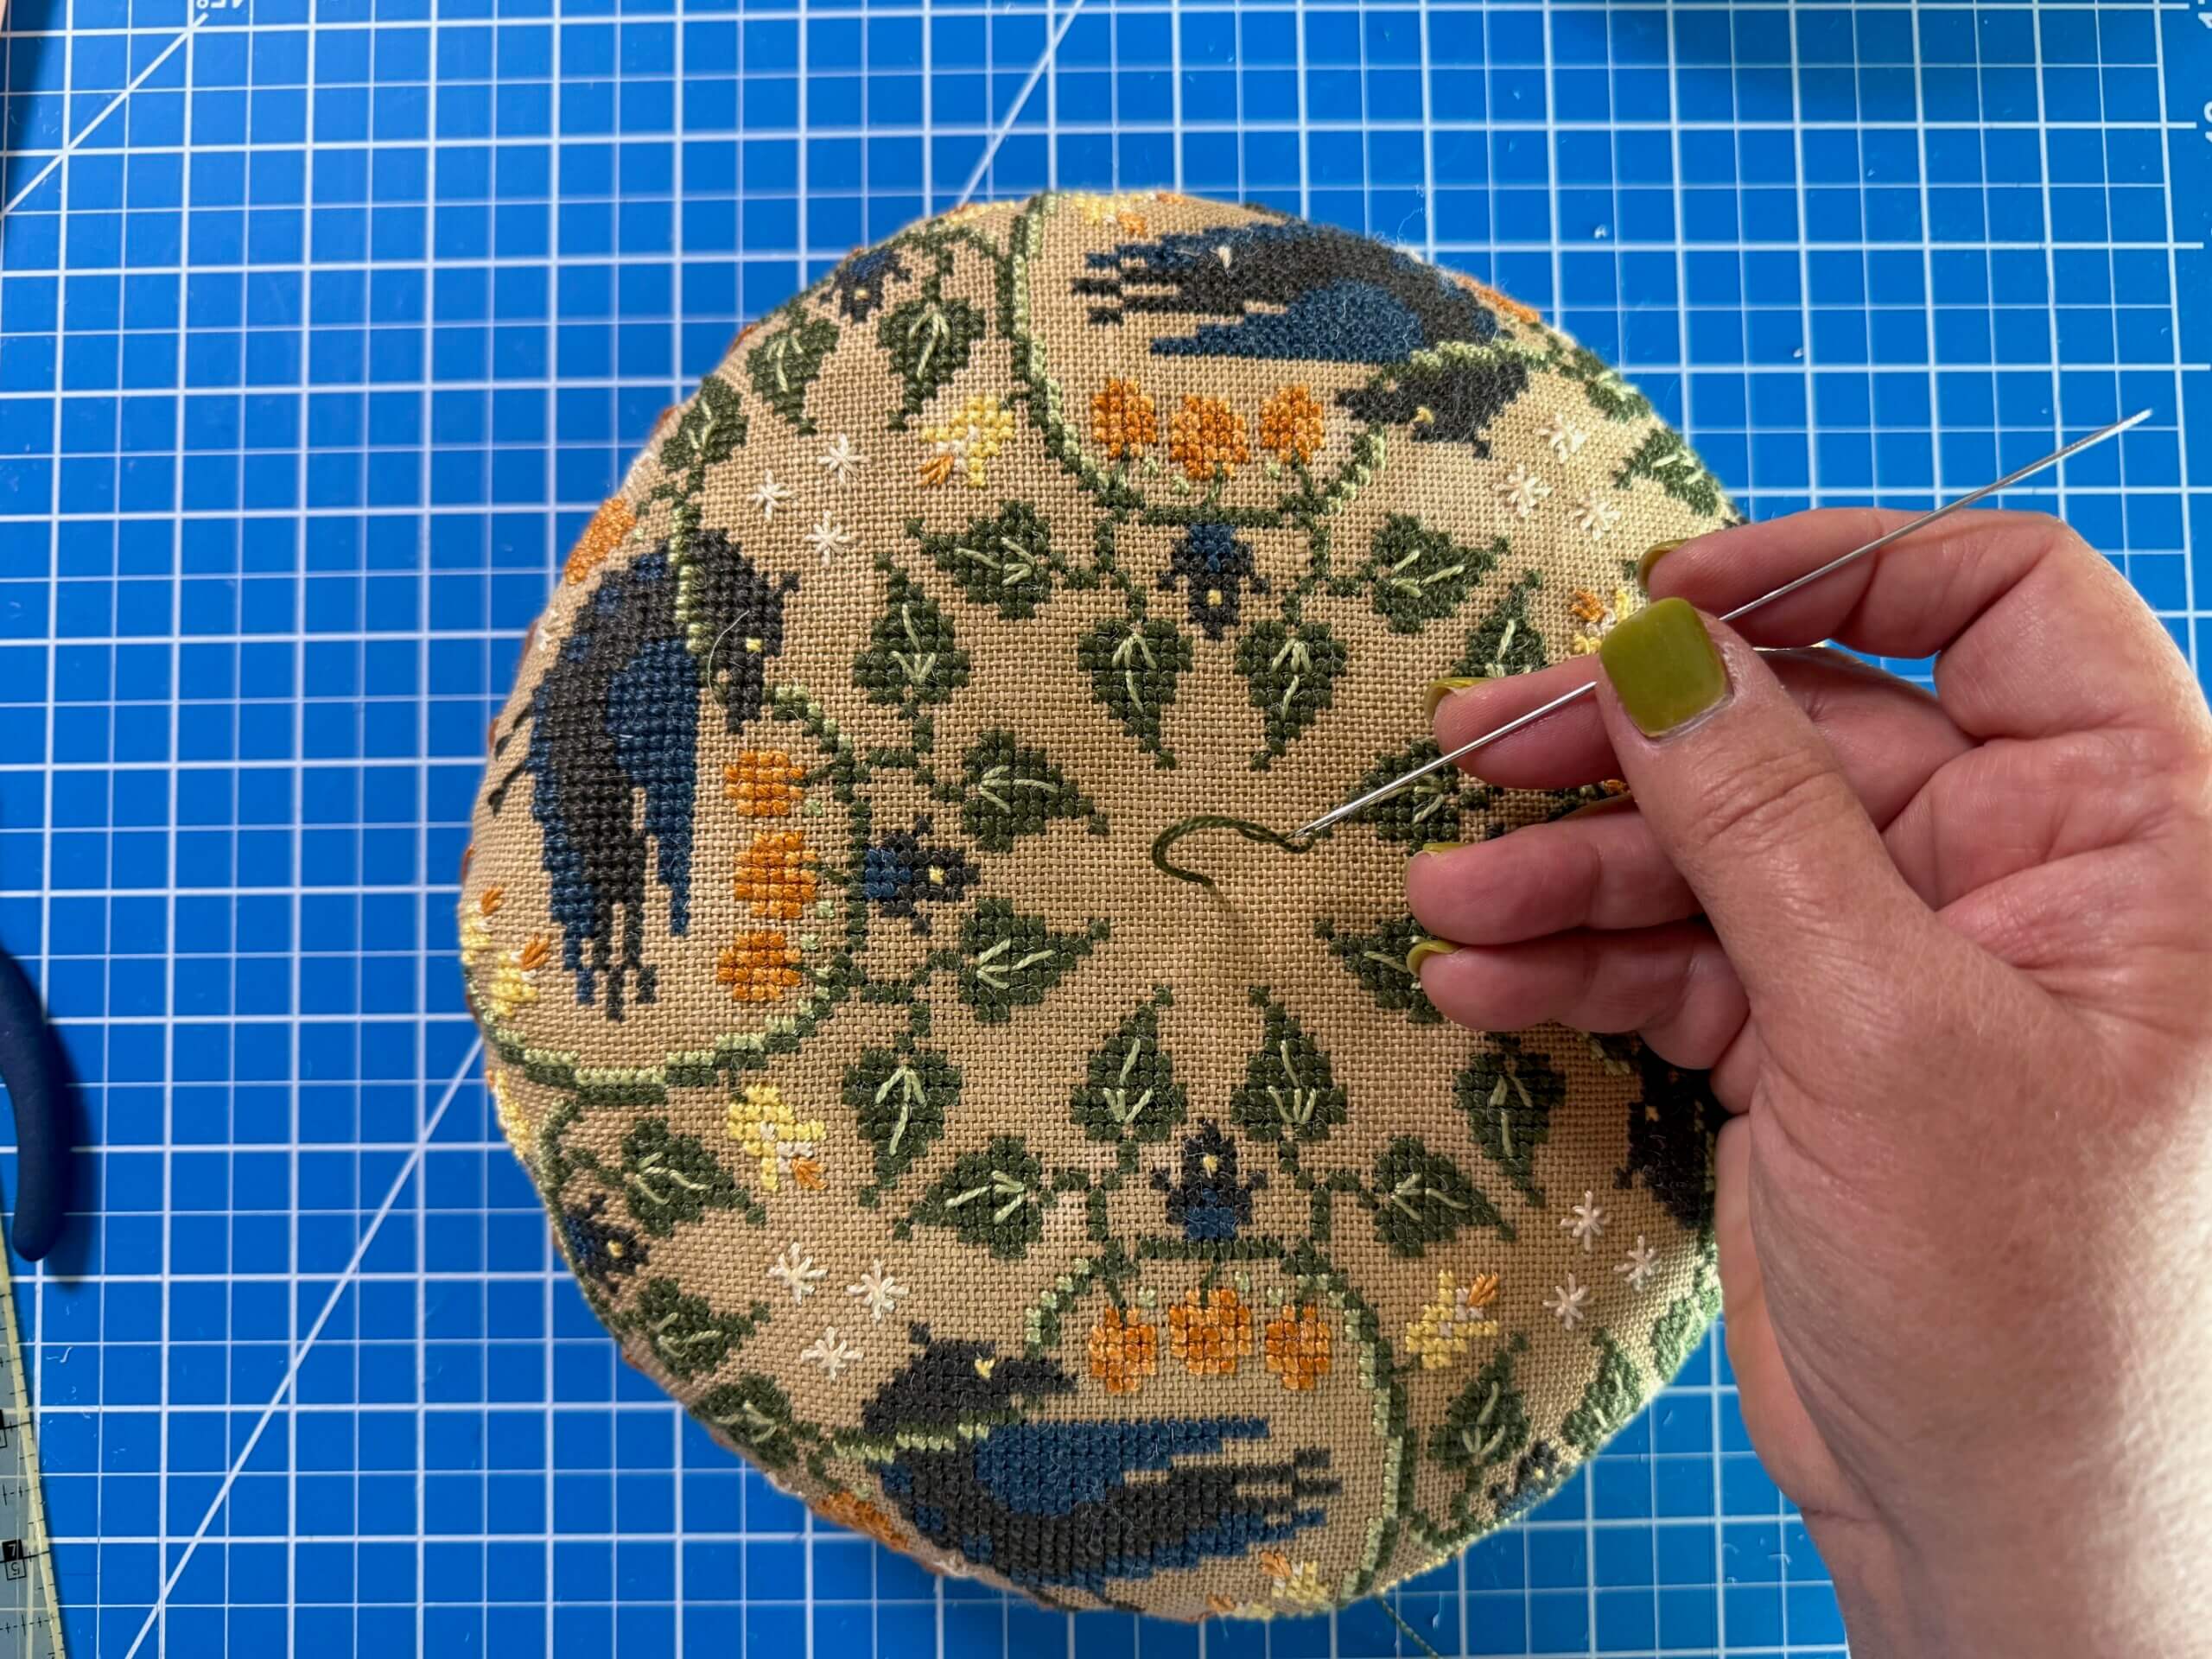
I added a sweet herringbone embellishment around the edge with the darker of the orange pearl cottons from the design.

Tuft your pumpkin: I used the dark green pearl cotton from the design, knot 1 end & thread with a doll making needle (nice & long). Bring the needle through the back side of the pumpkin up through the center.

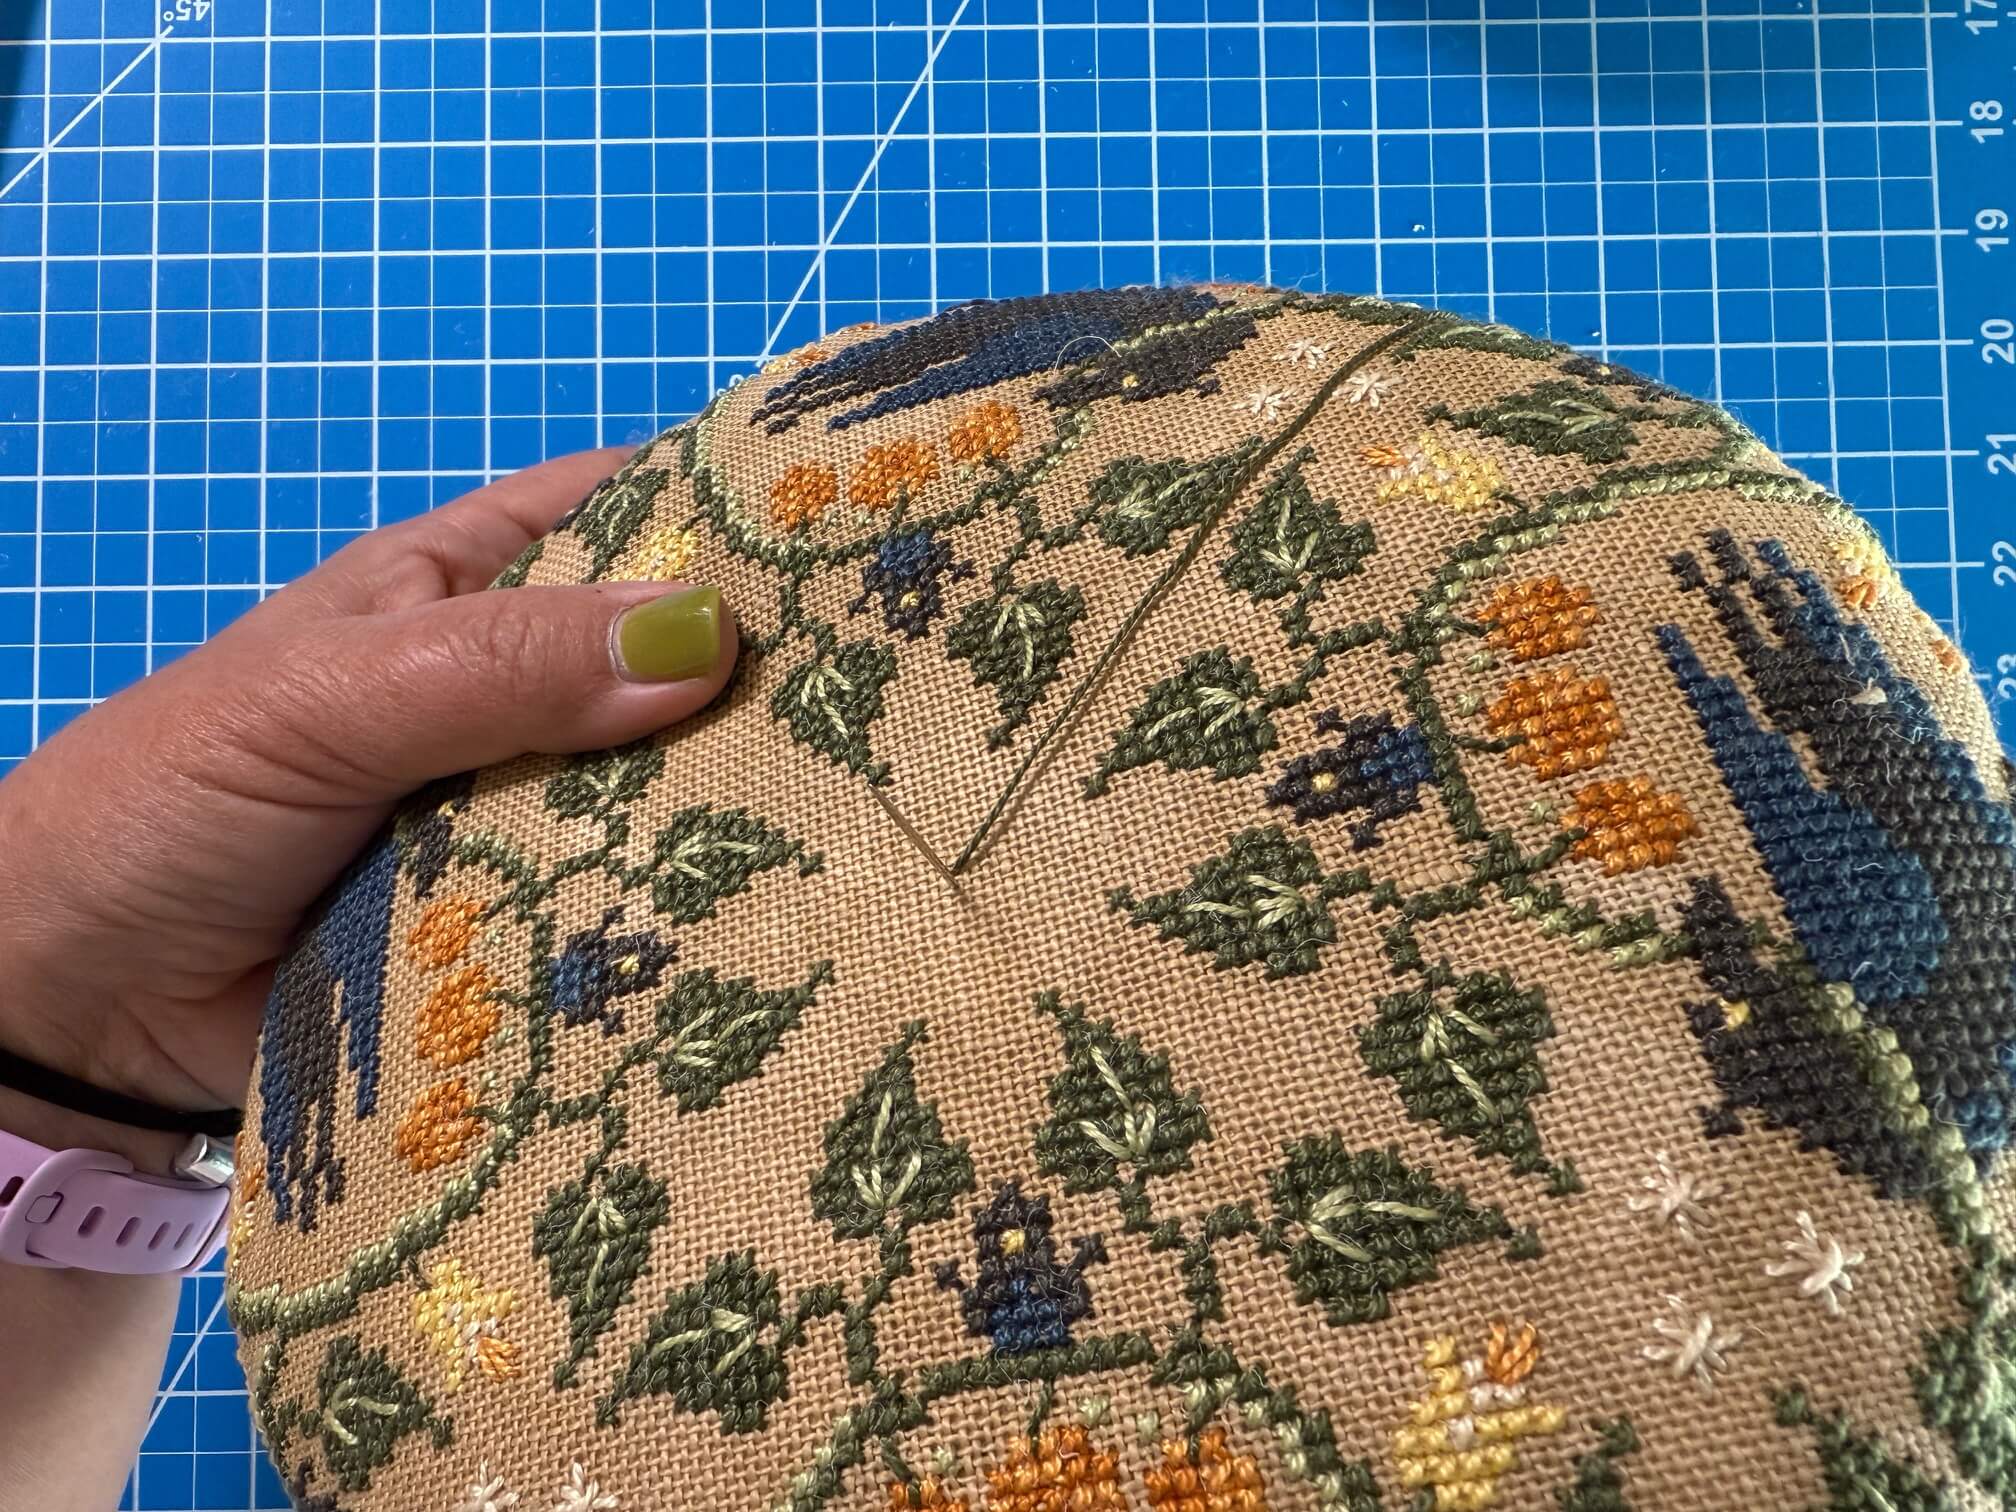
   Wrap the pearl cotton around the pumpkin & bring the needle up through the back center again. Pull on the thread to tuft the pumpkin.

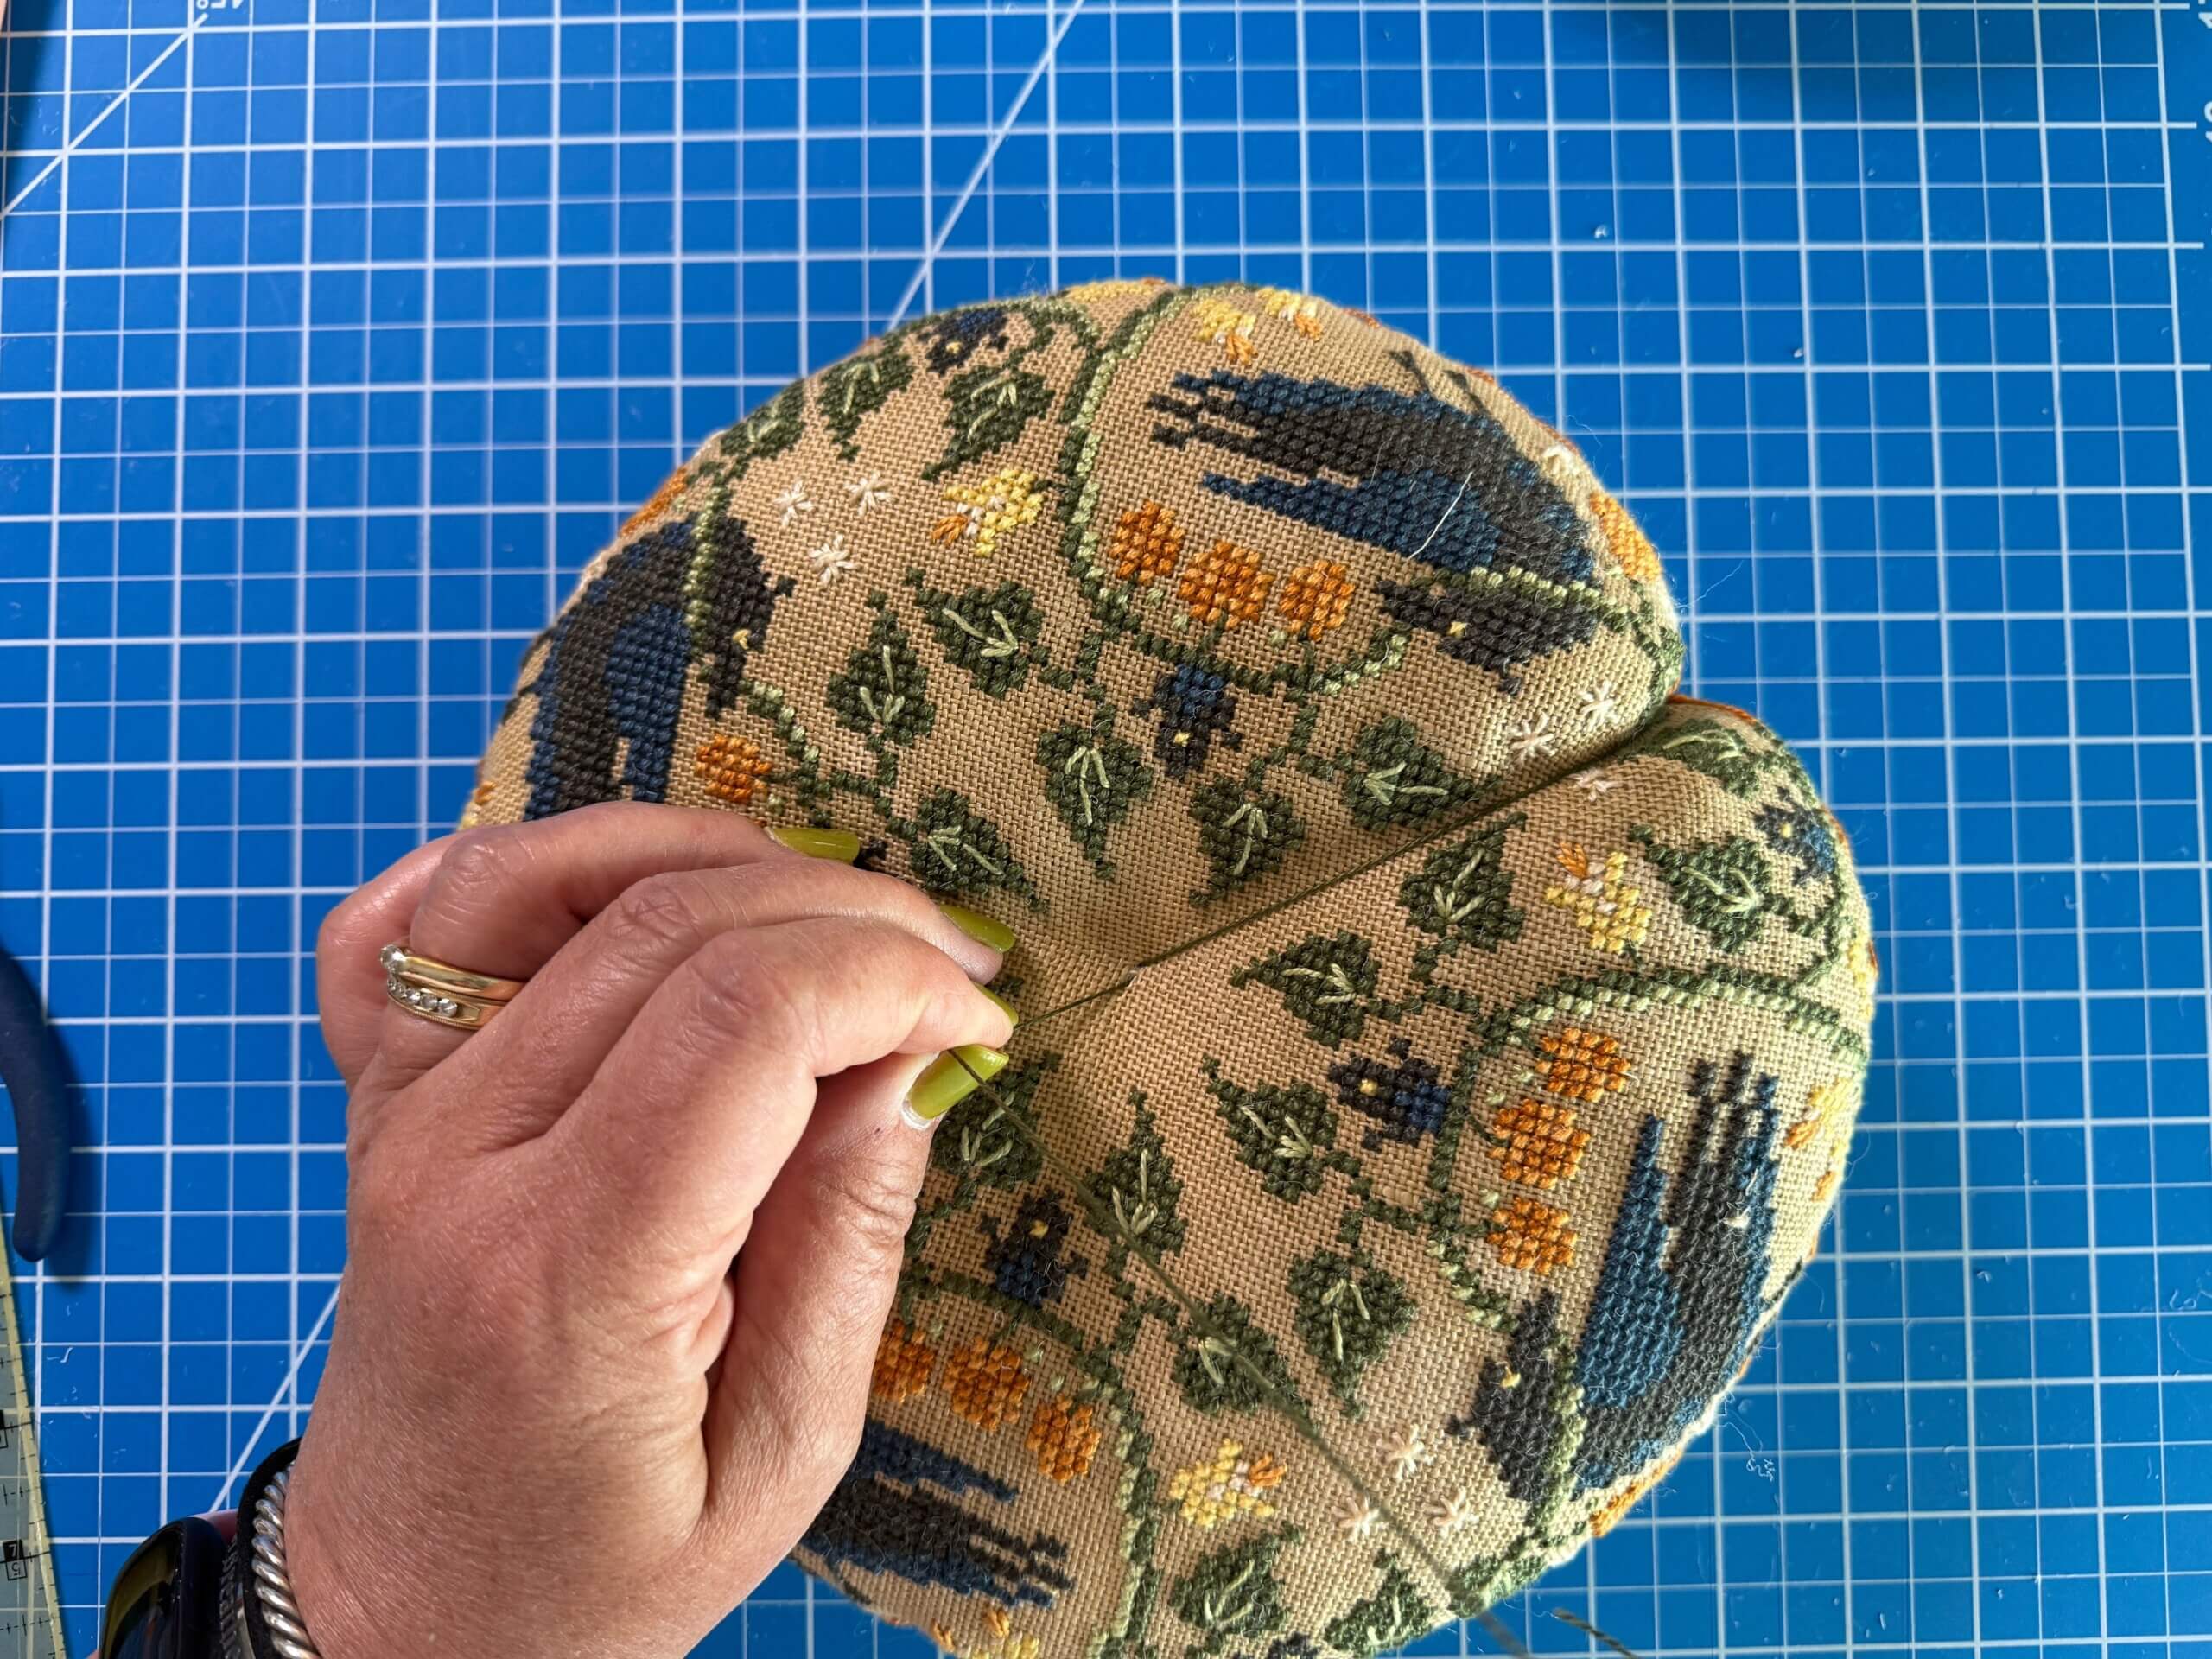
Repeat the previous steps until you have created 5 sections on your pumpkin.

HINT: I cut my Pearl Cotton threads short, so I only made 2 tufts then ran out of thread. Carefully knot on the bottom side of the pumpkin through the center. Start up with a new thread in the same spot. You will have to ‘push down’ on the stuffing to help you get the needle through to make the knot.

Finish the exact same way if you are making the smaller pumpkin on 32ct!

Have so much fun with these big guys!

A word about the dried, live stems: I did use some glue to attach my stems. I tried hot glue initially but could not get it to adhere. I turned to my trusty Tite Bond glue (Home Depot, Lowe’s) & it worked well. You may need to put glue in the center well of the pumpkin if you pulled tight (deep well) AND on the bottom of the stem!

Enjoy the Stitch,

Cathy, Hands On Design

#murderinthegarden #BAP

Filed Under: Uncategorized

Like this Post? Subscribe to My Newsletter!

THERE’S A HARE IN MY GARDEN FINISHING PICTURE WALK

Leave a Reply Cancel reply

Your email address will not be published. Required fields are marked *

Shop By Category

Newsletter Subscription

Search

New in the Shop

  • A HARVEST OF BLESSINGS A HARVEST OF BLESSINGS
  • BUY THE SCISSORS - THE CRAFT ROOM BUY THE SCISSORS - THE CRAFT ROOM
  • MURDER IN THE GARDEN MURDER IN THE GARDEN
  • THAT'S A WRAP - SPOOKY EDITION THAT'S A WRAP - SPOOKY EDITION

Hands On Design Instagoodness …

New project stitching, golf tournament fundraiser, New project stitching, golf tournament fundraiser, time to garden, surprise birthday party for a friend (such a surprise that I didn’t take a picture), sunset on the deck. 

I’m ready for the week ahead 🤞🏻 

#handsondesign #lastweekend #summertime #stitchsomehappy
No stitchy posts this weekend- I get to be Mom all No stitchy posts this weekend- I get to be Mom all weekend. Billy just got home from an amazing trip out west where he got to white water raft, ride a gondola, hike in a national park (where they saw all kinds of wildlife), swim, go to a real rodeo, go on an alpine rail, make new friends and so much more. 

I missed him so much (even though he doesn’t live with us every day…yep, the mom in me knew he was far away 😊) - we are so thankful to the Let’s Go West team for planning & documenting this trip. He’s staying on with us a few more days …I was even excited to do his laundry!?!?🤷🏻‍♀️🤦🏻‍♀️

#handsondesign #chickinthenest #stitchsomehappy
Are you in the mood for more BAP - Big Awesome Pro Are you in the mood for more BAP - Big Awesome Produce??

The follow up to 'There's a Hare in my Garden' will debut in September & I can't wait for you to see it!!

#handsondesign #bigawesomeproduce #fabricsbystephanie #pearlcotton #stitchsomehappy
The Finishing Touch Course-in-a-box is open for pr The Finishing Touch Course-in-a-box is open for pre-order only through July 31st! They will not be available after that date.

Pre-order means, if you place an order, you will receive yours (orders are fulfilled in the order they are received starting Aug 1st)

Head to chantelles141.com to read what all is included in your shipment & get your fabric & floss list while you are there 

#handsondesign #thefinishingtouch #courseinabox #homesweethome #stitchsomehappy
It's World Emoji Day!! 🌼🤷🏼‍♀️🍅🪡😉❤️ 

Did you know that when I released Well Hello There - we called those adorable buttons that grace each stitch every month 'button-moji's'?? 

Button-moji packs are still available from my dear friends @justanotherbuttoncompany - I don't know that button-moji ever caught on as a word but they sure look cute

#handsondesign #wellhellothere #EmojiFun #justanotherbuttoncompany #stitchsomehappy
A little 'down-time' between HOD models, I started A little 'down-time' between HOD models, I started Harvest Lilies from my good friend Tracy @inkcircles.xs - I switched up the linen for 32ct Rosewood @fabrics.by.steph & called for threads with Sulky 12wt. I do have a yellow pulled for the negative space that looks kinda quilty. I'm thinking about leaving it like it is...what do you think?

#handsondesign #harvestlillies #eveningstitching #stitchsomehappy
Join Me on Instagram

Helpful Links

  • My Account
  • Lost Password
  • About
  • Wholesale
  • Store Locator
  • Classes
  • Events
  • OOPSIE

FOLLOW US ON:

Facebook-Logo_For-Website Instagram-Logo_For-Website

Get My Newsletter

And be the first to know about new products, events, tutorials and more!

  • Email
  • Facebook
  • Instagram

Copyright © 2025 · Hands On Design

A Habermann Company · cathy@handsondesign.biz