It’s Thyme to Turnip the Beet!
The vegetable puns have been flying around our house lately!! I giggled my way through the whole design process right through the stitching and finishing!!
I wanted to experiment with more hoop finishes – actually, I wanted to dye the hoop. As I shopped around my small town with it’s limited crafting resources, I couldn’t find just the perfect purple dye. Yes, yes I know all about the internet & could easily order in the perfect dye. Sometimes…you are in more of a time crunch than ordering & shipping will allow.
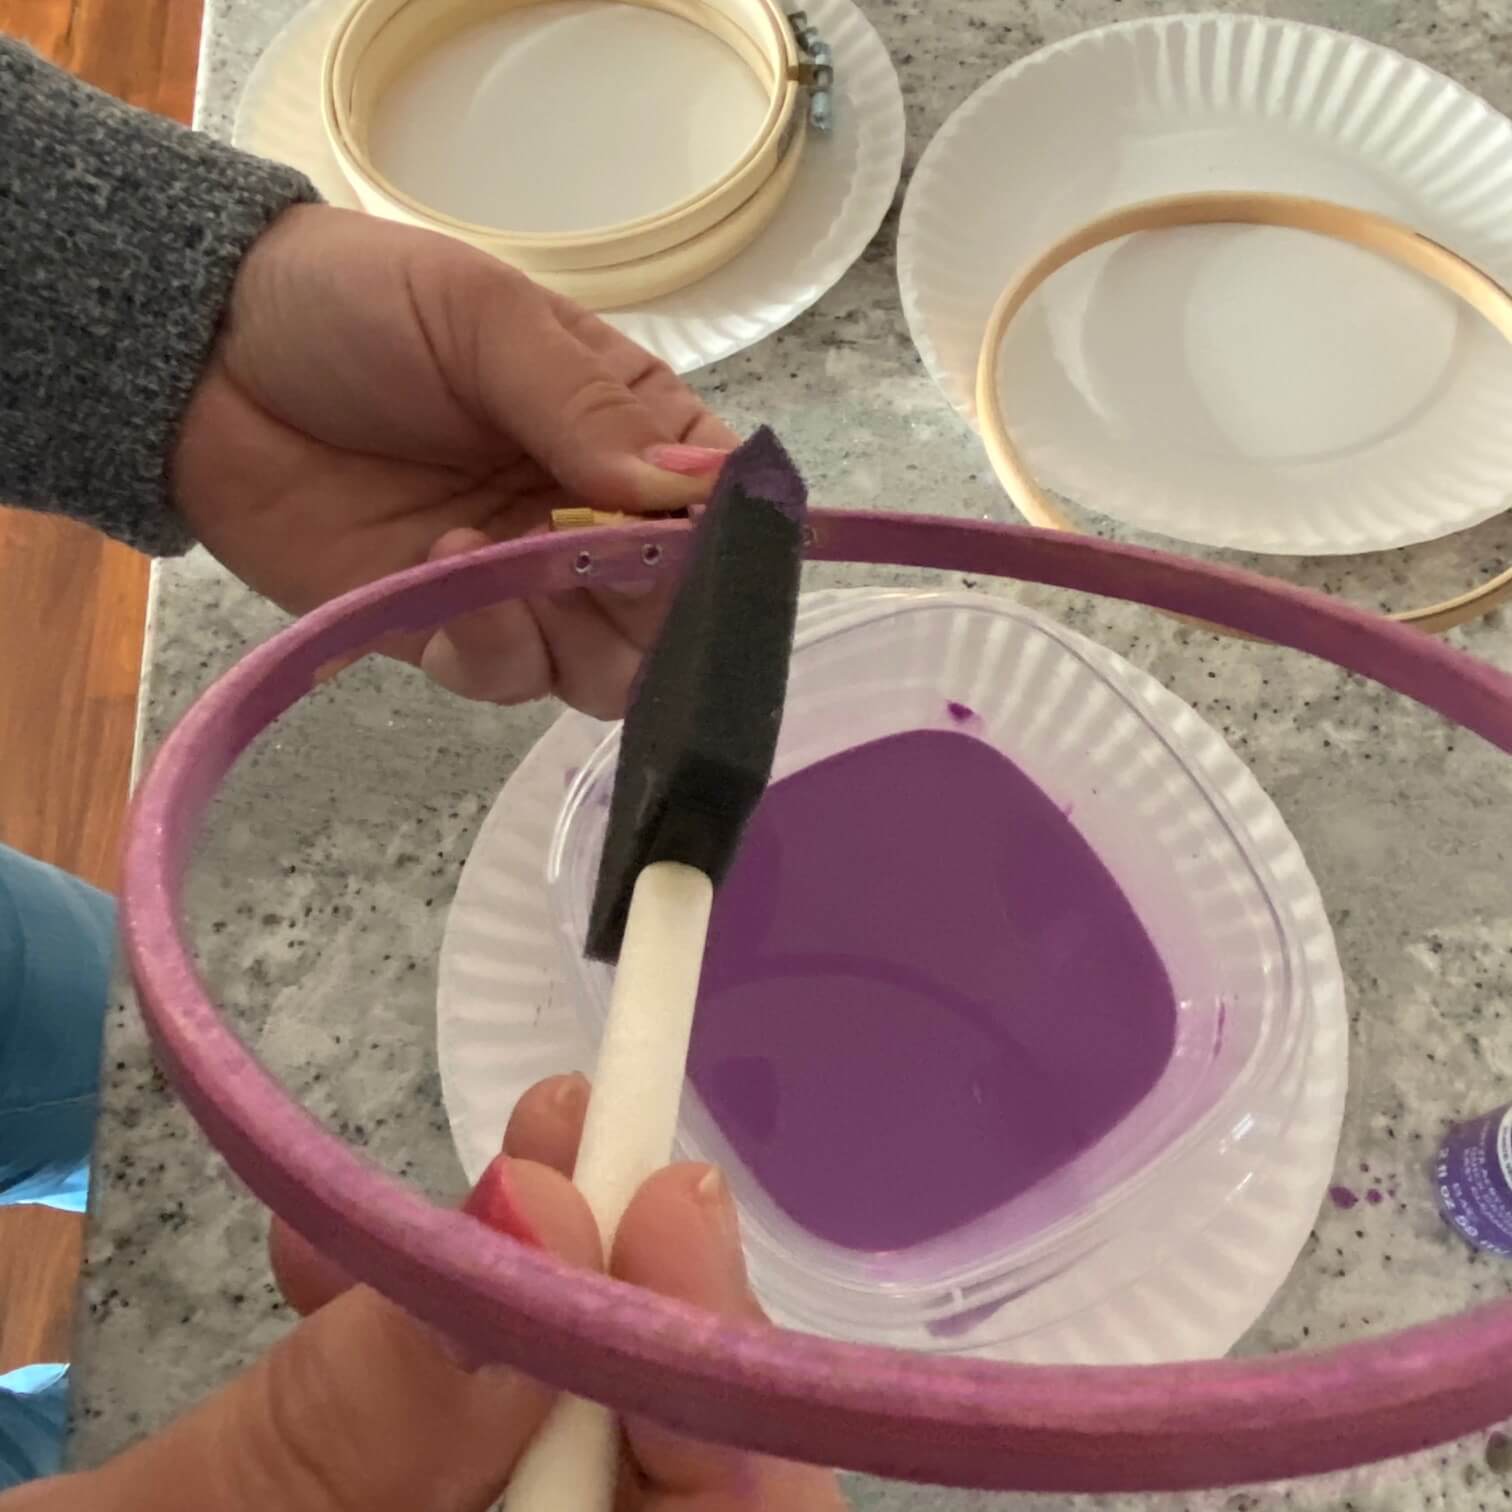
What I did have on hand is a whole lot of Craft Paint…including purple (Apple Barrel – 21487E Velvet Crush). I have also cornered the market on foam brushes over the years & had a ready supply of paper plates (I hear that some folks actually use them for dishes & not crafting!) I grabbed my 6″ hoops & I was good to go.
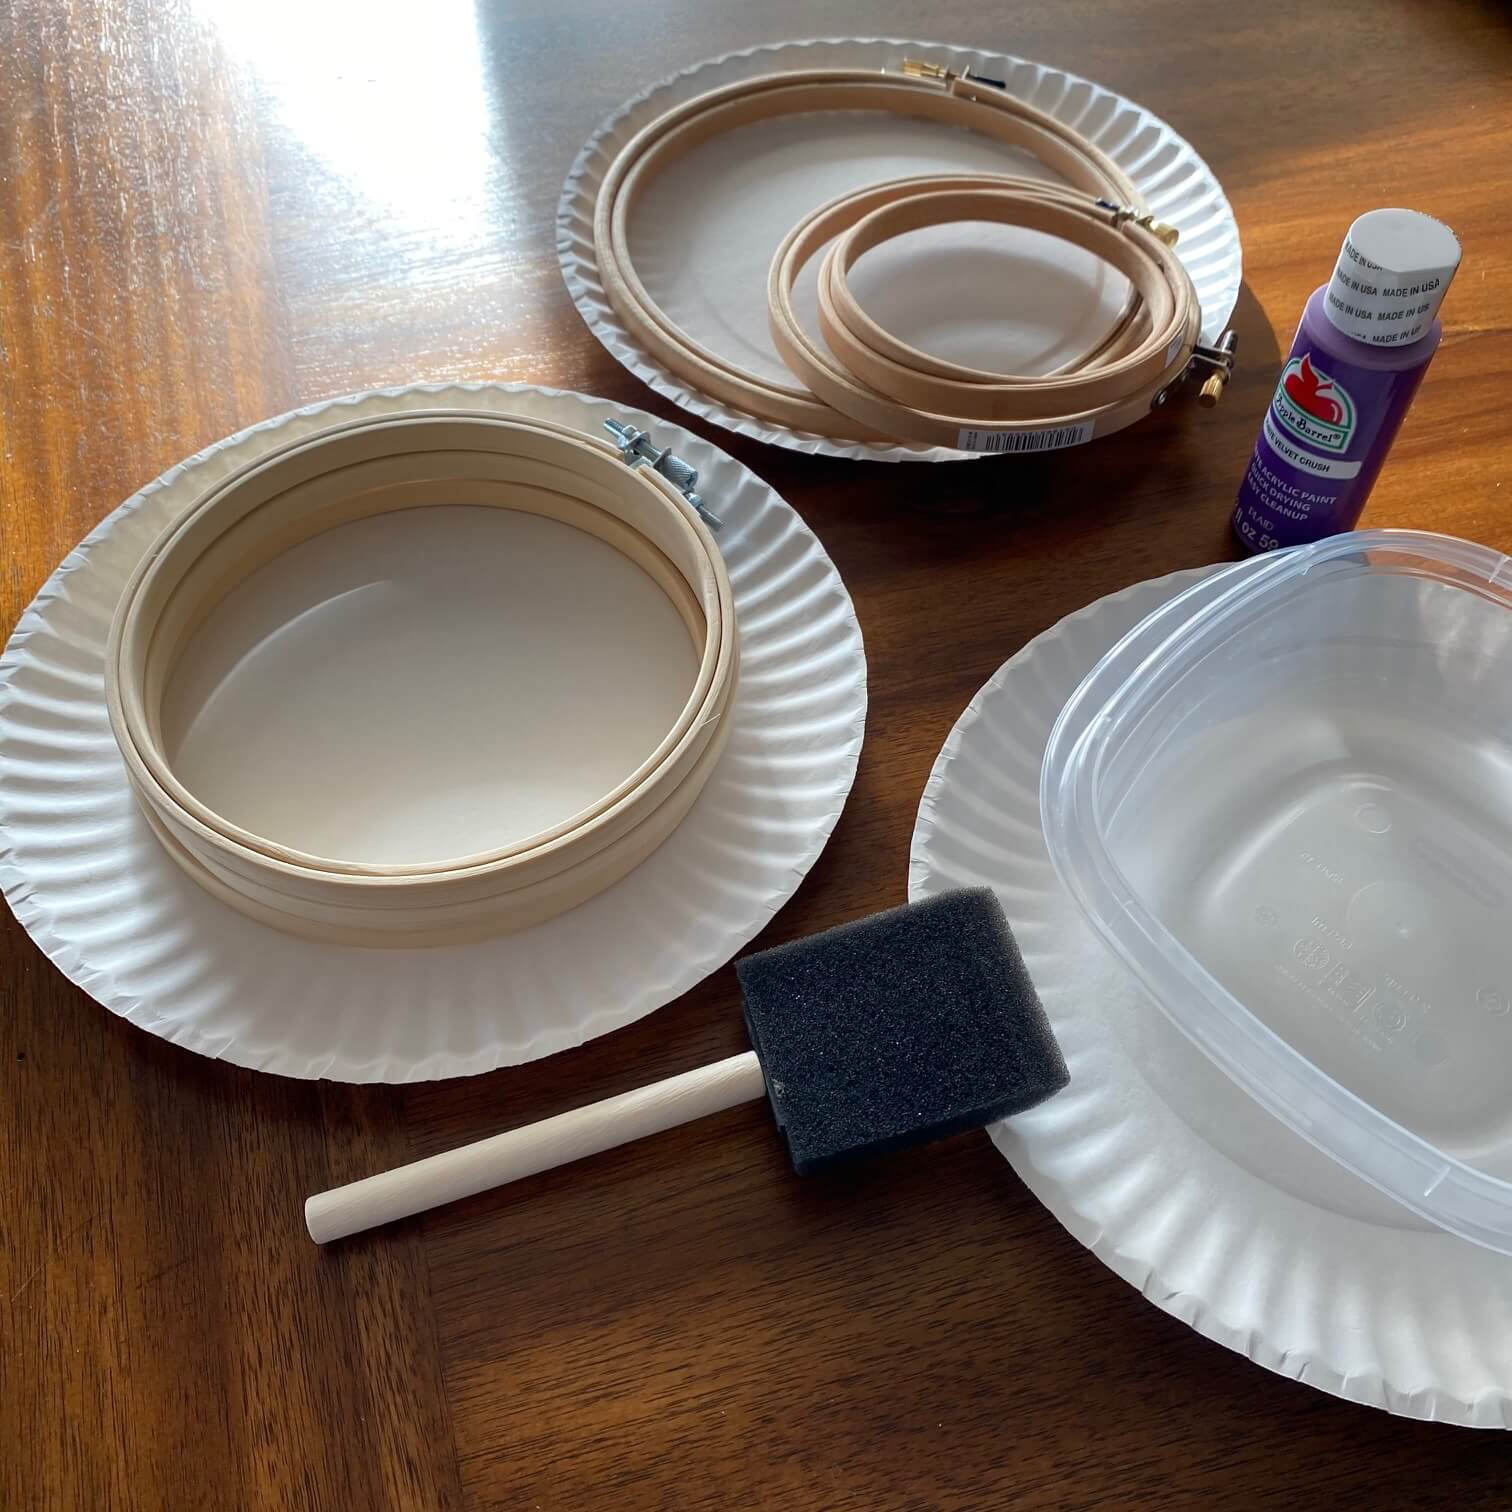
I grabbed a re-usable plastic container that I pack my & Mr. HOD’s lunch salads in (hopefully Mr. HOD doesn’t come home with purple teeth), then squirted a good amount into the container. (side note: I’m not going to give actual measurements here because this was an experiment on the fly…visuals are here to help guide you!)
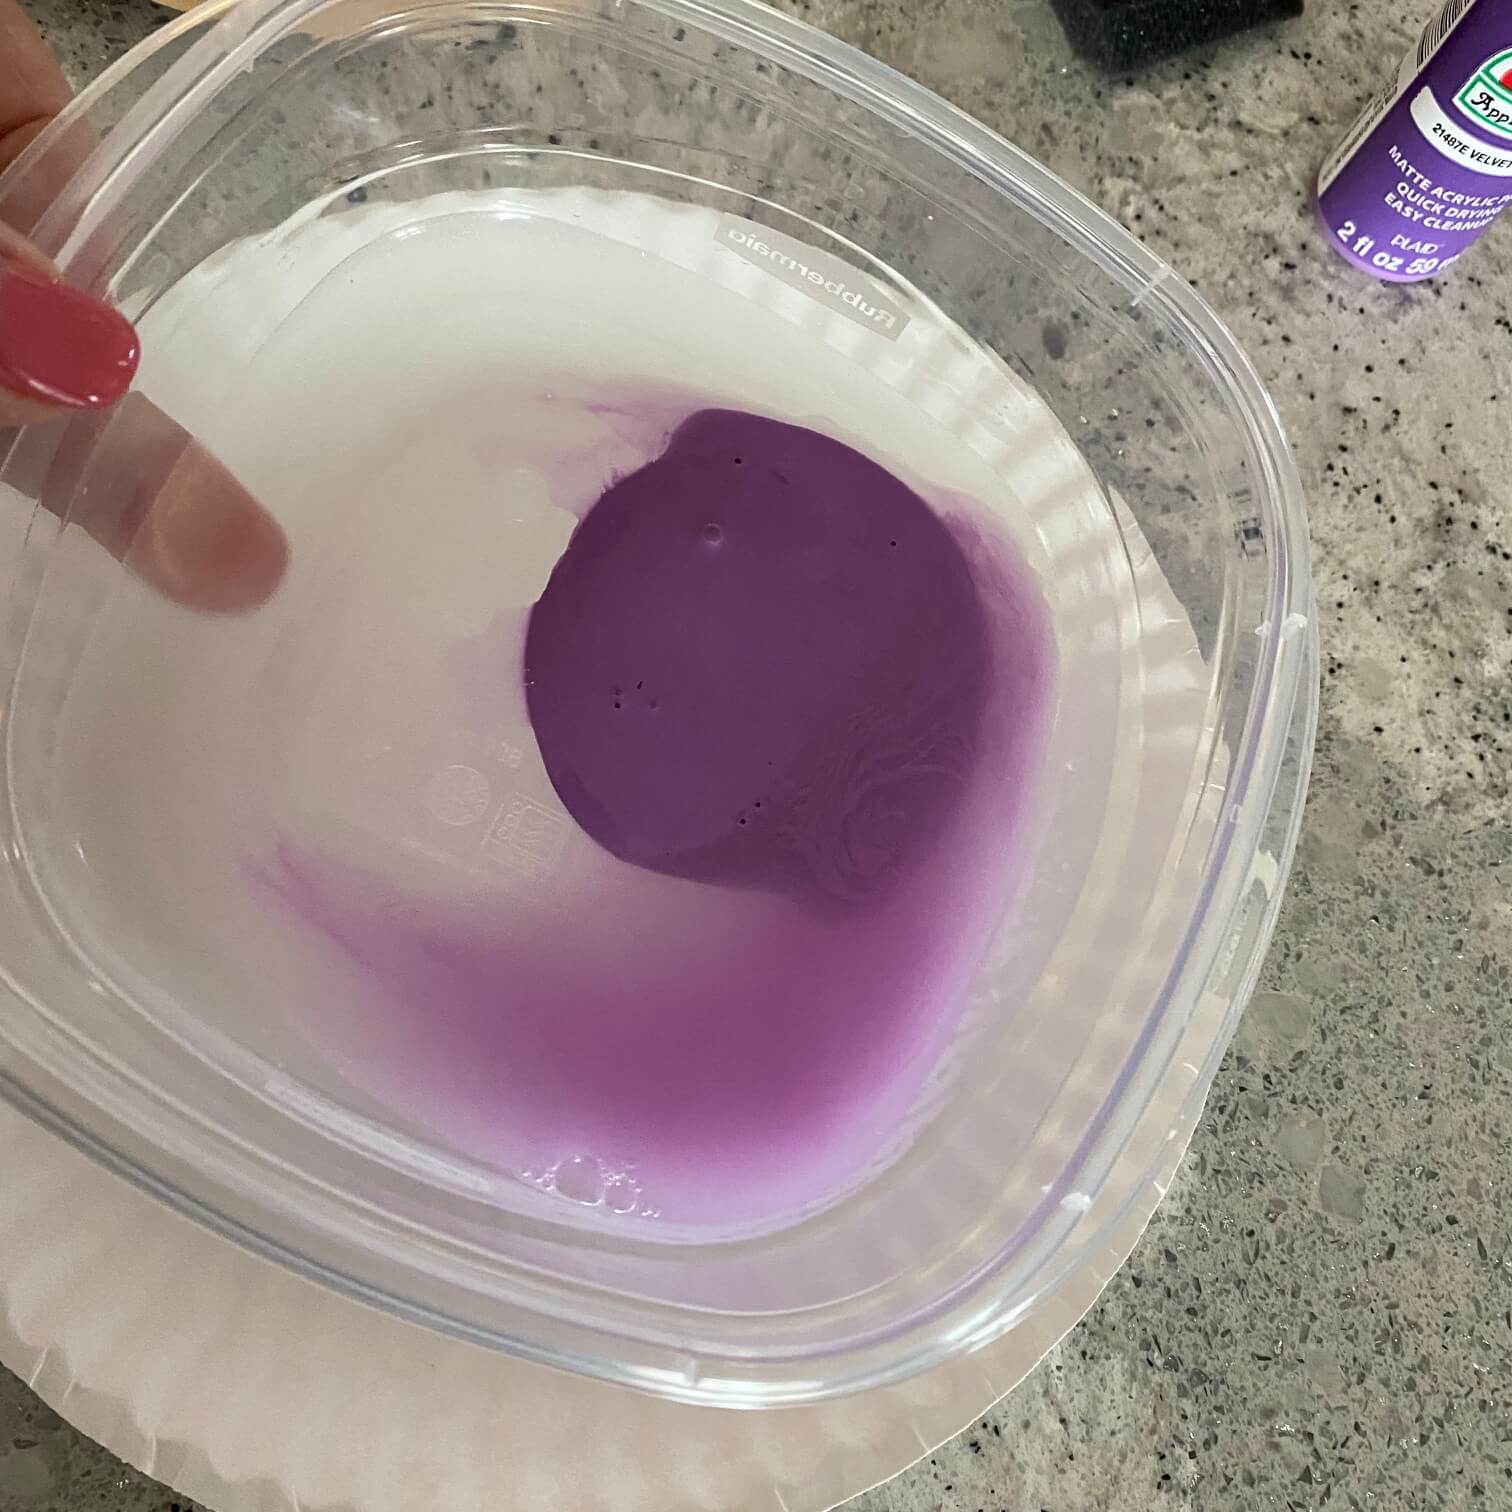
Added warm water – just a few large spoons full at first, to help water the paint down even more.
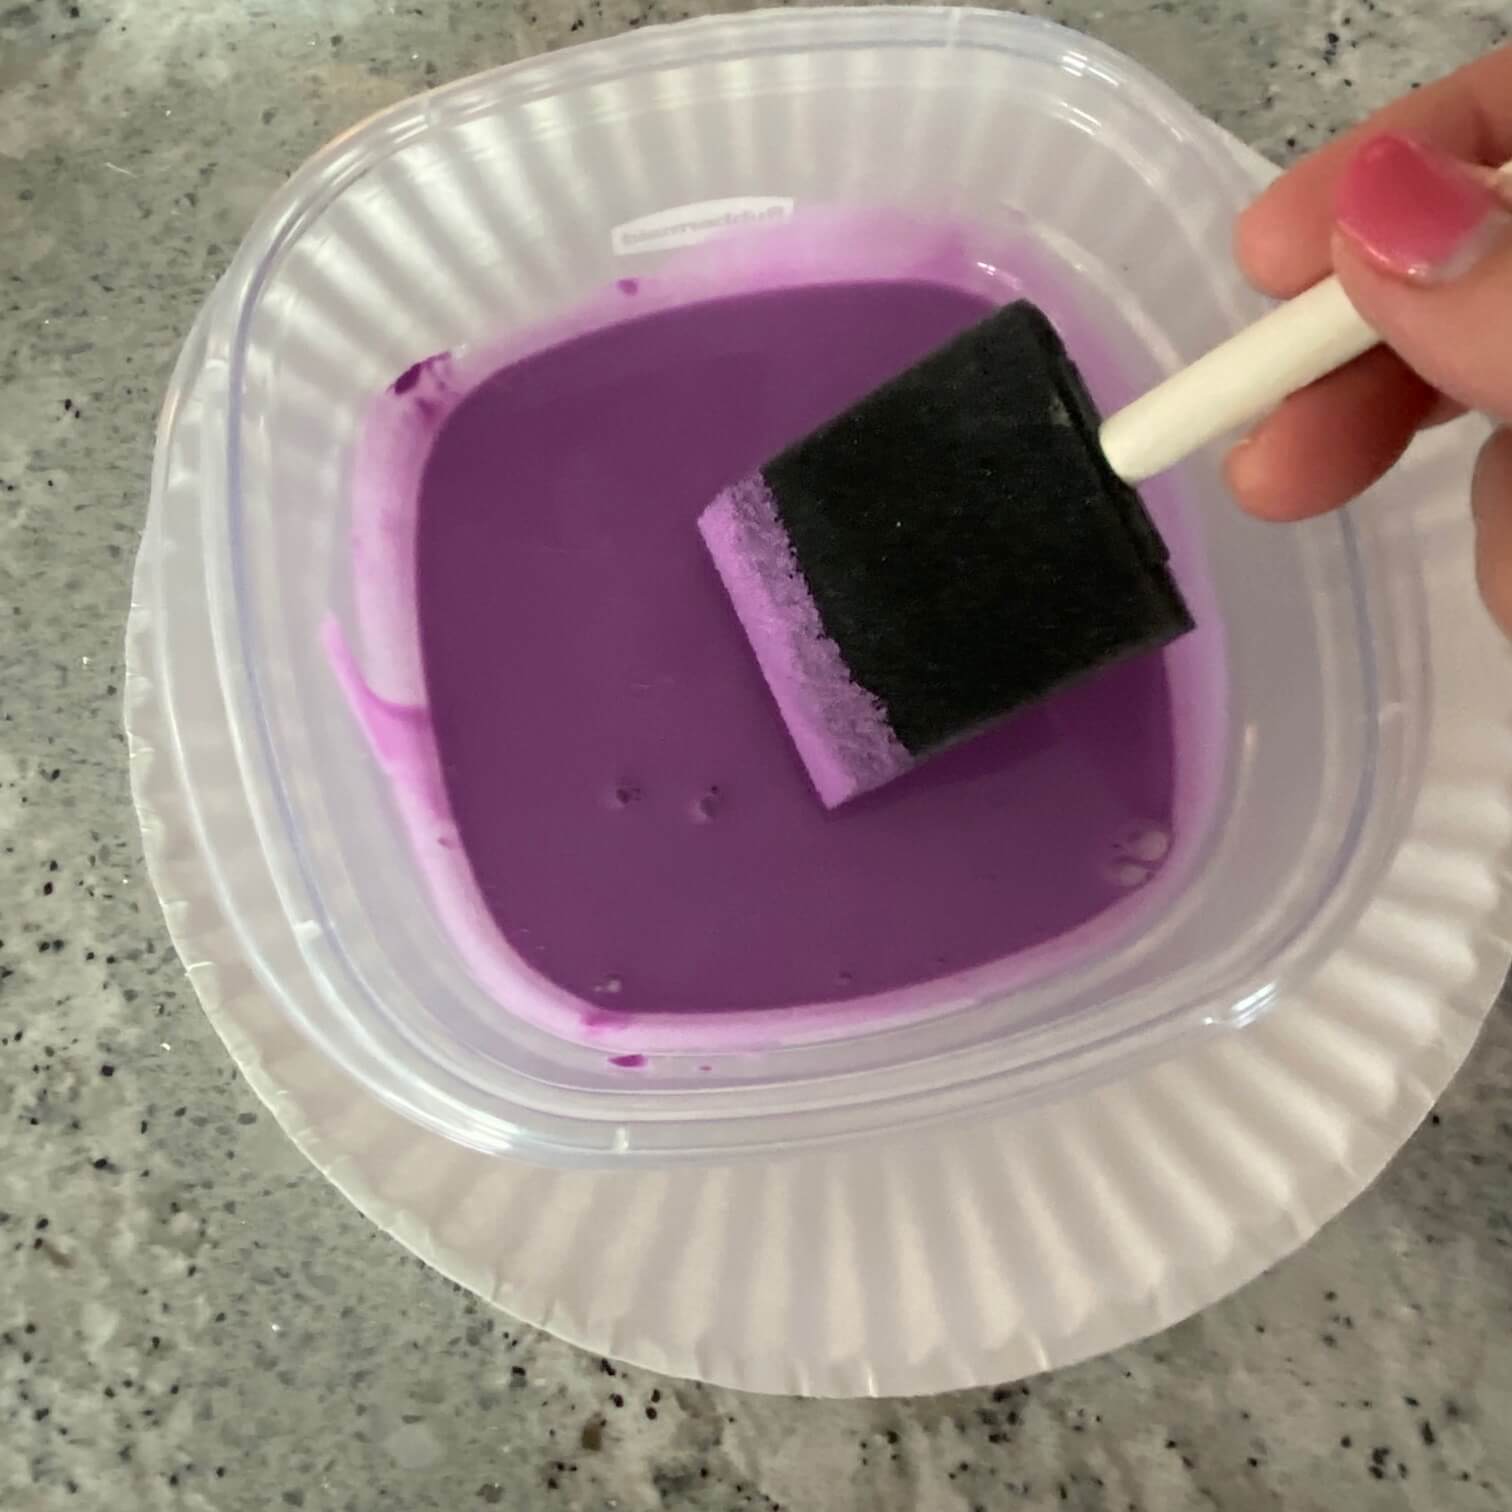
Mixed it all together with a foam brush. I was going for a watery consistency – my whole goal was to get color on the wood hoop but to be able to still see the ‘wood grain’ of the hoop.
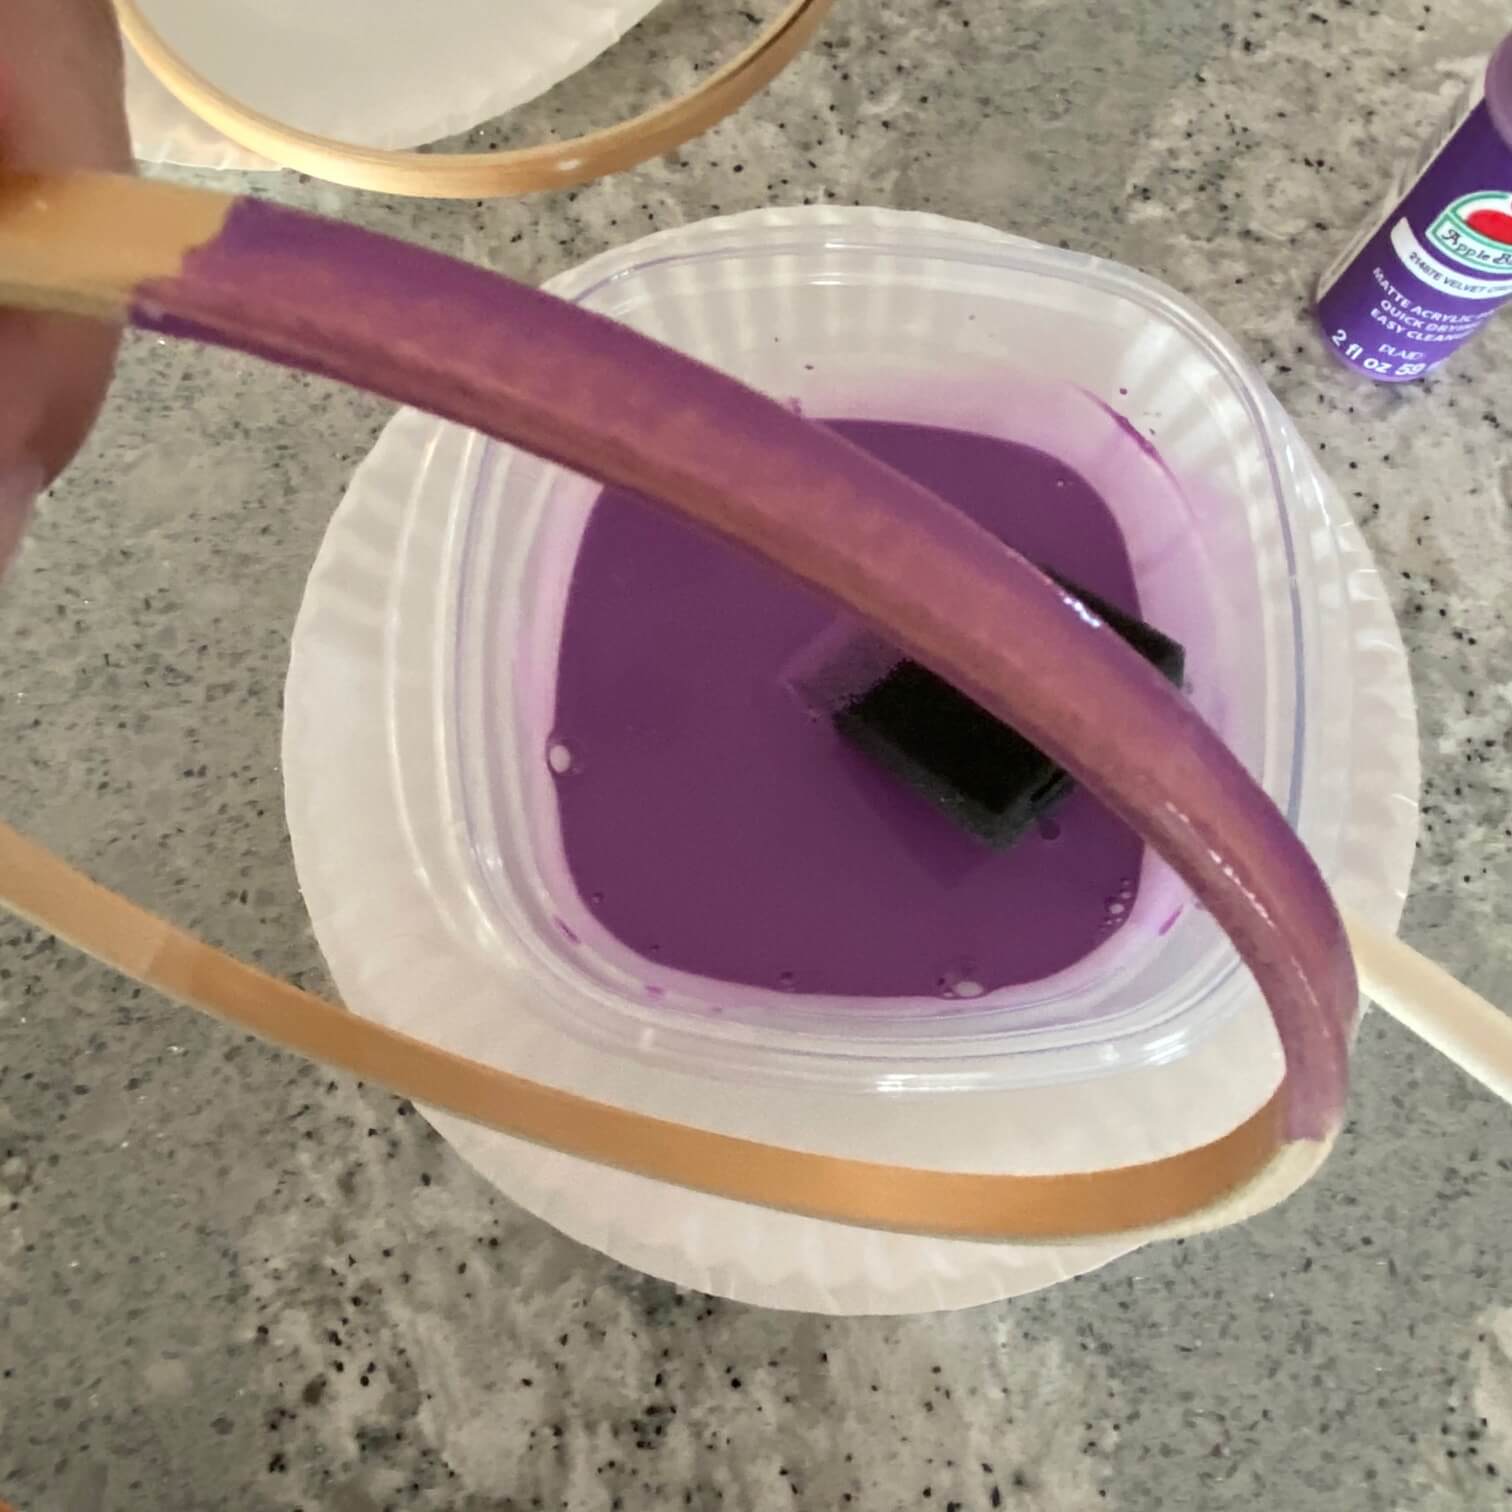
Just brush on a light coat covering all of the edges as well as the inside of the hoop. The paint is water base so gloves are not necessary (& paint will wash out of your clothing!) The paint will also wip off the metal hoop hardware later, so go ahead & be a little messy.
I let the paint dry & applied a 2nd coat. It did get a little blotchy in some areas but I didn’t mind. It dried to a nice matte purple which complimented my stitching perfectly.
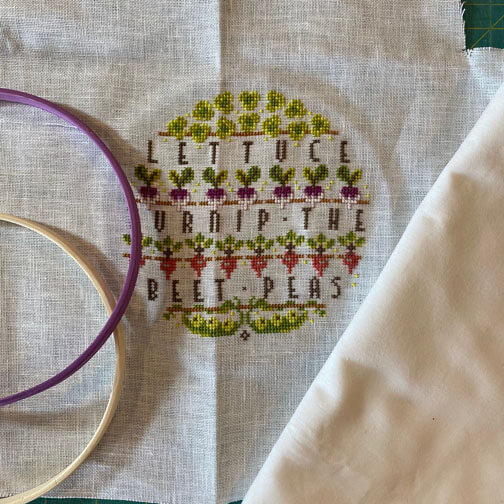
Grab your stitching, your painted (& dry) hoop & a piece of white cotton fabric(I keep bleached muslin on hand. Cut a piece of the white muslin to put under the stitcing. You will notice that it immediately makes your stitches ‘pop’ a little more. Treat the linen & cotton as 1 piece as you move forward with your finishing. (I put a piece of black cotton fabric behind the version that was stitched on the Chalk linen)
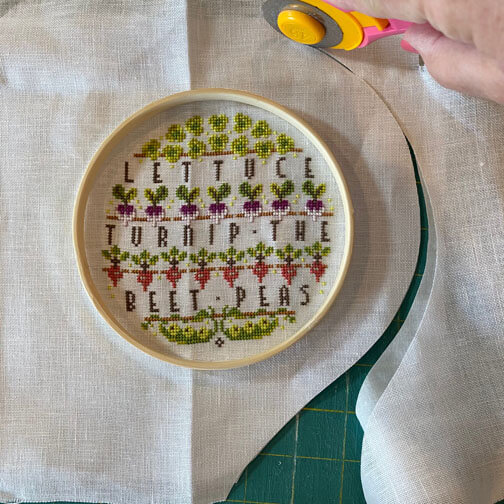
Trim 1.5-2″ around the hoop to prepare for finishing.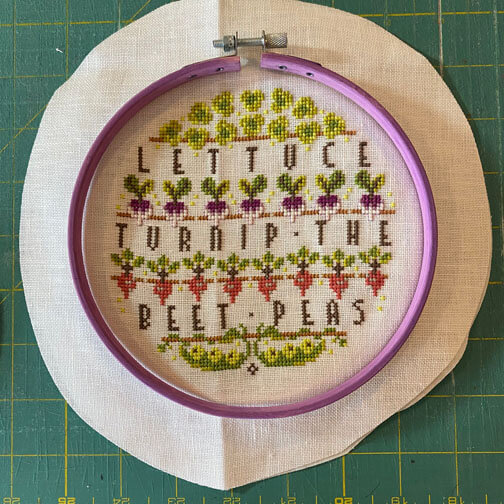
Place the painted hoop over the trimmed stitching & snug down onto the inner hoop. Adjust as necessary & tighten the outer hoop. Continue with your hoop finish as most tutorials (google cross stitch hoop finish & you will come up with plenty!)
Peas & Thanks for following me on my craftopic garden vegetable finish,
Enjoy the Stitch,
Cathy, Hands On Design


Cathy: This is such a sweet design, the hoop is a perfect color.
Catherine
Thank you!
Lettuce be thankful for you. You are so rad-dish!
That is so cute!